This section describes how to replace an ink tank in an installed Color BJ cartridge.
Solution
Untitled Document
Installing / Replacing an Ink Tank
This section describes how to replace an ink tank in an installed Color BJ cartridge.
Note:
Do not leave empty ink tanks in a Color BJ cartridge. Remove them immediately when they run out of ink, and replace them with new ones. Do not leave a Color BJ cartridge with either of its ink tanks missing as the ink in the BJ cartridge will dry and adversely affect print quality.
Do not replace ink tanks while the copier/fax is printing or performing another operation.
Make sure the machine is powered on.
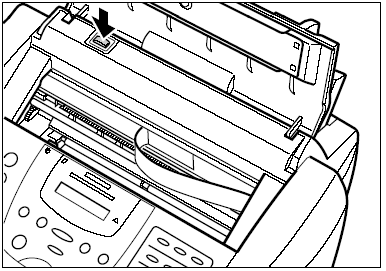
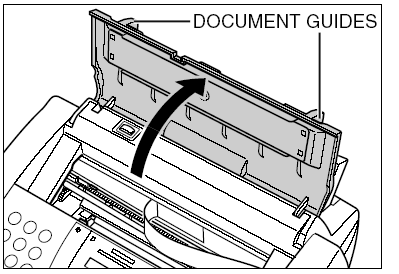
Lift the document guides to open the ADF (Automatic Document Feeder).
If the ADF (Automatic Document Feeder) does not open easily, slide the document guides outward and then open the ADF (Automatic Document Feeder). Alternatively, set the document feed lever to either the (automatic) document feed.
Press.
Caution:
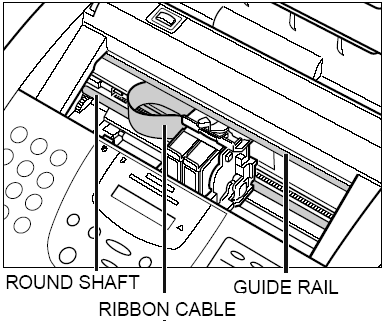
Do not try to manually move or stop the cartridge holder since this may damage the unit.
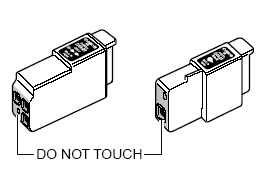
Do not touch the components shown or any metal parts since this may adversely affect operation of the unit and/or affect print quality.
The machine has an automatic protection feature that helps keep it from overheating. If the cartridge holder does not move, unplug the machine and let it cool for several minutes. Then plug it in again.
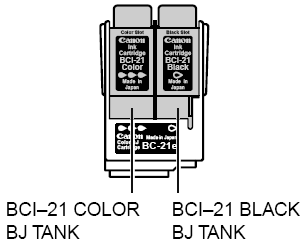
Note: The Color ink tank is on the left, and the Black ink tank is on the right.
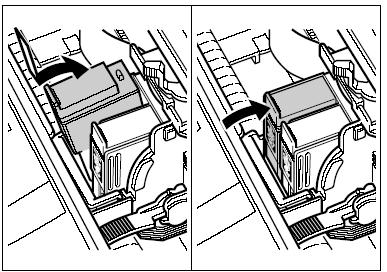
Pull forward the tab on the BJ tank to release it, then remove it from its slot.
Caution:
Do not remove the BJ cartridge from the machine.
Do not remove BJ tanks together. Remove and replace each one individually to ensure that they are inserted in the correct slot. Inserting them in the wrong slot will cause colors to print incorrectly.
If a partially used BJ tank must be removed for some reason, keep the BJ tank installed in a BJ cartridge. Otherwise the ink will dry and adversely affect print quality.
Discard the old BJ tank immediately according to the local laws and regulations for disposal of consumables.You may want to place it in a plastic bag to keep any residual ink from spilling.
Spilled ink can stain any surface; protect yourself and your work area.
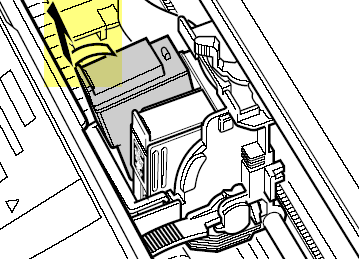
Remove the new BJ tank from its package, then remove the orange protective cap.
Caution:
Discard the cap. Never attempt to reattach it to the BJ tank.
Spilled ink can stain any surface; protect yourself and your work area.
Caution: Do not touch the ink port on the BJ tank.
Insert the BJ tank into the empty slot in the Color BJ cartridge, then press firmly on the BJ tank tab until it clicks into position.
Press . The cartridge holder moves to its home position on the right side of the unit and begins cleaning the BJ cartridge print head. This process takes about 55 seconds.
Caution: Do not try to manually move or stop the cartridge holder since this may damage the unit.

 .
.