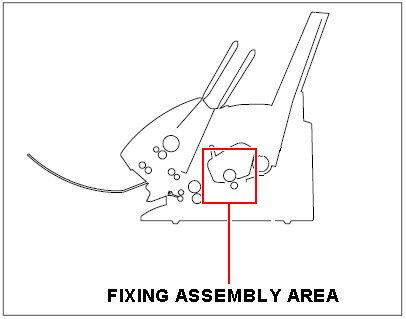
Clear the jam inside the fixing assembly area (L75/L80)
Article ID: ART154489
|
Date published: 06/09/2015
|
Date last updated: 01/22/2016
Description
Clear the jam inside the fixing assembly area of the machine.
Solution
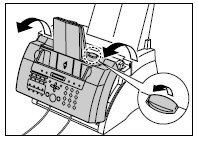
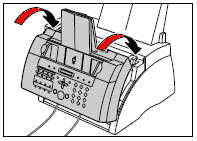
Lift the latch and open the front cover.
Do not try to open the front cover without lifting the latch since this may damage your machine.
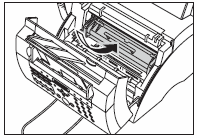
Hold the cartridge by its handle and remove it from the machine.
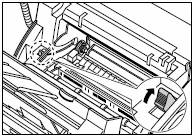
Move the paper release lever back.
-
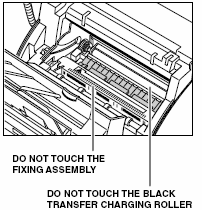
The fixing assembly becomes extremely hot when the machine is in use. Be very careful not to touch it so as to avoid injury.
-
Be careful not to touch the transfer charging roller since this adversely affects print quality.
Locate the paper jam and clear it as explained below.
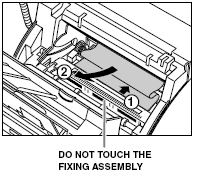
Top edge of the jammed paper in the fixing assembly:
Push the jammed paper back, then pull it carefully toward you to remove
The fixing assembly becomes extremely hot when the machine is in use. Be very careful not to touch it so as to avoid injury.
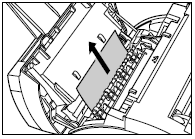
Top edge of the jammed paper has passed through the fixing assembly:
Pass the jammed paper under the roller.
Use hands to carefully pull out the jammed paper.
Do this carefully to prevent tearing the jammed paper. If you do tear it, be sure to remove any torn pieces from the machine since these will cause paper to jam again.
When you are finished, reinsert the cartridge. Hold the cartridge by its handle and insert it into the machine as far as it will go, making sure that its tabs are aligned with the rails inside the machine.