Untitled Document
How to do Print Head Alignment
If diagrams or ruled lines are misaligned, print head alignment is required.
Print Head Alignment procedures
1. Prepare to print.
a. Ensure that the printer is powered on and open the paper support.
b. Load two sheets of A4 or Letter-sized plain paper in the auto sheet feeder.
2. Print the head alignment sheet.
a. Press the <Menu> button.
b. Use the  or
or  cursor button to select 'Maintenance/settings' and press the <OK> button.
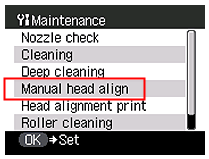
c. Use the or cursor button to select 'Maintenance' and the press the <OK> button.
d. Use the  /
/  cursor button to select 'Manual head align' and press the <OK> button.
e. Use the / cursor button to select 'Yes', then press the <OK> button. The printer prints the head alignment sheet.
- When the print head alignment sheet is printed, use the / cursor button to select 'Yes' and press the <OK> button.
- When the print head alignment sheet is not printed, use the / cursor button to select 'No' and press the <OK> button, and then print again.
3. Adjust the print head position.
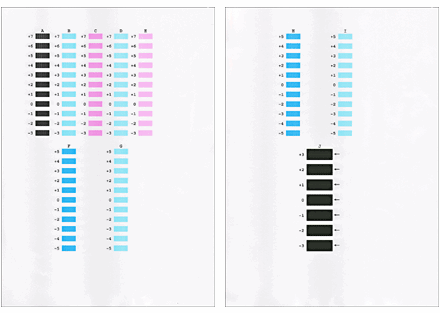
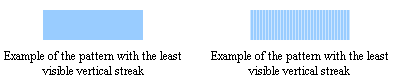
a. From each group, select the pattern which has the least visible streak.
b. Use the / cursor button to select the column to be adjusted.
c. Use the or cursor button to select the pattern number.
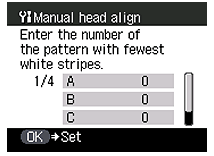
d. After setting all the columns (A to J), press the <OK> button. The print head position is adjusted.
