Installing the Printer Driver in Windows 2000 Add Printer Wizard
The following is the installation procedure of [Add Printer Wizard], under Windows XP.

Be sure that you have logged on as a member of Administrators. The full control access right for the printer is necessary for the installation of CARPS.
- From the [Start] menu, select [Printers and Faxes].
The [Printers and Faxes] folder appears.
- Click the [Add a Printer] in [Printer Tasks]..
- Click [Next].

- Select [Local printer attached to this computer], then click [Next].
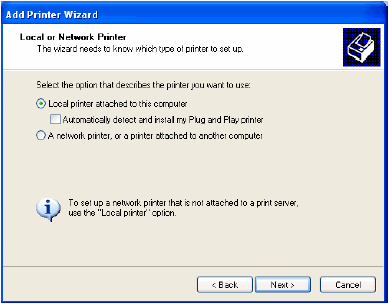
Selecting [Automatically detect and install my Plug and Play printer] is not recommended.
- Select the printer port you want to use, then click [Next].

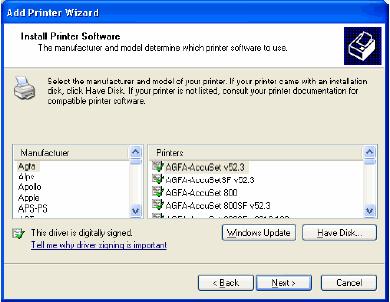
- Click [Have Disk].
The [Install From Disk] dialog box appears.
- Place the CD-ROM into the CD-ROM drive.
- Use [Browse] to select the folder containing the CARPS software, then click [OK].

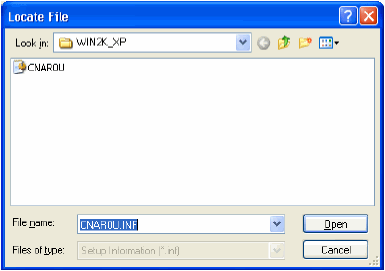
For example, if your CD-ROM drive is "D:", the path name of the folder would be "D:\Drivers\us_eng\WIN2K_XP". You can also enter the path name directly in the edit box.
- Select the printer model in the [Printers] list box, then click [Next].

- Enter the name you want to use, then click [Next].
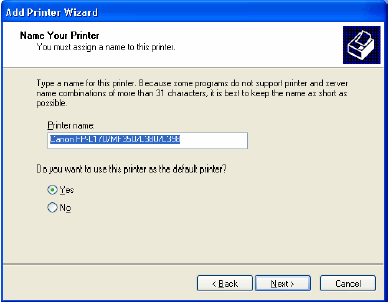
If you accept the default printer name, leave the edit box as it is, then click [Next].

If you already have another printer installed, you will be asked whether to use this printer as the default.
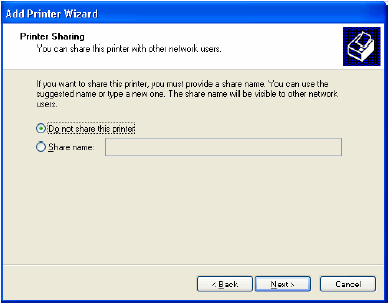
- Select whether this printer is shared with other computers or not, then click [Next].
Depending on the network settings in your operating system, this dialog box will not appear.
- Select [Yes] to print a test page, then click [Next]

If you do not want to print a test page, select [No]. In this case, step 14 will be skipped.
- Click [Finish].

The installation starts.
When the installation is complete, the [Add Printer Wizard] dialog box closes.
The printer icon is added to the [Printers] folder and the test page is printed.
- Click [OK] if the test page is printed correctly.

