|
i475D
|
i560 Series
|
i860 Series
|
i900D
|
|
i950 Series
|
i960 Series
|
i9100
|
i9900
|
|
S530D
|
S800
|
S820
|
S820D
|
|
S830D
|
S900
|
S9000
|
PIXMA iP4300
|
|
PIXMA iP4500
|
PIXMA iP4600
|
PIXMA iP4700
|
PIXMA iP4820
|
|
PIXMA iP5000
|
PIXMA iP5200
|
PIXMA iP5200R
|
PIXMA iP6000D
|
|
PIXMA iP6210D
|
PIXMA iP6220D
|
PIXMA iP6310D
|
PIXMA iP6600D
|
|
PIXMA iP6700D
|
PIXMA iP8500
|
PIXMA iP90
|
PIXMA iP90v
|
|
PIXMA iP1500
|
PIXMA iP1600
|
PIXMA iP1700
|
PIXMA iP1800
|
|
PIXMA iP2000
|
PIXMA iP2600
|
PIXMA iP2700
|
PIXMA iP2702
|
|
PIXMA iP3000
|
PIXMA iP3300
|
PIXMA iP3500
|
PIXMA iP3600
|
|
PIXMA iP4000
|
PIXMA iP4000R
|
PIXMA iP4200
|
PIXMA MP130
|
|
PIXMA MP150
|
PIXMA MP160
|
PIXMA MP170
|
PIXMA MP180
|
|
PIXMA MP190
|
PIXMA MP210
|
PIXMA MP240
|
PIXMA MP250
|
|
PIXMA MP270
|
PIXMA MP280
|
PIXMA MP280 w/ PP-201
|
PIXMA MP450
|
|
PIXMA MP460
|
PIXMA MP470
|
PIXMA MP480
|
PIXMA MP490
|
|
PIXMA MP495
|
PIXMA MP499
|
PIXMA MP500
|
PIXMA MP510
|
|
PIXMA MP520
|
PIXMA MP530
|
PIXMA MP560
|
PIXMA MP600
|
|
PIXMA MP610
|
PIXMA MP620
|
PIXMA MP620B
|
PIXMA MP640
|
|
PIXMA MP640R
|
PIXMA MP750
|
PIXMA MP760
|
PIXMA MP780
|
|
PIXMA MP800
|
PIXMA MP800R
|
PIXMA MP810
|
PIXMA MP830
|
|
PIXMA MP950
|
PIXMA MP960
|
PIXMA MP970
|
PIXMA MP980
|
|
PIXMA MP990
|
PIXMA mini260
|
|
Set Ink Drying Wait Time (Windows)
| Article ID: ART157547 |
| |
Date published: 06/09/2015 |
| |
Date last updated: 08/17/2015 |
Description
Setting Ink Drying Wait Time (Windows)
Solution
Set Ink Drying Wait Time
When the next page is ejected before the ink on the preceding page has dried, the page may be soiled. In this case, set the Ink Drying Time to a longer time.
-
Open the the printer's Properties screen.
Note: This setting must be set from the Printers Folder. If the printer Properties / Preferences are accessed from an application, the setting will be unavailable (grayed out).
For Windows 7, select 'Start', 'Control Panel', 'System and Security', and 'System'.
- Click / Select 'Start' from the bottom left of the Windows screen, and then select 'Devices and Printers'
- Click your right mouse button on the listing for your printer, and then select 'Properties' from the menu that appears.
For Windows Vista
- Click / Select 'Start' from the bottom left of the Windows screen, 'Control Panel', 'Hardware and Sound', and then click on 'Printers'. Note: If you are in 'Classic' view, Click 'Printers' directly from the 'Control Panel'.
- Click your right mouse button on the listing for your printer, and then select 'Properties' from the menu that appears.
For Windows XP Home Edition
- Click / Select 'Start' from the bottom left of the Windows screen, 'Control Panel,' 'Printers and Other Hardware,' and 'Printers and Faxes.'
- Click your right mouse button on the listing for your printer, and then select 'Properties' from the menu that appears.
For Windows XP Professional Edition
- Click 'Start' from the bottom left of the Windows screen, and 'Printers and Faxes.'
- Click your right mouse button on the listing for your printer, and then select 'Properties' from the menu that appears.
For Windows 2000
- Click / Select 'Start' from the bottom left of the Windows screen, and 'Settings,' then 'Printers.'
- Click your right mouse button on the listing for your printer, and then select 'Properties' from the menu that appears.
- Click the Maintenance tab.
- Click 'Custom Settings'.
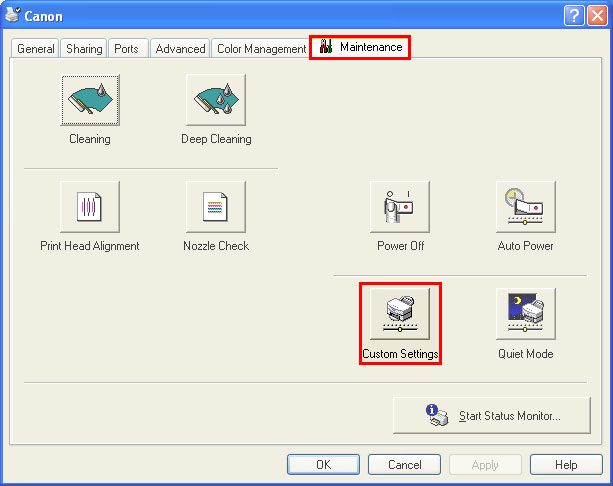
NOTE: Available maintenance functions vary depending on model
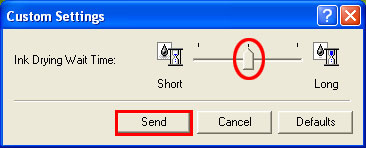
- Set 'Ink Drying Wait Time' in the Custom Settings dialog.
- Drag the 'Ink Drying Wait Time' slide-bar to change the setting. Moving the 'Ink Drying Wait Time' slide-bar to the right extends the amount of time to allow ink to dry.
- Click 'Send'.
- When the confirmation message is indicated, make sure that the printer is powered on, and click OK.
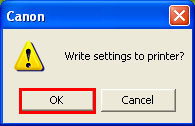
- Ink Drying Wait Time setting is completed.
|
