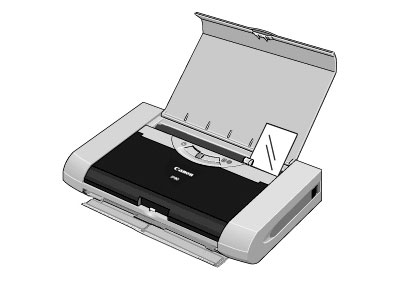
Load Paper Into Sheet Feeder ( i70 / i80 / iP90)
Instructions to load paper into the Sheet Feeder for the i70 / i80 / iP90.
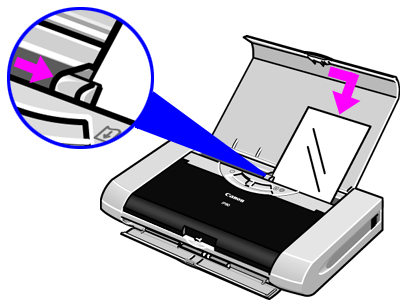
Set paper vertically in the auto sheet feeder regardless of printing orientation. If credit card sized Glossy Photo Paper is set in landscape orientation, paper may jam (only available in the iP90).
Note: Set envelopes with their flaps closed and facing down. If the paper is curled, bend the paper in the opposite direction, and avoid leaving ripples in the paper surface.
- Set paper, aligned with the right side of the Sheet Feeder, then pinch and move the Paper Guide until it rests against the left side of paper.
- Adjust the paper thickness lever to the appropriate setting.
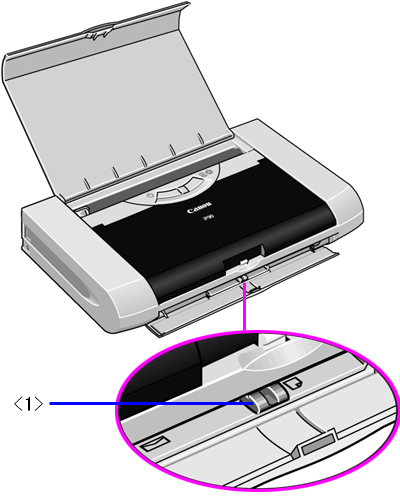
Note: For envelopes and T-Shirt Transfers, set the paper thickness lever to the left. For paper types other than the above, set the paper thickness lever to the right.
- Remove printed sheets (plain paper / High Resolution Paper) before the 50-sheet limit is reached, and printed sheets (when using other paper) before the respective sheet limit is reached. (If the output paper is curled, remove them sheet-by-sheet.)
Note: For the following paper, remove them from the paper output tray sheet by sheet:
- Glossy Photo Paper
- Photo Paper Plus Glossy (A4 size only)
- Matte Photo Paper
- Transparencies
- T-Shirt Transfers
- Photo Paper Pro
- Photo Paper Plus Semi-gloss
- Photo Paper Plus Double Sided
- Photo Stickers
