How to add text, headers, or captions using ImageBrowser
1. Select the images you want to print in the browser window.
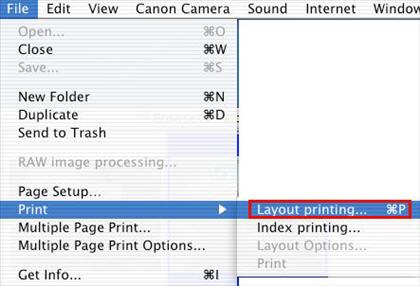
2. Select 'Print' from the File menu, and then select 'Layout printing'....
The following procedure is separated into 2 sections: steps for text/header editing, and steps for caption editing.
Text/header editing
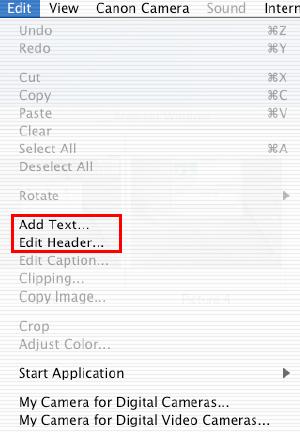
3. From the Edit menu, select 'Add Text', or 'Edit Header'.
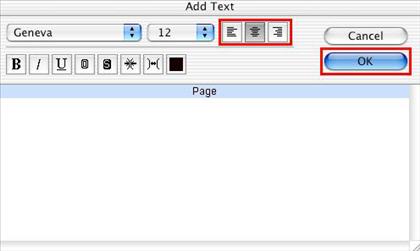
4. When 'Add Text' is selected, the dialog box shown below is displayed.
5. Edit the text, including the font, size, text alignment, and font attribute settings, and then click 'OK'.
6. When 'Edit Header' is selected, the dialog box shown below is displayed.
7. Edit the text, including the font, size, text alignment, and font attribute settings, and then click 'OK'.
Note: The text alignment (left-justified, centered, or right-justified) determines the header positioning on the printout.

8. The text or the header is inserted in the Print dialog box.

Note: The text box can be moved to the desired location by dragging it with the mouse.
Note: The header will be inserted in each page containing an image(s).
Back to top of page
Caption editing
Unlike text/headers, a different caption can be added to each image.
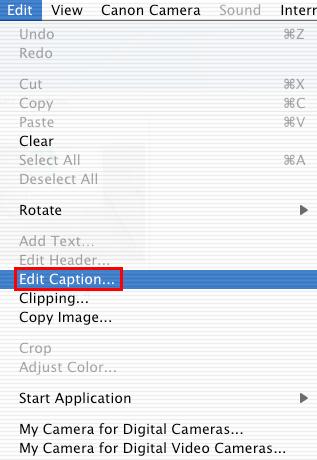
3. In the Print dialog box, select the image you want to add a caption to, and then select 'Edit Caption'... from the Edit menu.
Note: Unless an image is selected, Edit Caption... is not available.
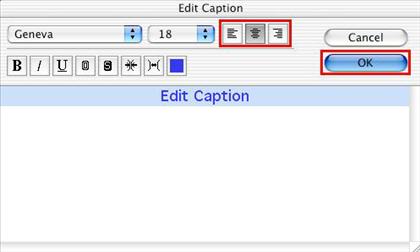
4. In the Edit Caption dialog box, edit the text, including the font, size, text alignment, and font attribute settings, and then click 'OK'.
Note: The font alignment (left-justified, centered, or right-justified) determines the caption positioning in relation to the selected image.
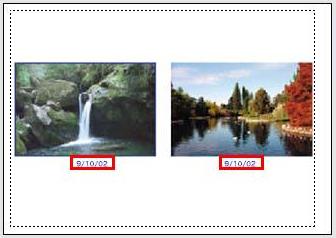
5. The caption is inserted below the image.

Note: You can use the procedure below to add the date, time, or file name to the caption:
From the ImageBrowser menu, select 'Preferences'....
Note: Under Mac OS 8.6 to 9.x, select 'Preferences'... from the Edit menu,.
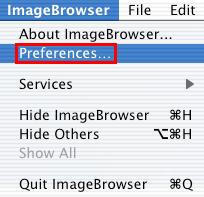
From the pop-up menu at the upper left, select 'Print'. Select item(s) to add to the caption, and then click 'OK'.

The selected items are added to the caption.
6. The text, header, or caption is added to the image.
Back to top of page
