➤
Home
Articles
FAQs
Ask a Question
Search
Models related to this article
PIXMA iP1500
Home
Articles
Products
Printers
Single Function Inkjet
Articles Detail
Install the print head (iP1500 / iP2000)
Article ID: ART158628
|
Date published: 06/09/2015
|
Date last updated: 08/18/2015
Description
Install the print head into the printer.
Solution
How to set the print head
Instructions to install the print head.
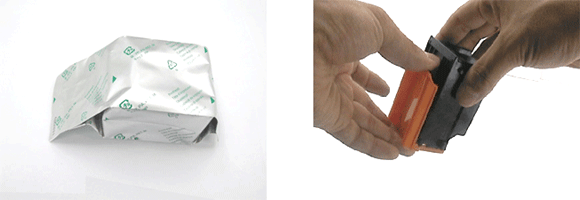
Remove the print head from its package, and remove the orange protective cap.
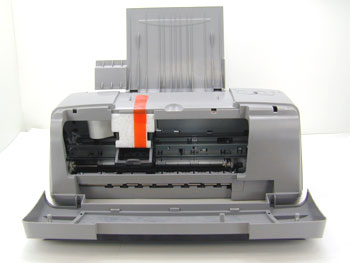
Open the printer's front cover and remove any protective materials inside the printer.
Note:
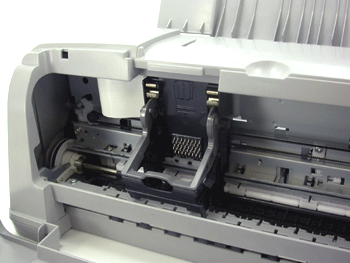
If the print head holder is not at the center, power the printer on to move the print head holder to the center.
Raise the print head lock lever, insert the print head into the print head holder, and lower the print head lock lever firmly.
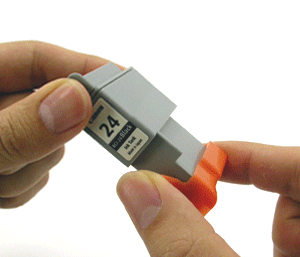
Remove the ink tanks from their packaging and remove the orange protective caps.
Note:
To avoid ink adhering to your fingers, brace the orange protective cap while removing it. Insert the ink tanks into the print head.
Insert the ink tanks until a click sound is made.
Note:
Insert the black ink tank first, and the other ink tank next.
Close the front cover.
Check that the power lamp lights in green.
Note:
If the power lamp does not light, power the printer on.
SIMS Doc Id
0
Rate this Article
Was this article helpful?
Yes, This document is helpful
No, This document needs a clearer explanation
Please provide your comments
Rate Article