Manual Color Adjustment
Follow the steps below to make fine adjustments to the color hue for the printed output. These settings will only make minor color adjustments. If more drastic color adjustment is necessary, use an image editing application.
After confirming that the cable is connected and the printer is powered on, perform the following to adjust the color.
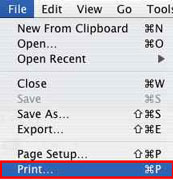
- Select 'Print' from the File menu to open the Print dialog.
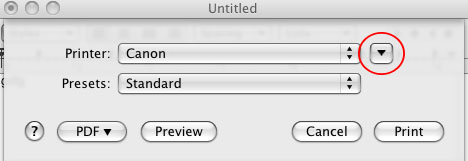
- In the Printer pop-up menu, select the printer you are using.
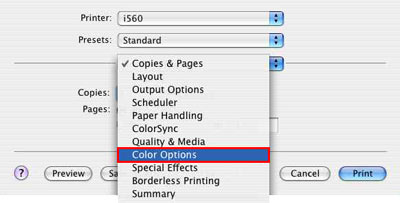
- In the third pop-up menu, select 'Color Options'.
Note: In Mac OS X 10.5, you may need to expand the print window by clicking the down arrow as shown below to see the third menu.
- Adjust the color setting, moving its slide bar to the right or left.
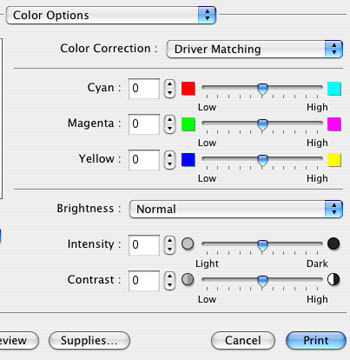
Note: Move the slide bar to the right from the center to deepen the intensity. Move it to the left to lighten the intensity.
- When the setting is finished, click 'Print' to perform printing.
