Perform A Deep Print Head Cleaning
Deep Cleaning is a more powerful process than print head cleaning.
Note: After confirming that the printer is connected to the computer and that the printer is powered on, perform the following:
-
Click 'Properties' from the Printer icon.
For Windows 7
- Click the 'Start' button from the bottom left of the Windows screen, and then click on 'Devices and Printers'.
- Click your right mouse button on the listing for your printer, and then select 'Printing Preferences' from the menu that appears.
For Windows Vista
- Click / Select the 'Start' from the bottom left of the Windows screen, 'Control Panel', 'Hardware and Sound', and then click on 'Printers'. Note: If you are in 'Classic' view, click 'Printers' directly from the 'Control Panel'.
- Click your right mouse button on the listing for your printer, and then select 'Preferences' from the menu that appears.
For Windows XP Home Edition
- Click / Select the 'Start' button from the bottom left of the Windows screen, 'Control Panel,' 'Printers and Other Hardware,' and 'Printers and Faxes.'
- Click your right mouse button on the listing for your printer, and then select 'Preferences' from the menu that appears.
For Windows XP Professional Edition
- Click 'Start' from the bottom left of the Windows screen, and 'Printers and Faxes.'
- Click your right mouse button on the listing for your printer, and then select 'Preferences' from the menu that appears.
For Windows 2000
- Click / Select 'Start' from the bottom left of the Windows screen, and 'Settings,' then 'Printers.'
- Click your right mouse button on the listing for your printer, and then select 'Properties' from the menu that appears.
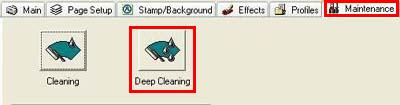
- Click the Maintenance tab and click 'Deep Cleaning'.
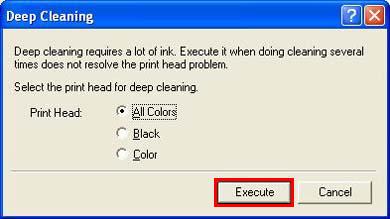
- Select 'All Colors', 'Black' or 'Color' for the print head that requires cleaning, and click 'Execute'.
- Confirm the message below and click 'OK'.
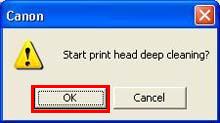
- Confirm the message below and click 'OK'.

The power lamp will flash and Deep Cleaning will start. (Do not perform other operations until Deep Cleaning completes. Deep Cleaning will take about one to two minutes.)
To check the status of the print head nozzles:
-
- Load letter sized plain paper in the sheet feeder.
- Press and hold the <Resume/Cancel> button.
- When the Power lamp blinks twice, release the button.

Note: The Power lamp blinks and the nozzle check pattern will be printed. (After the printer initializes, it will take about 10 seconds until printing is completed.)
- Examine the nozzle check pattern output. If any lines or colors are missing from the nozzle check pattern perform up to two more deep print head cleanings.
Caution: Avoid performing more than three deep cleanings in a twenty-four hour period.
- Print the nozzle check pattern again. If the nozzle check pattern is still incorrect, service may be required.
