Setting the correct Paper Size in the printer driver (Windows)
| Article ID: ART158777 |
| |
Date published: 06/09/2015 |
| |
Date last updated: 08/18/2015 |
Description
Setting the correct Paper Size in the printer driver (in Windows)
Solution
Setting the Page Size in the Printer Driver
-
Open the printer's Preferences/Properties:
For Windows Vista
- Click / Select 'Start' from the bottom left of the Windows screen, 'Control Panel', 'Hardware and Sound', and then click on 'Printers'. Note: If you are in 'Classic' view, Click 'Printers' directly from the 'Control Panel'.
- Click your right mouse button on the listing for your printer, and then select 'Preferences' from the menu that appears.
For Windows XP Home Edition
- Click / Select 'Start' from the bottom left of the Windows screen, 'Control Panel,' 'Printers and Other Hardware,' and 'Printers and Faxes.'
- Click your right mouse button on the listing for your printer, and then select 'Preferences' from the menu that appears.
For Windows XP Professional Edition
- Click 'Start' from the bottom left of the Windows screen, and 'Printers and Faxes.'
- Click your right mouse button on the listing for your printer, and then select 'Preferences' from the menu that appears.
For Windows 2000/Me/98
- Click / Select 'Start' from the bottom left of the Windows screen, and 'Settings,' then 'Printers.'
- Click your right mouse button on the listing for your printer, and then select 'Properties' from the menu that appears.
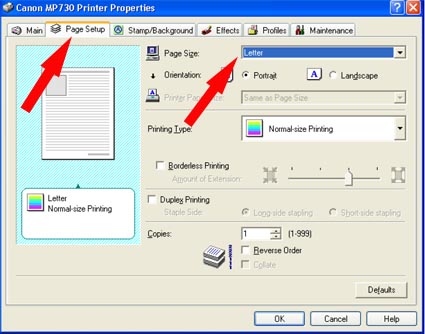
- On the Page Setup tab, make sure that the 'Page Size' setting matches the the paper size currently loaded into the printer.
- Click the 'OK' button to save the setting.