How to perform Print Head Alignment
The print head alignment is performed to resolve printing problems such as vertical mis-alignment or poor print quality.
1. Connect the printer to the TV, and power the printer and TV on.
2. Set 4" x 6" sized paper in the auto sheet feeder, and extend the paper support.
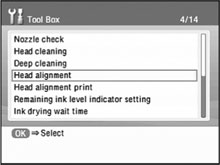
3. Use the left and right cursor buttons to select 'Tool Box' on the right and then press the 'OK' button.
4. Use the up and down cursor buttons to select 'Head alignment' and then press the 'OK' button.
Note: By selecting 'Head alignment print', it is possible to print the current print head alignment values.
5. Use the up and down cursor buttons to select 'Yes' and then press the 'OK' button. (The Power lamp blinks and the nozzle check pattern printing starts.)
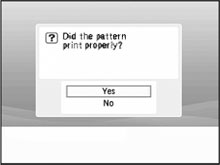
6. Confirm that the nozzle check pattern is properly printed, and use the up and down cursor button to select 'Yes' and press the 'OK' button.

Nozzle check pattern printed properly
7. Examine the printed pattern, and using the left and right cursor buttons, enter the pattern number in column A that has the fewest visible stripes.
<1> Example of the fewest visible stripes
<2> Example of the most visible stripes
8. Move the cursor buttons to column B through D by using the up and down cursor buttons, and enter the pattern numbers.
9. After entering the pattern numbers in all the columns, press the 'OK' button.