Run the CanoScan Setup CD Manually (LiDE 20, 30, 50)
| Article ID: ART159563 |
| |
Date published: 06/09/2015 |
| |
Date last updated: 08/18/2015 |
Description
Run the CanoScan Setup CD Manually (LiDE 20, 30, 50)
Solution
Running the CanoScan Setup manually (Windows)
- For Windows XP, click 'Start', and then select 'My Computer'.
For other Windows operating systems, double-click the 'My Computer' icon on in the Windows desktop.
- Double-click on the 'CANOSCAN' icon to start the CanoScan setup utility.
- Double-click the 'Setup' icon. The CanoScan installation will start.
Running the CanoScan Setup manually (Macintosh)
- First, double-click the "CD-ROM" icon on desktop.

-
Double-click the appropriate file.
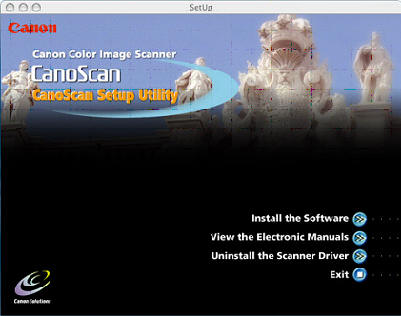
- If using OS 9 or OS X Classic Mode, double-click the "Setup" icon in the finder.

The main menu screen of CanoScan Setup will appear.
-
If using OS X Native Mode, first install Toolbox, and then the ScanGear Plug-in driver (See below for folder location on CD).
| Toolbox |
| Mac OS X\CanoScan Toolbox\CanoScan Toolbox Installer |
| ScanGear Plug-in |
| \Mac OS X\ScanGear CS\ScanGear CS |
