Manual print head alignment instructions i70 (Mac OS 9)
Solution
Follow the steps below to perform a Print Head Alignment (Mac OS 9):
Note: After confirming that the cable is connected and the printer is powered on, perform the following.
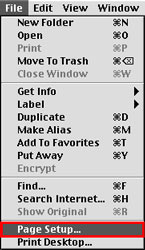
From the File menu, select 'Page Setup'.
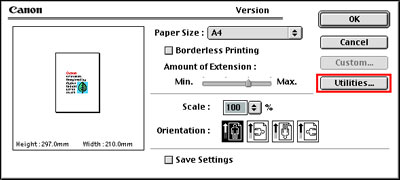
In the Page Setup dialog, click 'Utilities'.
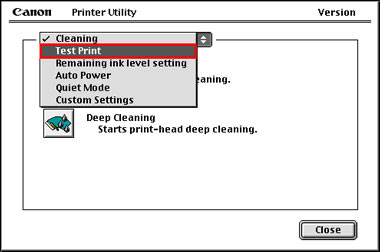
From the pop-up menu, select 'Test Print'.
Click the 'Print Head Alignment' icon.
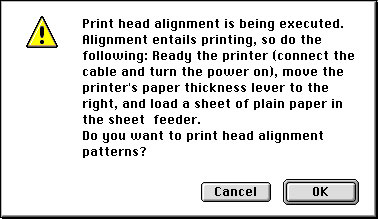
The message below is displayed. After confirming the two points below, click 'OK'.
The printer will perform a print head cleaning before printing the alignment pattern. The power lamp flashes during cleaning operation. Do not perform any other operations. After cleaning has finished, the first head alignment pattern will be printed.
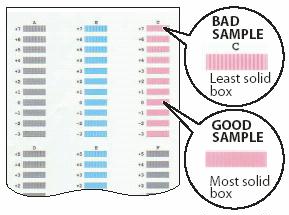
Refer to the printed sheet, and enter the numbers on the next screen. Select the pattern with the fewest visible vertical stripes in Column A.
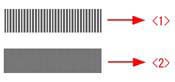
<1> Example of highly visible vertical stripes in the pattern. <2> Example of the fewest visible vertical stripes in the pattern.
Enter the selected pattern's number in the Column A box.
Similarly, enter the selected numbers in the boxes for columns B to F.
After all numbers have been entered, click 'Send'.