Seat the print head
Install the Print Head:
- Power on the printer.
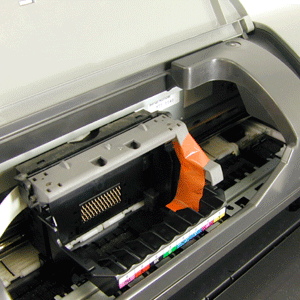
- Open the front cover. (The print head holder will move to the center.)
- Remove the attached orange tape, and raise the print head look lever.
Note: If the front cover is left open for more than 10 minutes, the print head holder will move to the right. If this occurs, close the front cover once, and then re-open it.
- Remove the print head from its package and remove the orange protective cap.
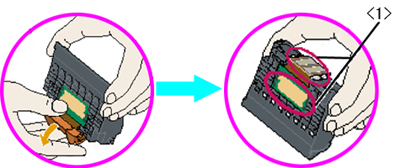
<1> Electrical Contacts and Print Head's Nozzle Area
<2> Ink Supply Filters
Caution: To avoid any damage, do not touch the print head's nozzle area, electrical contacts, or ink supply filters. Do not re-attach the protective cap after it has been removed.
- Set the print head into the print head holder.
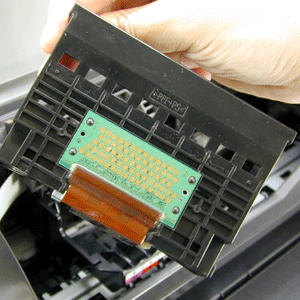
- Lower the print head lock lever until a click sound is made. (The print head is installed.)
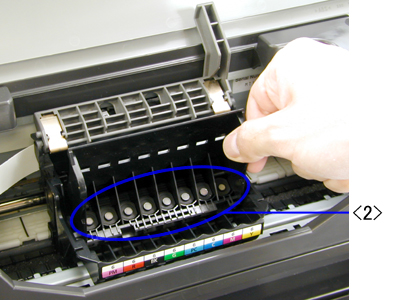
- Install the ink tanks.
- Close the front cover.
Return to the top.
Install the ink tanks:
- Remove the Yellow ink tank (BCI-6Y) from its package.
- Pull the orange tape in the direction of the arrow to remove it completely, and remove the shrink-wrap film.
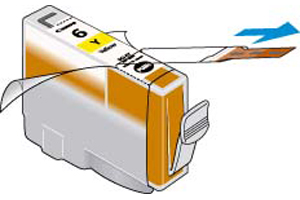
Note: Remove the orange tape so that a long thin hole can be seen.
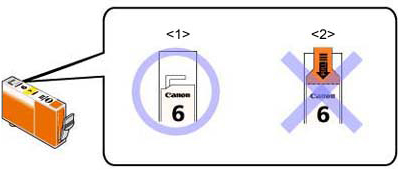
<1> Removed correctly
<2> Removed incorrectly (Remove the orange tape so that a long thin hole can be seen.)
- Hold the ink tank as shown in the image below.
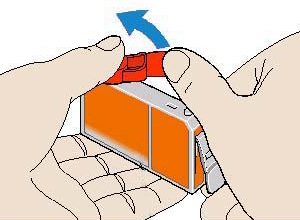
- Twist the orange protective cap in the direction of the arrow, and remove it.
- Insert the ink tank into the slot at the right end, and push down on the <PUSH> mark on top of the ink tank
- Push the ink tank down until a click sound is made. Install the other ink tanks in the same manner as the steps above.
- Verify the inks are installed in the correct order and seated completely.
Return to the top.
Ink tanks' installation order:

- <Y> Yellow (BCI-6Y)
- <M> Magenta (BCI-6M)
- <C> Cyan (BCI-6C)
- <PC> Photo Cyan (BCI-6PC)
- <G> Green (BCI-6G)
- <BK> Black (BCI-6BK)
- <R> Red (BCI-6R)
- <PM> Photo Magenta (BCI-6PM)
Note: Check that each ink tank is installed in the right position.
Return to the top.
Ink tanks' installation status:
- Properly installed

- Improperly installed

Left Image: The BK ink tank is not fully seated.
Right Image: All ink tanks are not fully seated.
Return to the top.
