|
Please follow the procedure below to uninstall (delete) EOS Utility Ver. 3.x and then re-install it.
IMPORTANT
Before uninstalling (deleting) EOS Utility Ver. 3.x, confirm that all open programs have been closed.
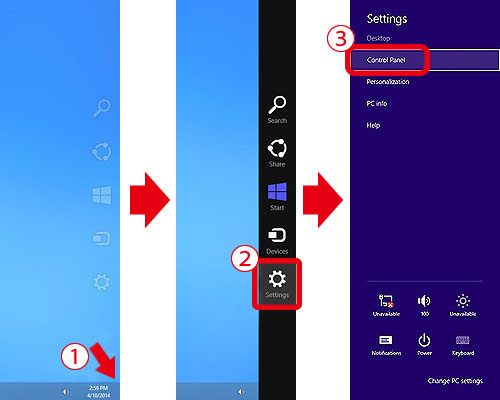
Uninstalling (Deleting) EOS Utility Ver. 3.x 1.  Move the pointer to the bottom right side of the screen. When the Charms are displayed, move the pointer up to select  [Settings]. Next, select the  [Control Panel].
2. Click [Uninstall a program].
3. Select [Canon Utilities EOS Utility 3], and then click [Uninstall/Change].

4. A dialogue box similar to the one in the example image below will be displayed.
Click [OK] to begin the uninstallation of [EOS Utility 3].
5. Click [Ignore] if the following screen appears.
6. If the software is successfully uninstalled, the following screen will appear.
Click [OK] to close the window.
This completes the procedure for uninstalling EOS Utility Ver. 3.x.
Re-installing EOS Utility Ver. 3.x 1. After uninstalling EOS Utility Ver. 3.x using the procedure above, please restart your computer.
IMPORTANT
To prevent possible operational problems, make sure to restart your computer after uninstalling EOS Utility Ver. 3.x. Re-installing the software without restarting your computer first may cause operational problems to occur.
2. Confirm the version information appearing on your EOS DIGITAL Solution Disk.
If [30.0] or later appears, please use the disk to perform the installation.
NOTE
- EOS Utility Ver.3.x is not included on versions of the disk prior to [30.0].
- If the EOS DIGITAL Solution Disk was not included with you camera, please download the software from the Canon homepage.
3. Insert the EOS DIGITAL Solution Disk (CD-ROM) into the computer.
Click the window that appears in the upper right of your screen.
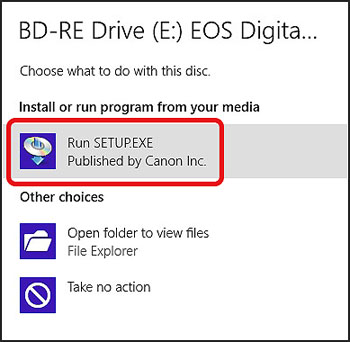
4. If the following window appears, click [Run SETUP.EXE].
5. Select the area in which you live.
6. Select the country where you live, and then click [Next].
7. If a language setting screen appears, select the desired language from the options displayed.
8. Click [Custom Installation].

9. Click [OK] when the following window appears.
10. In the [Software to be installed] window, select [EOS Utility Ver. 3] (  ), and then click [Next].
11. Confirm that [EOS Utility Ver.3] has been selected, then click [Install].

12. Click [Yes] to accept the License Agreement.
NOTE
- In some cases, the [User Account Control] screen may appear. In this case, please click [Yes] and proceed with installation.
13. Installation begins.
14. Click [Next] when [The software has been successfully uninstalled.] is displayed.
15. The following screen appears. In this example, [No, I will register later.] has been selected, and [Next] has been clicked. To register your camera on CANON iMAGE GATEWAY, select [Yes, I would.], and complete the registration procedure.
16. Click [OK].
17. Click [Finish].
NOTE
On some computers, [Restart] may be displayed instead of [Finish]. In this case, click [Restart]. If you installed the software from a CD-ROM, please remove the CD after the computer restarts.
This completes the procedure for re-installing EOS Utility Ver.3.x.
|
