
Sending images to a Smartphone (Wireless Connection)
| Article ID: ART161548 | | | Date published: 08/04/2015 | | | Date last updated: 11/13/2020 |
Description
Solution
| Solution |
Preparation: Installing Camera Connect on a Smartphone To communicate with a smartphone, the dedicated smartphone application Camera Connect (free of charge) is necessary.
Step 1: Connecting the Camera to the Smartphone (Basic Settings)
1. Turn the camera and the smartphone on.
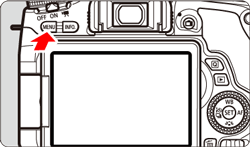
2. Press the cameraâs [MENU] button to display the menu screen.
3. Press the [
 ], [ ], [  ] keys to select the [ ] keys to select the [  ] tab. ] tab.
4. Press the [
 ], [ ], [  ] keys to select [Wi-Fi/NFC], then press [ ] keys to select [Wi-Fi/NFC], then press [  ]. ].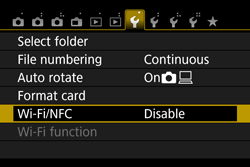
5. Press the [
] key to select [Enable], then press [ ].For smartphones equipped with NFC features, press the [INFO] button to add [
 ] to [Allow NFC connections]. ] to [Allow NFC connections].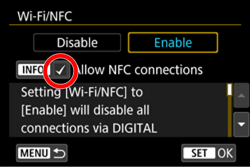
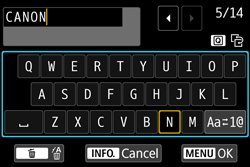
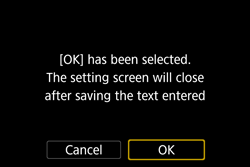
* For more information on using the keyboard, please refer to Additional Information: Using the Virtual Keyboard.
This concludes the explanation of the basic setting procedures.
Please proceed to one of the sections below based on the desired connection method.
To connect with smartphones equipped with NFC, please proceed to Step 2-A: Connect the Camera and a Smartphone using the NFC Function.
To connect with smartphones that are not equipped with NFC, please proceed to Step 2-B: Using Camera Access Point Mode to Establish a Connection between the Camera and the Smarphone.
Step 2-A: Connecting the Camera and a Smartphone using the NFC Function
If your Camera Connect version is 2.7.10 or later, check the Android OS version of your smartphone. If the version is 10.0 or later, the camera firmware must be up to date to take advantage of NFC functionality. You can download the latest firmware from the Canon website.
If your Camera Connect version is 2.7.10 or later, check the Android OS version of your smartphone. If the version is 10.0 or later, you cannnot connect to the camera using NFC functionality.
1. Touch the smartphone to the camera.
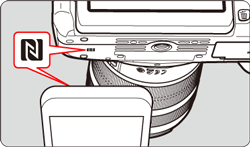
Camera Connect starts on the smartphone and establishes a connection.
When a message indicating the connection is displayed on the cameraâs LCD monitor, communication can be established even if the smartphone is moved away from the camera.
When the connection has been established, the screen shown below will be displayed on the cameraâs monitor.*
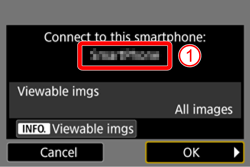
 : The device name set on Camera Connect. : The device name set on Camera Connect.
* When connection settings are already saved, this screen will not appear and the LCD monitor will turn off.
2. Save the connection settings.
Press the [
] key to select [OK], then press [ ].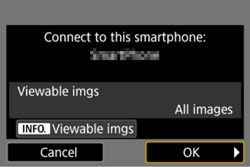
After a message is displayed, the cameraâs LCD monitor will turn off.

When the operation on the camera is completed in step 2, the Camera Connect Main window will appear.
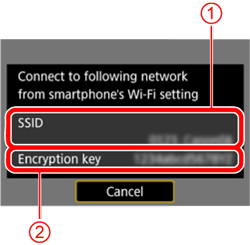
Step 2-B: Using Camera Access Point Mode to Establish a Connection between the Camera and the Smartphone 1. Press the [
], [ ] keys to select [Wi-Fi function] on the [ ] tab, then press [ ].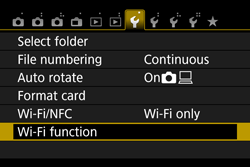
2. Press the [
], [ ] or [ ], [ ] keys to select [  ] (Connect to smartphone), then press [ ]. ] (Connect to smartphone), then press [ ].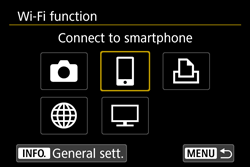
3. Press the [
], [ ] keys to select [Camera access point mode], then press [ ].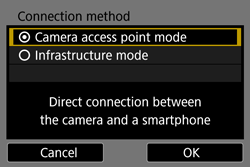
Select [OK] and press [
] to go to the next screen.
4. Press the [
], [ ] keys to select [Easy connection], then press [ ].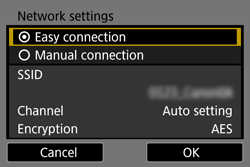
Select [OK] and press [
] to go to the next screen.
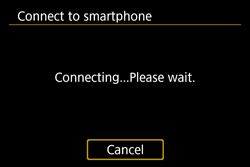
5. Operate the smartphone and connect it to the camera.
6. When the screen below appears, start Camera Connect on the smartphone.
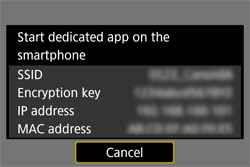
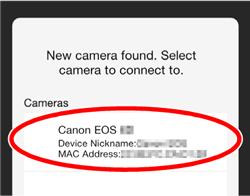
7. Select and touch the camera to connect to from [Cameras] on Camera Connect to establish a connection.
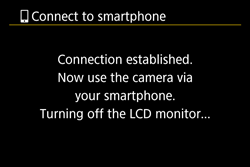
When a connection is established, the screen on the left will appear on the cameraâs LCD monitor.
: The device name set on Camera Connect
8. Press the [
] key to select [OK], then press [ ].
After a message is displayed, the cameraâs LCD monitor will turn off.
When the operation on the camera is completed in step 2, the Camera Connect Main window will appear.
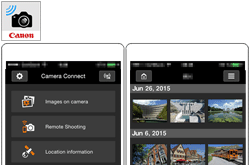
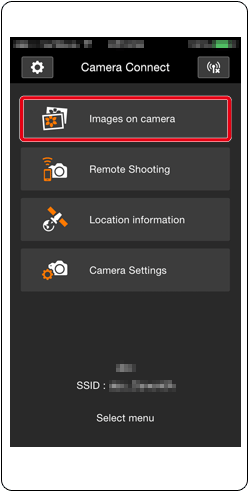
Step 3: Viewing and Saving Images with the Smartphone 1. Select [Images on camera] from the Camera Connect main window on the smartphone.
2. Save images from the camera to the smartphone.
When the connection has been established, the images stored in the camera will be displayed in [Camera Connect] as shown in the example image below.
Tap the [
 ] button appearing at the bottom of the screen. ] button appearing at the bottom of the screen.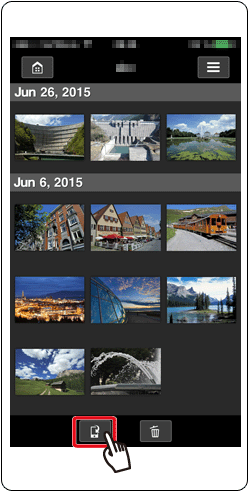
3. When the selection screen is displayed, choose the desired images (
), and then tap [Save] ( ). ).
The selected images will be saved to the smartphone.
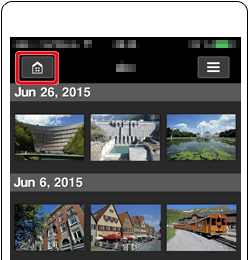
4. After the images have been saved, tap the home button in the top left of the screen to return to the menu.
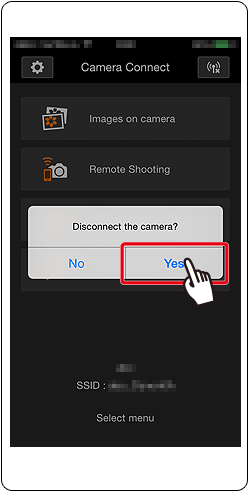
5. To end the connection, tap the [
 ] icon in the upper right of the screen, then tap [Yes] when the confirmation screen appears. ] icon in the upper right of the screen, then tap [Yes] when the confirmation screen appears.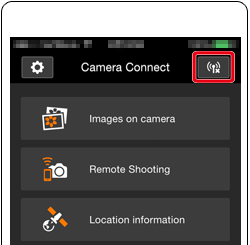
This concludes the procedure for sending images to a smartphone via a wireless LAN.
*Androidâ¢, and Google Play⢠are trademarks of Google Inc.
Additional Information: Using the Virtual Keyboard The following section describes how to set the cameraâs nickname (for identification).
The nickname can be changed later from the [General sett.] screen.
|
||||||||||||||
| Related Info |
Smartphone (Device) Specifications and System Requirements for a Wireless Connection with a Camera (Canon Camera Connect)
|
||||||||||||||
|
ID: 8202587300_EN_9
|
|||||||||||||||
 ] tab > Auto Power Off to [Disable] is recommended.
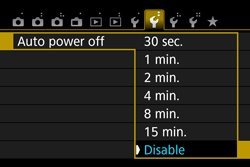
 mark are NFC-enabled. Some smartphones are not labeled with the
 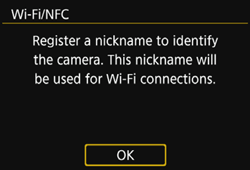 Â
 ], when there is no card, or when the LCD monitor is closed with the screen facing inward.

