Scanning with Auto Scan in IJ Scan Utility on a Windows PC - MG5700 Series / MG6800 Series / MG7720
| Article ID: ART161644 |
| |
Date published: 09/10/2015 |
| |
Date last updated: 05/31/2019 |
Description
This article explains how to use the Auto Scan function of IJ Scan Utility on a Windows PC.
Solution
You can scan easily by automatically detecting the item type.
 Important
-
Make sure that your scanner or printer is turned on.
-
Place items on the platen of your scanner or printer.
-
Start IJ Scan Utility.
-
Click Auto.
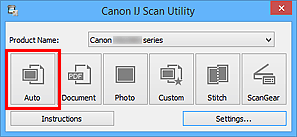
Scanning starts.
 Note
Note
