Use the operation panel on your printer to set the static IP address.
 For the MB2020, use the arrows and the OK button to select the options noted below.
Follow these steps:
-
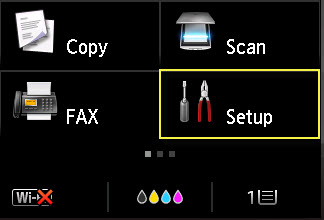
From the Home screen, tap Setup (if Setup is not on the screen, swipe over to it then tap it).
-
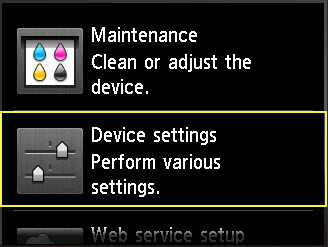
Tap Device Settings.
-
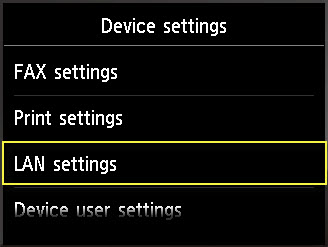
Tap LAN settings.
-
Tap Other settings.

-
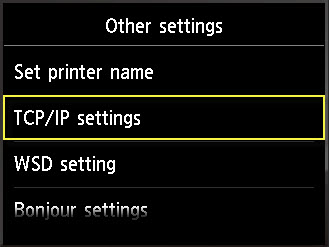
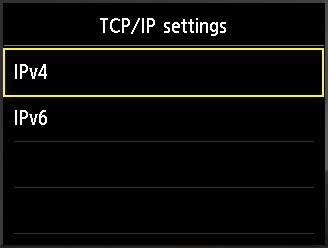
Tap TCP/IP settings.
-
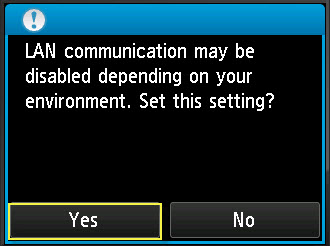
Tap IPv4.
-
Tap Yes.
-
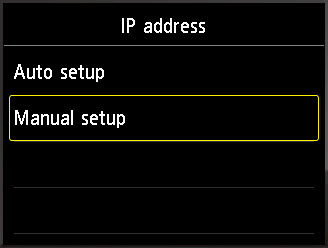
Tap IP address.

-
Tap Manual setup.
-
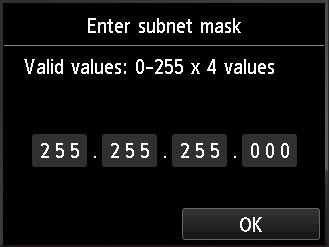
On the Enter IP address screen, tap the first set of numbers (octet) and then tap the numbers for the IP address that you want to specify. Then, tap OK.

Do this for the remaining sets of numbers (octets) in the IP address. Tap OK.
-
Repeat these steps for the subnet mask.
-
Repeat these steps for the default gateway.

