|
You can use the CameraWindow software application to save movies and photos from the camcorder to a computer.
The system requirements are shown below (February 9, 2015)
Windows
| OS | Windows 8 / 8.1
Windows 7 Service Pack 1 |
| Computer | Computer running one of the above operating systems (preinstalled), with an included USB port; Internet connection required for auto updating |
| CPU | 1.6 GHz or higher |
| RAM | Windows 8 / 8.1 (64 bit), Windows 7 (64 bit): 2 GB or more
Windows 8 / 8.1 (32 bit), Windows 7 (32 bit): 1 GB or more |
| Interface | USB and Wi-Fi*1 |
| Free Hard Disk Space | 150 MB or more |
| Display | 1,024 x 768 resolution or higher |
*1: Wi-Fi connections require supported cameras.
Macintosh
| OS | OS X 10.9*1, 10.8*1*2 |
| Computer | Computer running one of the above operating systems (preinstalled), with an included USB port; Internet connection required for auto updating |
| CPU | Core 2 Duo or higher |
| RAM | 2 GB or more |
| Interface | USB and Wi-Fi*3 |
| Free Hard Disk Space | 150 MB or more |
| Display | 1,024 x 768 resolution or higher |
*1: Information on computer models compatible with OS X 10.9 and 10.8 is available on the Apple website.
*2: OS X 10.8.2 or later required for Wi-Fi connections (with supported cameras only).
*3: Wi-Fi connections require supported cameras.
Making Preparations You can download the CameraWindow software (in the CAMCORDER Software package) for free from the following Canon Web site. The site also has system requirements, latest information about the software, instructions on how to open the software package and how to run the installer. To download and install the software, click on your country/region and follow the onscreen instructions.
http://www.canon.com/icpd/
IMPORTANT
- Using the software, you can update to the latest version, and download new functions via the Internet (some software excluded). Be sure to install the software on a computer with an Internet connection so you can use this function.
- An account with Administrator privileges is required for installing and uninstalling software.
- Internet access is required to use this function, and any ISP account charges and access fees must be paid separately.
NOTE
- In the example procedure below, the [DIGITAL VIDEO CAMERA Software] has been downloaded from the Canon homepage and the used to install the [CameraWindow] software on a computer running Windows 7. The installation procedures and screens displayed may differ depending on the operating system, or the software you use.
- The first time you connect the camera to the computer, drivers will be installed, so it may take a few minutes until camera images are accessible.
- Because the content and functions of software vary according to the camcorder model, if you have several camcorders, you must update to the latest version of the software for each camcorder.
Downloading the software You can download the [DIGITAL VIDEO CAMERA Software] software from the Canon homepage. Follow the instructions on the download page to download the software.
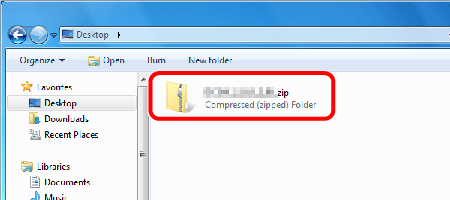
Installing the software 1. Double-click the downloaded file.
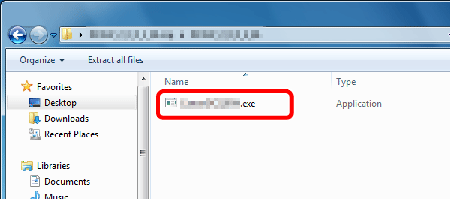
2. Double-click [CanonDVSxxW.exe].
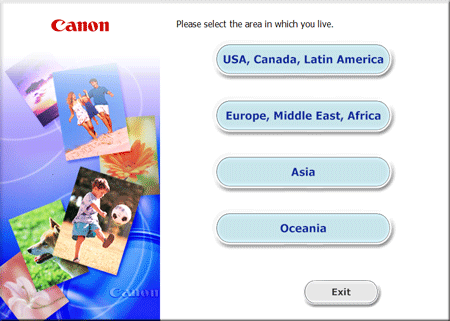
3. Select the area in which you live.
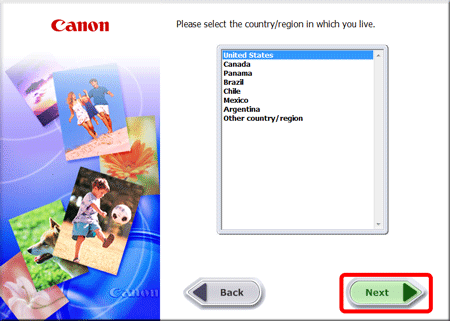
4. Select the country where you live, and then click [Next].
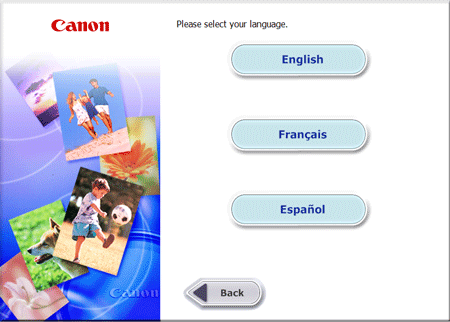
5. Select your language.
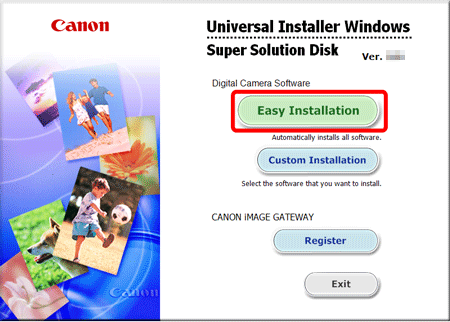
6. Click [Easy Installation] to automatically install all the software applications.
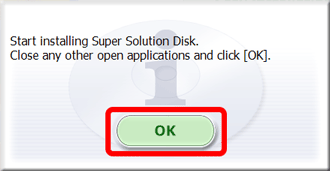
7. The following screen will appear. Click [OK].
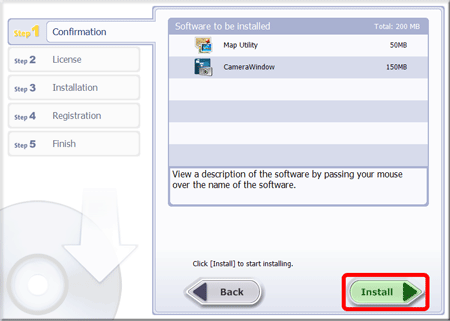
8. The following screen will appear. Click [Install].
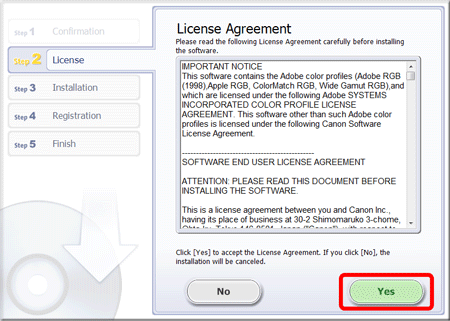
9. The following screen will appear. Click [Yes] after reading the content carefully.
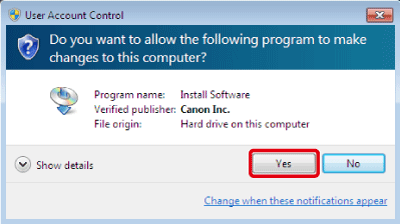
10. If the following window appears, click [Yes].
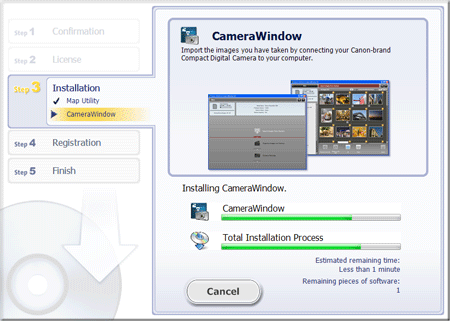
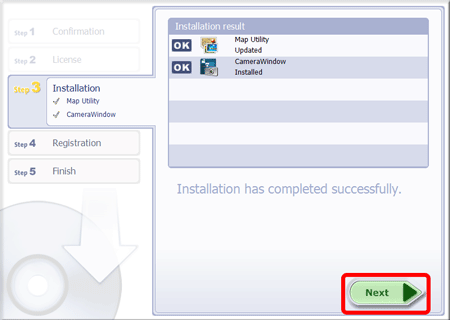
11. Installation begins.
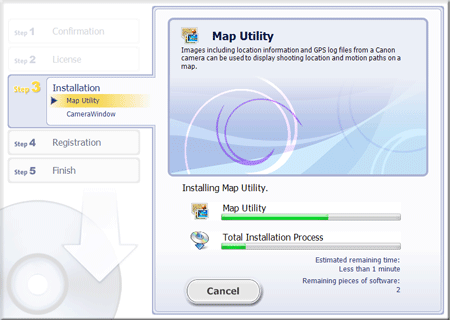
CameraWindow will be installed.
12. The following screen will appear. Click [Next].
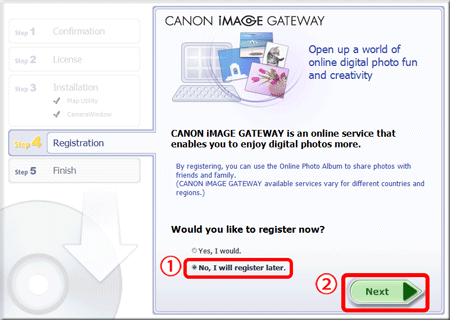
13. The following screen appears.
- In this example
 [No, I will register later] has been selected, and [No, I will register later] has been selected, and  [Next] has been clicked. [Next] has been clicked.
(To register in CANON iMAGE GATEWAY, select [Yes, I would] and complete the registration procedure.)
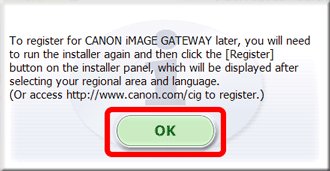
14. Click [OK].
15. If restarting the computer is not necessary, a [Finish] screen will be displayed. In this case, please click [Finish].
If restarting the computer is necessary a [Restart] screen will be displayed. In this case please click [Restart].
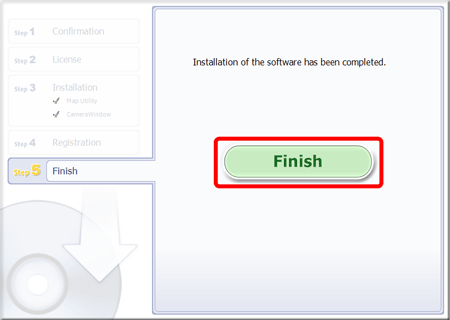
This completes the software installation procedure.
Saving to a Computer 1. Power the camcorder with the compact power adapter (AC adapter).
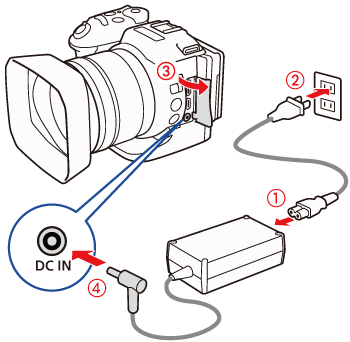
IMPORTANT
Make sure to power the camcorder with the compact power adapter when connecting with an external device.
2. Set the camcorder to playback mode, and then display the index screen for photos.
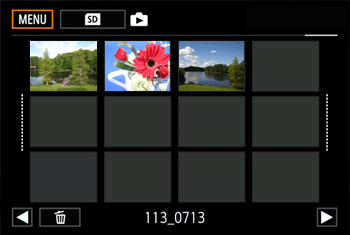
REFERENCE
Switching to Playback mode from Video clip shooting mode or Photo shooting mode:
When you hold the [  ] button pressed down during video clip shooting mode or photo shooting mode, the camcorder will switch to playback mode and display the last clip or photo recorded, depending on the position of the movie photo switch.
3. Connect the camcorder to the computer using the USB cable included with the camcorder.
Windows: If the AutoPlay dialogue box appears instead, click Downloads Images From Canon Camera to start the CameraWindow program.
- CameraWindow will start automatically and the main screen will appear.
Mac OS: CameraWindow will start automatically and the main screen will appear.
If a device selection window appears, select your camcorder’s model name from the list and click [OK].
4. In CameraWindow’s main screen, click [Import Images from Camera] and then click [Import Untransferred Images]
- Photos you have not yet transferred to the computer will be saved.
- Click [Cancel] to interrupt the transfer while it is in progress.
5. When the transfer is completed, click [OK] and close CameraWindow.
CAUTION
- When the camcorder is connected to a computer:
- Do not open the recording media slot cover.
- Do not change or delete any of the camcorder’s folders or files directly from the computer as this may result in permanent data loss.
-Do not set the computer in Sleep or Hibernate mode (Windows) and do not activate the Sleep function (Mac OS).
- If you wish to use the recordings on your computer, make copies of them first. Use the copied files, retaining the originals.
NOTE
To uninstall CameraWindow:
Windows: In the Control Panel, open [Add or Remove Programs]. Slelect [Canon Utilities CameraWindow DC8], click Uninstall/Change and follow the instructions.
Mac OS: Drag and drop the following folder to the [Trash].
/Applications/Canon Utilities/CameraWindow
- Depending on the computer, the software may not work correctly.
- When the camcorder is powered only using the battery pack, the batteriy’s charge on the camcorder’s details are of the CameraWindow screen ([Battery Capacity])* will always appear as [Full] regardless of the actual remaining battery charge.
* Will not be displayed when the compact power adapter is not used.
|
