|
Install the MF Drivers and MF Scan Utility from the DVD-ROM that is supplied with the machine. For more information about how to connect the machine and a computer, see "Getting Started" before starting.
IMPORTANT
If you are connecting the machine and a computer via a USB cable, install the software before connecting the USB cable. A USB cable is not included with the machine. Prepare one separately.
NOTE
- The options to be displayed differ depending on your model.
- The installation screen differs depending on the version of Mac OS X.
- Be sure to close all applications that are running.
1. Insert the supplied DVD-ROM into the drive on the computer.
2. Turn OFF the machine.
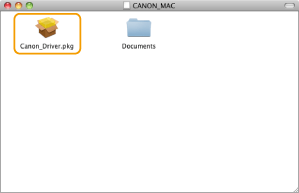
3. Double-click the DVD-ROM icon, and double-click the [Canon_Driver.pkg] icon.
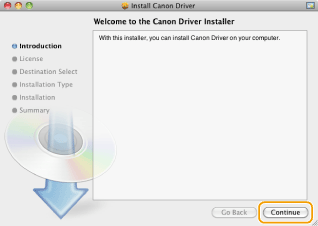
4. Click [Continue].
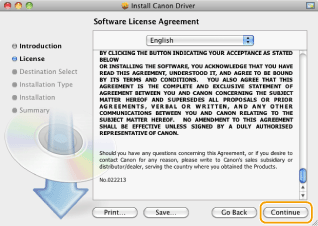
5. Read the License Agreement, and click [Continue].
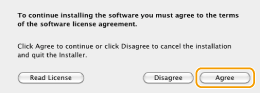
6. Click [Agree].
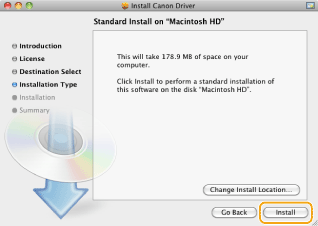
7. Click [Install].
- [Change Install Location] may appear, but you cannot change the installation location.
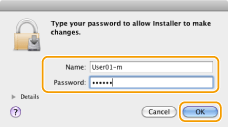
8. Enter your [Name] and [Password], and click [OK].
- If you are using Mac OS X 10.7.x or later, click [Install Software].
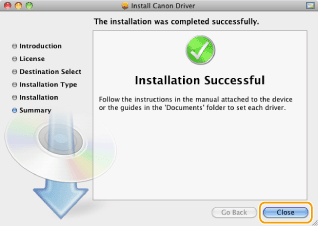
9. When the following screen appears, click [Close].
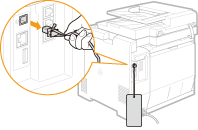
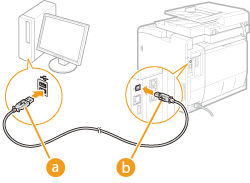
10. Remove the cap that covers the USB port on the back side of the machine.
11. Connect the USB cable.
- Connect the flat end
 to the USB port on the computer. to the USB port on the computer.
- Connect the square end
 to the USB port on the machine. to the USB port on the machine.
12. Turn ON the machine.
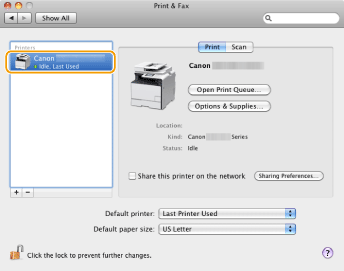
13. Open [System Preferences], and click [Print & Fax], [Print & Scan], or [Printers & Scanners].
14. Check that the machine is added to the dialog box.
- If the machine is added to the dialog box, installation is complete.
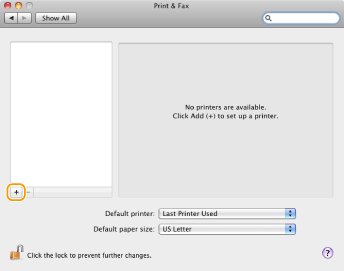
- If the machine is not added to the dialog box, proceed to step 15.
15. Click the [+] icon.
- If another dialog box does not appear, click [Add Other Printer or Scanner] or [Add Printer or Scanner] after clicking the [+] icon.
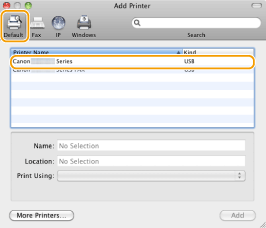
16. Click [Default], and select a printer name for which [USB] is displayed in the [Kind] column.
17. Select either one of the following options from [Print Using] or [Use]: [Select a driver to use], [Select Printer Software], or [Select Software].
18. Select a driver that is capable for this machine from the driver list, and click [OK].
- If you are using Mac OS X 10.5.x, clicking [OK] is not required.
19. Click [Add].
20. Check that this machine is added to the [Print & Fax], [Print & Scan], or [Printers & Scanners] dialog box.
|