Follow these steps to install the L24 / L36 Colortrac scanner to the iPF670 or iPF770 printer:
- Make sure the printer stand is assembled and the printer is installed properly before installing the scanner.
- Utilizing the allen wrench (either the one from the printer or the one included with the scanner), loosen the screw from the left side roll holder cover and remove both pieces of the cover.

- Locate the left side mounting bracket and secure it to the printer using 3 hex screws.

- Reinstall the left cover using the original screw.
NOTE: Only the bottom cover is used. The top portion of the cover is no longer required and should be stored in a safe place.

- Repeat the same procedure for the right side.


- Standing at the back of the printer, place the scanner's feet in the holes on the top of the scanner mounting brackets and push the scanner forward slightly. Secure in place using the 2 thumb screws provided.

- Mount the cable guide onto the right side bracket (just underneath the thumb screw).
- Connect the power cable to the scanner (AC power cord plugs into the AC power brick), and then into a power outlet.
- If you have not already done so, remove the packing tape from the scanner.
- Power on the scanner (the power switch is located on the right side of the scanner).

- Make sure that the blue light is on in the bottom left corner of the scanner control panel and that the LCD display is on.

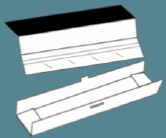
- Locate the Calibration Target, unpack/fold it, and then insert it into the scanner centered (solid black rectangle facing up), black edge first.
- To calibrate the scanner, use the scanner's control panel right arrow to go to the Settings menu (
 ).
).
- Make sure the brackets are on the Calibration icon (
 ) (the first icon) and then press the OK button.
The scanner will feed in the calibration target. Once the calibration is completed, the target will be ejected from the back of the scanner.
- Once calibrated, package the Calibration target back up in it's container and store it in a safe place (you will need it again at a later time).
- Install the document guides onto the back of the scanner.
Note: The L36 has 3 document guides, the L24 only has 1 document guide.

- The scanner is now ready to use.
