
Sending Images from the Camera to an Android Smartphone (PowerShot SX720 HS)
| Article ID: ART164686 | | | Date published: 02/22/2016 | | | Date last updated: 06/09/2017 |
Description
Sending Images from the Camera to an Android Smartphone (PowerShot SX720 HS)
Solution
| Solution |
This camera sends images to smartphones and tablet computers that have Wi-Fi functions.
This article explains [how to connect to a smartphone by pressing the Wi-Fi button to send the images in the camera].
For instructions on how to send images using the NFC function with an Android smartphone (OS version 4.0 or higher) that supports NFC, refer to Sending Images from a Camera to an Android Smartphone via NFC Connection.
The following 4 steps explain how to use a smartphone to control the camera and shoot remotely via the Wi-Fi function. Start the operation from step 1.
 : Check the OS version on your smartphone. : Check the OS version on your smartphone. : Install Camera Connect on your smartphone and turn Wi-Fi on. : Install Camera Connect on your smartphone and turn Wi-Fi on. : Connect the camera and smartphone. : Connect the camera and smartphone. : Use the smartphone to shoot. : Use the smartphone to shoot.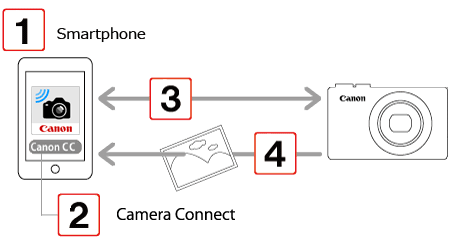
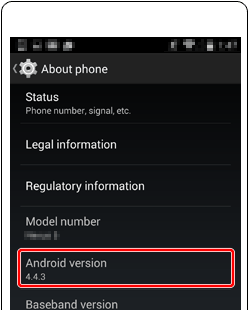
Step 1: Check the OS version on your smartphone
 1. Check the environment on your smartphone. 1. Check the environment on your smartphone.
Step 2: Install Camera Connect on your smartphone and turn Wi-Fi on
Download Camera Connect from Google Play and install it on your smartphone.
If Camera Connect is already installed on your smartphone, proceed to Step 3: Connect the camera and smartphone.
1. Touch the [Play Store] icon on your smartphone to start Google Play.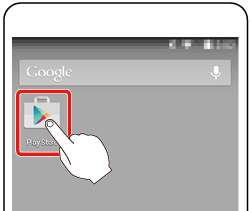
2. Touch the search icon.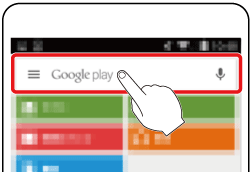
3. Enter "Camera Connect" as the keyword in the search field  and then tap the search icon and then tap the search icon  . .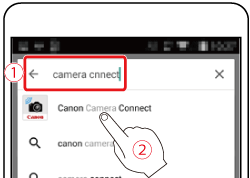
4. Select [Camera Connect] in the search results and install it.The home screen will reappear when the installation of Camera Connect is complete.
5. Touch the menu key on your smartphone and then touch [Settings] (  ). ).
6. Make sure your smartphone is not in airplane mode.
7. Turn the [Wi-Fi] switch ON ( ) and then tap [Wi-Fi] ( ).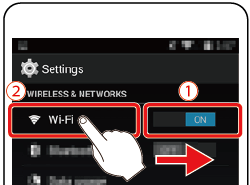
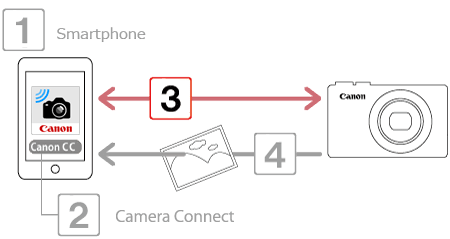
Step 3: Connect the camera and smartphone
 1. Press the [ 1. Press the [  ] button on the camera. ] button on the camera.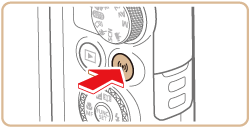
2. Press the [  ], [ ], [  ], [ ], [  ], [ ], [  ] buttons, select [ ] buttons, select [  ], and then press the [ ], and then press the [  ] button. ] button. 
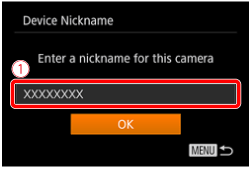
3. Press the [ ], [ ] buttons to select [Add a Device], and then press the [ ] button.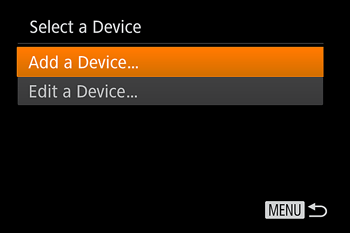
4. The cameraâs SSID and password are displayed.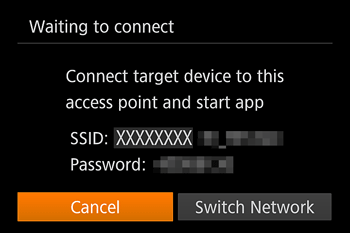
5. In the smartphoneâs Wi-Fi setting menu, choose the SSID (network name) displayed on the camera to establish a connection. In the password field, enter the password displayed on the camera.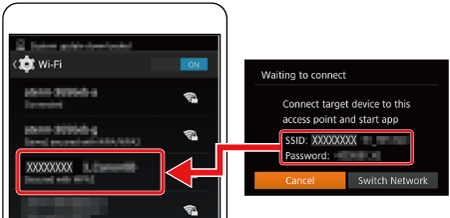
6. Touch the [Canon Connect] icon (  ) on the smartphone to start [Camera Connect]. ) on the smartphone to start [Camera Connect].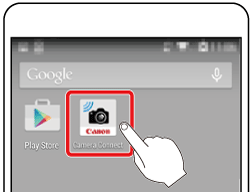
7. Press the [ ], [ ] buttons to select [Yes], and then press the [ ] button.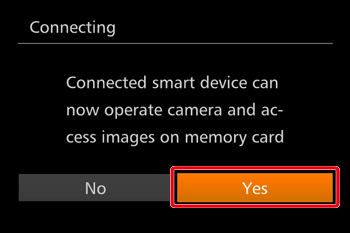
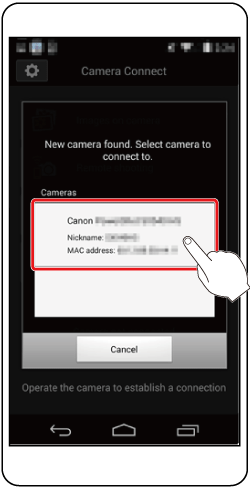
8. The following screen is displayed when the connection with the smartphone is established.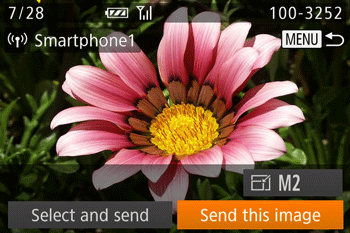
Step 4: Send images to a smartphone
1. Touch [Images on camera] in Camera Connect.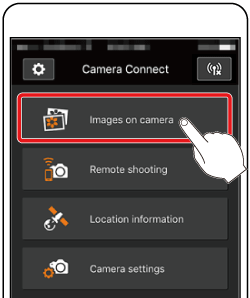
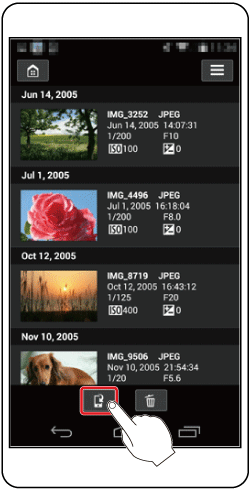
2. Use your smartphone to send images from the camera to the smartphone.
3. When the selection screen appears, select the images you wish to send (save) ( ) and then touch [Save] ( ) on the bottom right side of the screen to send the selected images to the smartphone.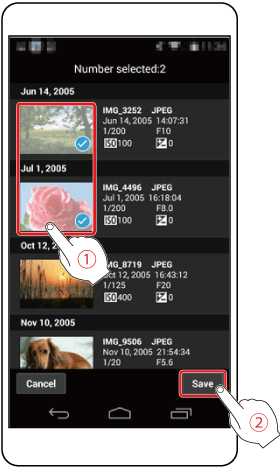
4. When the images have been transferred, touch the home button on the top left to return to the menu screen.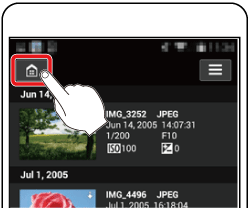
5. To end the connection, touch the icon [  ] on the top right, and then touch [Yes] on the confirmation screen. ] on the top right, and then touch [Yes] on the confirmation screen.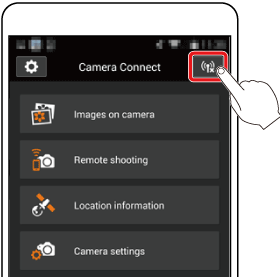  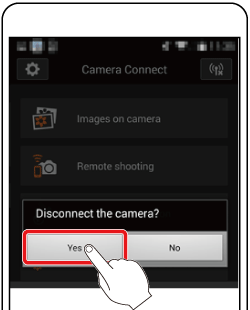
*Android, and Google Play are trademarks of Google Inc.
|
| Related Info | Smartphone (Device) Specifications and System Requirements for a Wireless Connection with a Camera (Canon Camera Connect) |
|
ID: 8202818900_EN_4
|
|
 are for cameras.
 ] : high, [
  ] : medium, [
  ] : low, [
  ] : weak
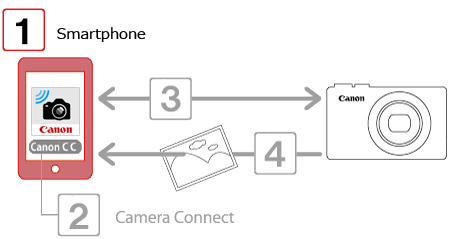
 [About Device]
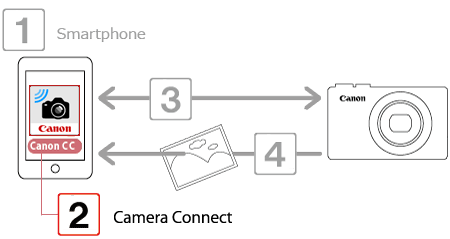
 ] tab > [Wireless settings] > [Wi-Fi Settings] > [Target History] > [Off].
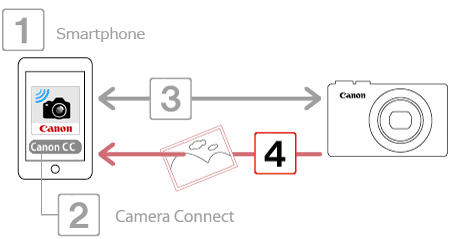
SIMS Doc Id
8202818900