| Solution |
By recording a time-lapse movie that combines images shot at a specified interval, you can create movies with fast-moving stars. You can adjust the shooting interval and recording duration as needed.
IMPORTANT
- Note that each session takes a long time, and requires many shots. Check the battery level and memory card space in advance.
- Procedures for shooting start time-lapse movies are explained below.
1. Turn the camera on.
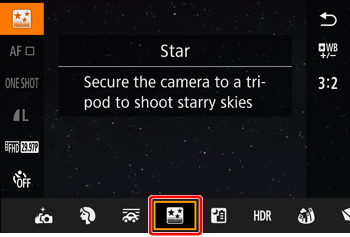
2. Set the mode dial to [SCN].

3. Press the [  ] button when the shooting screen is displayed.

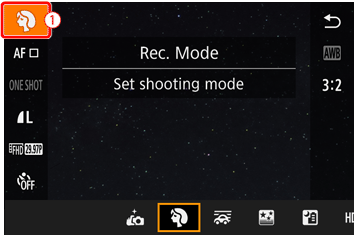
4. When the menu options are displayed, press the [  ] , [  ] buttons to choose [Rec. Mode] (  )in the upper left of the screen, and then press the [ ] button.

REFERENCE
- If the default settings have not been changed, [
 ] will be displayed. ] will be displayed.
5. Press the [  ] , [  ] buttons to choose [  : Star] from the options displayed at the bottom of the screen, and then press the [ ] button.

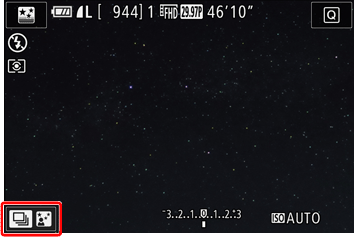
6. Press [ ] (  ) when the following screen is displayed.

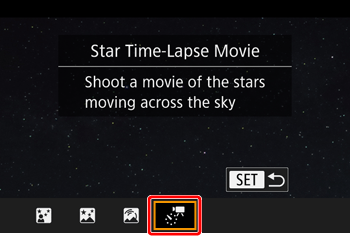
7. Press the [ ] , [ ] buttons to choose [  : Star Time-Lapse Movie ] from the options appearing on the bottom of the screen, and then press the [ ] button.
NOTE
- Zoom is set to maximum wide angle and cannot be adjusted.
8. Press the [ ] button.

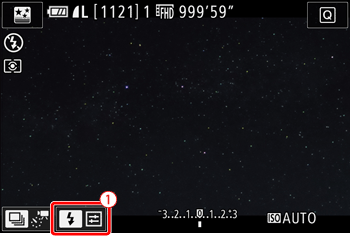
NOTE
- You can also touch ( ) on the shooting screen to make the setting.
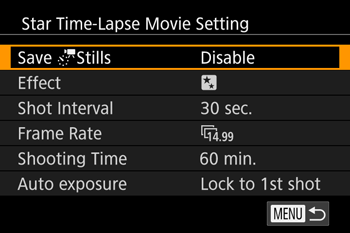
9. When the following screen appears, press the [ ] , [ ] buttons to select the desired item and make the setting for the movie.
- Select the desired item and press the [ ] button.
The options that can be configured in [Start Time-lapse Movie] mode are shown in the table below.
| Item | Options | Details |
|---|
| Save [
] Stills | Enable / Disable | You can choose to save each shot collected before the movie is created. When [Enable] is selected, you cannot use [Effect]. |
| Effect |
 ,
,
 ,
,
 ,
,
 ,
,

| Choose movie effects, such as star trail. |
| Shot Interval | 15 sec., 30 sec., 1 min. | Choose the interval between each shot. |
| Frame Rate |
 ,
,
 (NTSC)
 ,
,
 (PAL)
(PAL) | Choose the movie frame rate. |
| Shooting Time | 60 min., 90 min., 120 min., Unlimited | Choose the length of the recording session. To record until the battery runs out, choose [Unlimited]. |
| Auto exposure | Lock to 1st shot / For each shot | You can choose to lock to the first shot's exposure or change the exposure for each shot. |
REFERENCE
- A shooting interval of [1 min.] is not available with these effects: [ ] , [ ] , [ ] or [ ]
Estimated playback time based on shooting interval and frame rate (for a one-hour session)
| Interval between Shots | Frame Rate | Playback Time |
|---|
| NTSC | PAL |
|---|
| 15 sec. |
|
| 16 sec. |
| 15 sec. |
|
| 8 sec. |
| 30 sec. |
|
| 8 sec. |
| 30 sec. |
|
| 4 sec. |
| 1 min. |
|
| 4 sec. |
| 1 min. |
|
| 2 sec. |
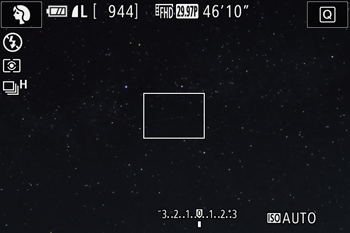
10. Mount the camera on a tripod or take other measures to keep it still.
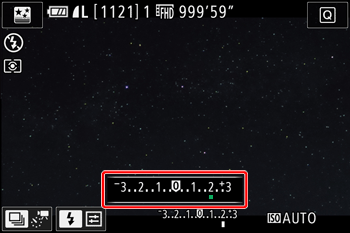
11. Check the brightness.
- Press the shutter button all the way down to shoot a single still image.
- Switch to Playback mode and check image brightness.
- To adjust brightness, turn the exposure compensation dial and change the exposure level. Check brightness again by taking another shot.
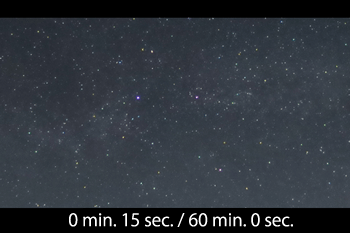
12. Press the movie button. Recording begins, and the indicator on the back of the camera blinks.
 ã 
- Do not disturb the camera while shooting.
- To cancel shooting, press the movie button again. Note that cancellation may take up to about 30 seconds.
- The camera operates in Eco mode while shooting.
IMPORTANT
- There will be a delay before you can shoot again, as the camera processes the images.
- If the camera runs out of battery power or memory card space, shooting stops and a movie created from the images up to that point is saved.
NOTE
- Sound is not recorded.
- For easier viewing, try choosing [MENU]
 [ [  ] tab [Night Display] before shooting. ] tab [Night Display] before shooting.

- You can also access the screen in step 9 by choosing [MENU] [
 ] tab [Star Time-Lapse Movie Setting]. ] tab [Star Time-Lapse Movie Setting].
- Images saved with [Save Stills] set to [Enable] are managed as a single group, and during playback, only the first image is displayed. To indicate that the image is part of a group, [
 ] is displayed in the upper left of the screen. If you erase a grouped image, all images in the group are also erased. Be careful when erasing images. ] is displayed in the upper left of the screen. If you erase a grouped image, all images in the group are also erased. Be careful when erasing images.
- Grouped images can be played back individually and ungrouped.
- Protecting a grouped image will protect all images in the group.
- Grouped images can be viewed individually when played back using Image Search. In this case, images are temporarily ungrouped.
- The following actions are not available for grouped images: editing Face ID information, magnifying, tagging as favorites, editing, printing, setting up individual image printing, or adding to a photoboo. To do these things, either view grouped images individually or cancel grouping first.
- Try switching to manual focus mode to more accurately specify the focal position before shooting.
This concludes the explanation of shooting star time-lapse movies.
|