| Solution |
IMPORTANT
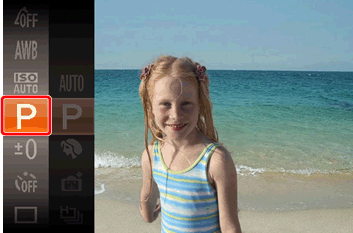
- The instructions in this section apply to a camera with the [Shooting Mode] set to [
 : Program AE]. : Program AE].
Using the Self-timer
- With the self-timer, you can include yourself in group photos or other timed shots. The camera will shoot about 10 seconds after you press the shutter button.
Shooting Mode with Limited Self-Timer Settings
IMPORTANT
- When the [Shooting mode] is set to [
 : Smart Shutter ] or [ : Smart Shutter ] or [  : High-Speed Burst ], the self-timer cannot be configured. : High-Speed Burst ], the self-timer cannot be configured.
1. Turn the camera on.
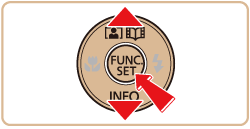
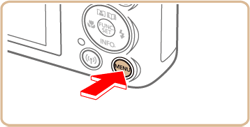
2. Press the [  ] button, when the menu items are displayed, press the [  ] , [  ] buttons and select [Self-timer].
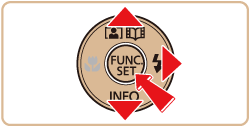
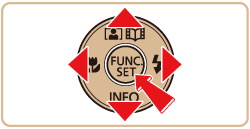
3. Press the [  ] button to access the [Self-timer items], press the [ ], [ ] buttons to select [  ], and then press the [ ] button.

4. Once the setting is complete, [ ] is displayed on the screen.
 Proceed to Shoot
Using the Self-Timer to Avoid Camera Shake
- This option delays shutter release until about two seconds after you have pressed the shutter button. If the camera is unsteady while you are pressing the shutter button, it will not affect your shot.
1. Turn the camera on.
2. Press the [ ] button, when the menu items are displayed, press the [ ] , [ ] buttons and select [Self-timer].
3. Press the [ ] button to access the [Self-timer items] items, press the [ ], [ ] buttons to select [  ], and then press the [ ] button.

4. Once the setting is complete, [ ] is displayed on the screen.
 Proceed to Shoot
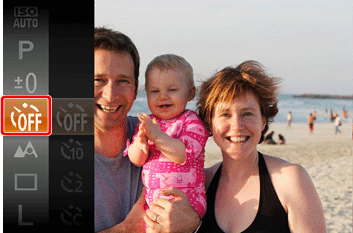
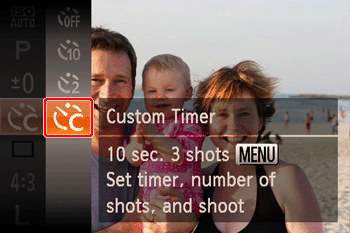
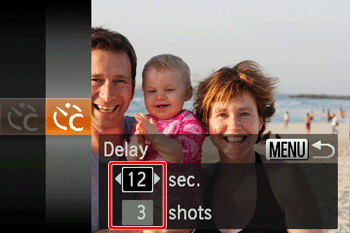
Customizing the Self-Timer
- You can specify the delay (0 â 30 seconds) and number of shots (1 â 10).
Shooting Mode with Limited Self-Timer Settings
1. Turn the camera on.
2. Press the [ ] button, when the menu items are displayed, press the [ ], [ ] buttons and select [Self-timer].
3. Press the [ ] button to access [Self-timer items], press the [ ], [ ] buttons to select [  ], and then press the [ MENU ] button.
4. Set the delay and number of shots.
- Press the [ ], [ ] buttons to choose [Delay] or [Shots].
- Press the [
 ], [ ] buttons to choose a value, and then press the [ ] button. ], [ ] buttons to choose a value, and then press the [ ] button.
5. Once the setting is complete, [ ] is displayed on the screen.
NOTE
- When you specify multiple shots, image brightness and white balance are determined by the first shot. More time is required between shots when the flash fires or when you have specified to take many shots. Shooting will stop automatically when the memory card becomes full.
- When a delay longer than two seconds is specified, the blinking lamp and self-timer sound will speed up two seconds before the shot. (The lamp will remain lit if the flash fires.)
Proceed to Shoot
Shoot.
- For Still Images: Press the shutter button halfway to focus on the subject, and then press it all the way down.
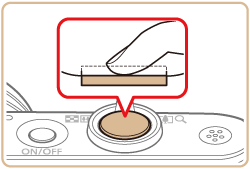

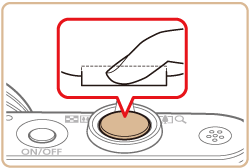
- For Movies: Press the movie button.
IMPORTANT
- For movies recorded using the self-timer, recording begins after your specified delay time, but specifying the number of shots has no effect.
- Once you start the self-timer, the lamp will blink and the camera will play a self-timer sound.
- Two seconds before the shot, the blinking and sound will speed up. (The lamp will remain lit if the flash fires.)
REFERENCE
- To cancel shooting after you have triggered the self-timer, press the [MENU] button.
- To restore the original setting, choose [
 ] in step 3. ] in step 3.
Self-timer settings are not available in the following shooting modes.
 ... not available
| Function | Shooting Mode |
| Self-Timer |

|

|

|

|

|
|
|

|

|

|

|

|

|

|

|

|

|

|

|

|
|
|

|
|
|
|
|
|
|
|
|
|
|
|
|
|
|
|
|
|
|
|
|
|
|
|
|
|
|
|
|
|
|
|
|
|
|
|
|
|
|
|
Self-timer settings are not available in the following shooting modes.
... not available
| Function | Shooting Mode |
Self-Timer
Settings |
|
|
|
|
|
|
|
|
|
|
|
|
|
|
|
|
|
|
|
|
|
| Delay*1 |
|
|
|
|
|
|
|
|
|
|
|
|
|
|
|
|
|
|
|
| Shots*2 |
|
|
|
|
|
|
|
|
|
|
|
|
|
|
|
|
|
|
|
*1 Can not be set to 0 seconds in modes without selection of the number of shots.
*2 When the number of shots cannot be configured, the setting is locked to 1 shot.
Auto Shooting after Face Detection (Smart Shutter) [Auto Shooting after Smile Detection]
- The camera shoots automatically after detecting a smile, even if you do not press the shutter button.
1. Turn the camera on.
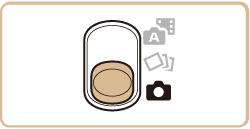
2. Set the [Mode Switch] to [  ].
3. Press the [ ] button, then press the [ ], [ ] buttons and select the [Shooting Mode].
4. Press the [ ] or [ ] buttons, and after the [Shooting Mode]-selection screen is displayed, press the[ ], [ ] buttons and select [ ]. Press the [ ] button.
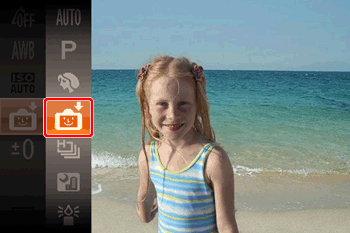

5. Press the [ ] button, then press the[ ], [ ] buttons and select [ ]. Press the [ ] button.
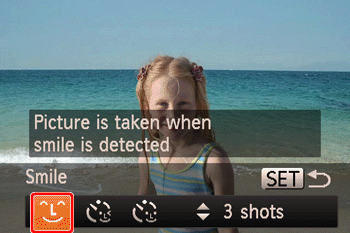
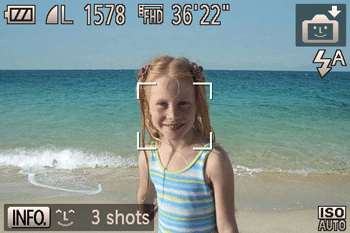
6. The camera now enters shooting standby mode, and [Smile Detection on] is displayed.
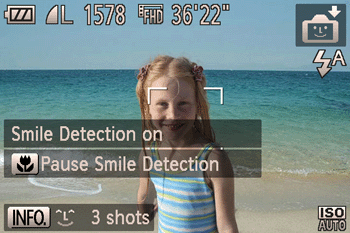
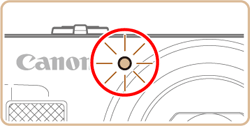
7. Aim the camera at a person. Each time the camera detects a smile, it will shoot after the lamp lights up (on the front side of the camera).
- To pause smile detection, press the [ ] button. Press the [ ] button again to resume detection.
IMPORTANT
- Switch to another mode when you finish shooting, or the camera will continue shooting each time a smile is detected.
NOTE
- You can also shoot as usual by pressing the shutter button.
- The camera can detect smiles more easily when subjects face the camera and open their mouths wide enough so that teeth are visible.
- To change the number of shots, press the [ ], [ ] buttons after choosing [ ] in step 5.
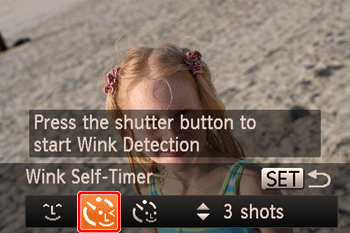
[Using the Wink Self-Timer]
- Aim the camera at a person and press the shutter button all the way down. The camera will shoot about two seconds after a wink is detected.
1. Press the [ ] button, then press the [ ], [ ] buttons and select [ ]. Press the [ ] button.
2. Compose the shot and press the shutter button halfway.
- Make sure a green frame is displayed around the face of the person who will wink.

3. Press the shutter button all the way down.
- The camera now enters shooting standby mode, and [Wink to take picture] is displayed.
- The lamp blinks and the self-timer sound is heard.
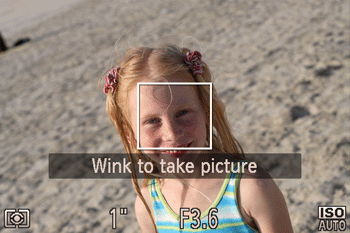
4. Face the camera and wink.
- The camera will shoot about two seconds after detecting a wink by the person whose face is inside the frame.
- To cancel shooting after you have triggered the self-timer, press the [MENU] button.
NOTE
- If the wink is not detected, wink again slowly and deliberately.
- Winking may not be detected if the subject's eyes are obscured by hair, a hat, or glasses.
- Closing and opening both eyes at once will also be detected as a wink.
- If winking is not detected, the camera will shoot about 15 seconds later.
- If no one is in the shooting area when the shutter button is pressed all the way down, the camera will shoot after a person enters the shooting area and winks.
- To change the number of shots, press the [ ], [ ] buttons after choosing [ ] in step 1.
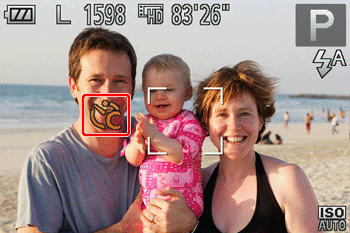
[Shooting when people are added to the scene [Using the Face Self-Timer]]
- The camera will shoot about two seconds after detecting that the face of another person (such as the photographer) has entered the shooting area. This is useful when including yourself in group photos or similar shots.
1. Press the [ ] button. Press the [ ], [ ] buttons and select [ ]. Press the [ ] button.
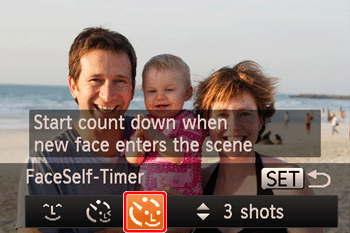
2. Compose the shot and press the shutter button halfway.
- Make sure a green frame is displayed around the face you focus on and white frames around other faces.
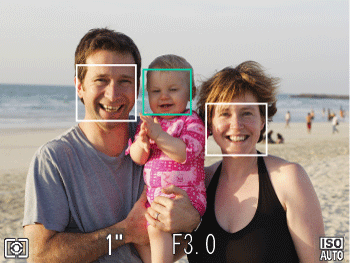
3. Press the shutter button all the way down.
- The camera now enters shooting standby mode, and [Look straight at camera to start count down] is displayed.
- The lamp blinks and the self-timer sound is heard.
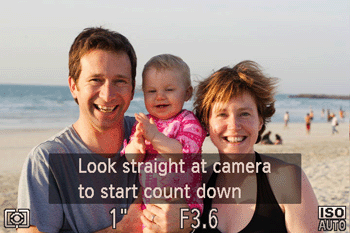
4. Join the subjects in the shooting area and look at the camera.
- After the camera detects a new face, the blinking lamp and self-timer sound will speed up. (If the flash fires, the lamp will remain lit.) About two seconds later, the camera will shoot.
- To cancel shooting after you have triggered the self-timer, press the [MENU] button.
REFERENCE
- Even if your face is not detected after you join the others in the shooting area, the camera will shoot about 15 seconds later.
- To change the number of shots, press the [ ], [ ] buttons after choosing [ ] in step 1.
|
