|
Before You Start Follow these steps to connect the machine to a network.
1. Check your computer settings.

 Make sure that the computer is correctly connected to the network. For more information, see the instruction manuals for the devices you are using, or contact the device manufacturers.
Make sure that the network settings have been completed on the computer. If the network has not been set up properly, you will not be able to use the machine on the network, even if you perform the rest of the procedure below.
NOTE
- Depending on the network, you may need to change settings for the communication method (half-duplex/full-duplex) or the Ethernet type (10BASE-T/100BASE-TX). For more information, contact your Internet service provider or Network Administrator.
- To check the MAC address of the machine. For details, see the "User's Guide" from the Canon website (canon.com/oip-manual).
- To connect to an IEEE 802.1X network, see the "User's Guide" from the Canon website (canon.com/oip-manual).
2. Select wired or wireless LAN.
 see [
Basic Network Settings
]
see [
Basic Network Settings
]
3. Connect to a wired or wireless LAN.

Proceed to the section that corresponds to the setting you selected in step 2.
4. Set the IP address as necessary.

This step is required when you want to assign a specific IP address to the machine or change the dynamic IP addressing protocol from the default DHCP.
Selecting Wireless LAN
To connect the machine to the computer via wireless LAN, select wireless LAN using the operation panel. For how to connect to and specify settings for a wireless LAN/wired LAN, see "Getting Started". Note that if you change the setting from <Wired LAN> to <Wireless LAN> or vice versa, you will need to uninstall MF Drivers installed on your computer and then reinstall them. For details, see the "MF Driver Installation Guide" from the Canon website (canon.com/oip-manual).
1. Tap <Menu> in the <Home> Screen.
2. Tap <Network Settings>.
- If a screen for entering a PIN is displayed, enter the PIN with the numeric keys and tap <Apply>. For details, see the "User's Guide" from the Canon website (canon.com/oip-manual).
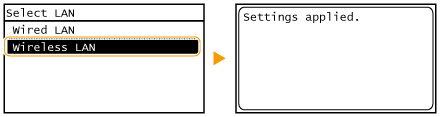
3. Tap <Select Wired/Wireless LAN>.
4. Tap <Wireless LAN>.
Connecting to a Wireless LAN
Wireless routers (or access points) connect the machine to a computer via radio waves. If your wireless router is equipped with Wi-Fi Protected Setup (WPS), configuring your network is automatic and easy. If your networking devices do not support automatic configuration, or if you want to specify authentication and encryption settings in detail, you need to manually set up the connection. Make sure that your computer is correctly connected to the network.
IMPORTANT
Risk of information leak
- Use wireless LAN connection at your own discretion and at your own risk. If the machine is connected to an unsecured network, your personal information might be leaked to a third party because radio waves used in wireless communication can go anywhere nearby, even beyond walls.
Wireless LAN security
- The wireless LAN security that is supported by the machine is listed below. For the wireless security compatibility of your wireless router, see the instruction manuals for your networking devices or contact your manufacturer.
- 128 (104)/64 (40) bit WEP
- WPA-PSK (TKIP/AES-CCMP)
- WPA2-PSK (TKIP/AES-CCMP)
NOTE
Required devices for wireless LAN connection
- The machine does not come with a wireless router. Have the router ready as necessary.
- The wireless router must conform to IEEE 802.11b/g/n and be able to communicate in 2.4 GHz frequency band. For more information, see the instruction manuals for your networking devices or contact your manufacturer.
Setting Up Connection Using WPS
When using WPS, two modes are available: push button mode and PIN code mode.
Find the WPS mark shown below on the package of your wireless router. Also make sure that there is a WPS button on your networking device.

NOTE
If the wireless router is set to use WEP authentication, you may not be able to set up connection using WPS.
Manually Setting Up Connection
When manually setting up a wireless connection, you can either select a wireless router or manually enter the required information. Regardless of the method, make sure that you have the required setup information, including the SSID and network key.
- Selecting a Wireless Router
Select this setup option if you need to manually set up the connection but want to complete the setup as easily as possible.
- Manually Entering the Setup Information
|
