Your MG3000 Series printer can be connected to a wireless network using a computer or mobile device. Usually, this is done via Easy wireless connect (this is also known as Cableless Setup). However, if Easy Wireless Connect fails, your printer can be connected to a wireless network using a USB cable.
Follow the steps below to connect your printer to a wireless network using a USB cable.
- Insert the Setup CD-ROM that came with your printer, or click here to go to the Canon website to download the Full Driver & Software package.
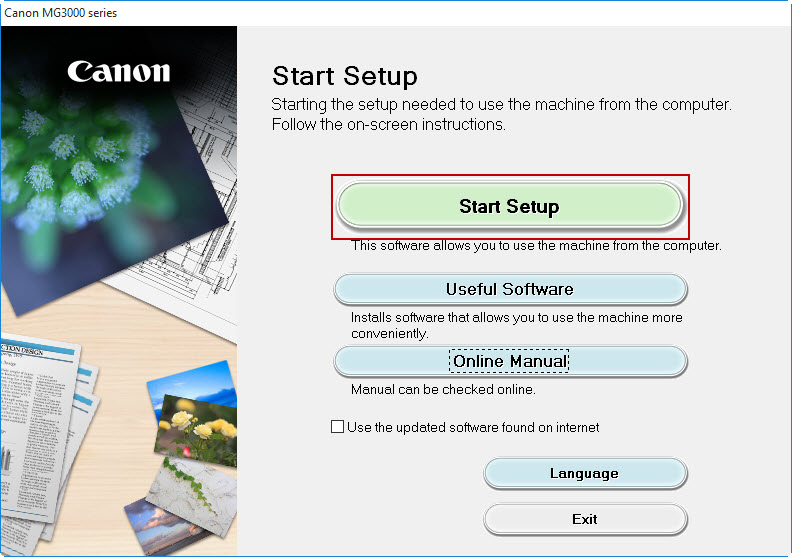
- Run MSETUP4.EXE from the setup CD-ROM, or open the Full Driver & Software package file after it has finished downloading. The setup program will begin.
- Click Start Setup.
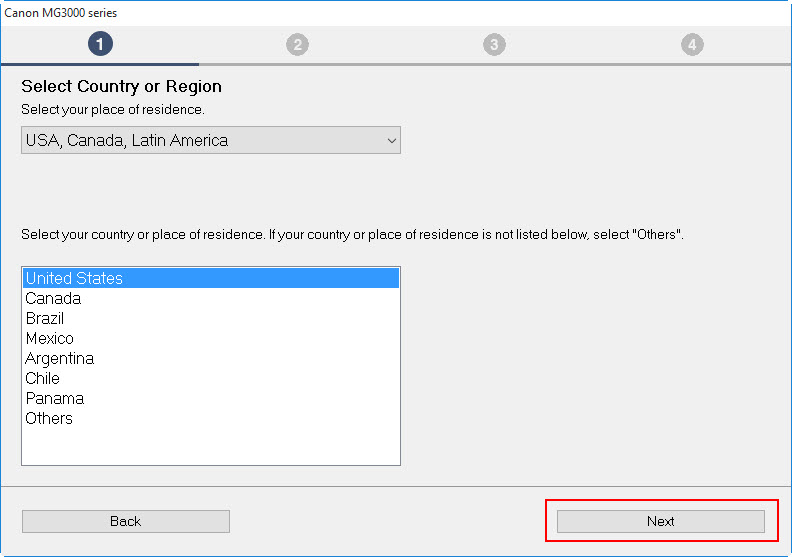
- When asked to select your place of residence, select your region from the drop down menu and then select your country from the list below. Click Next.
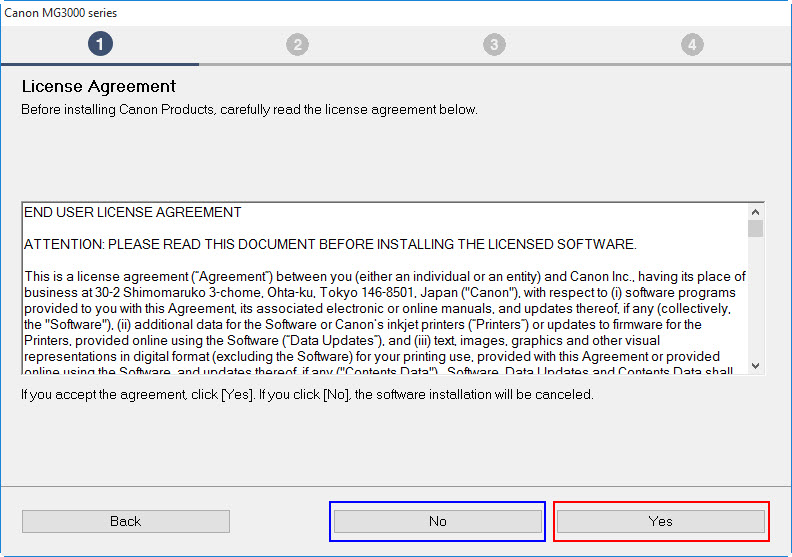
- Read through the license agreement. Click Yes to proceed. If you click No, the installation will not continue.
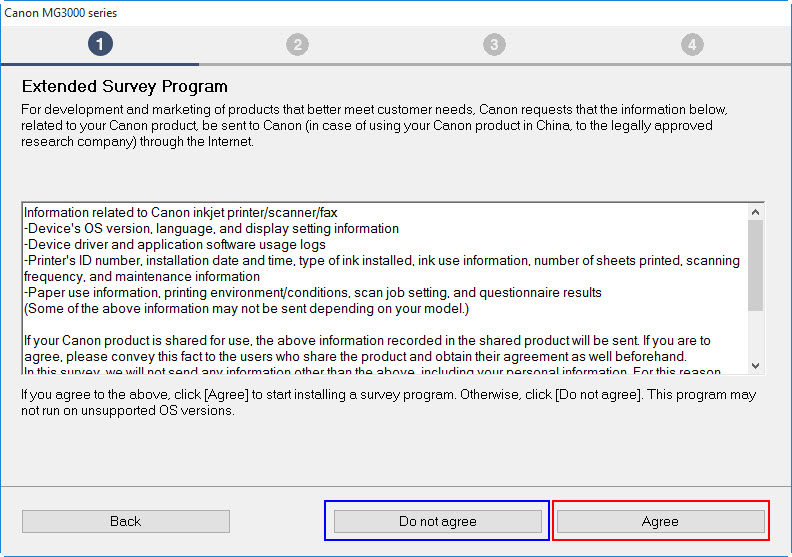
- Read through the Extended Survey Program details. If you wish to participate, click Agree. If you do not wish to participate, click Do not agree. Participation is optional. If you do not participate, this will not impact your ability to use the printer.
- On the Firewall Settings screen, be sure that there is a check in the box for Deactivate the block. Click Next.

The installer will then proceed.

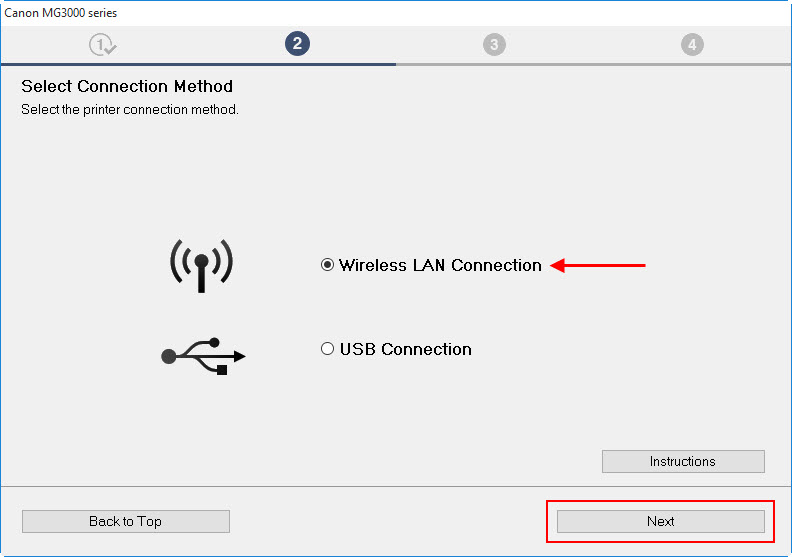
- On the Select Connection Method screen, click Wireless LAN Connection and click Next.
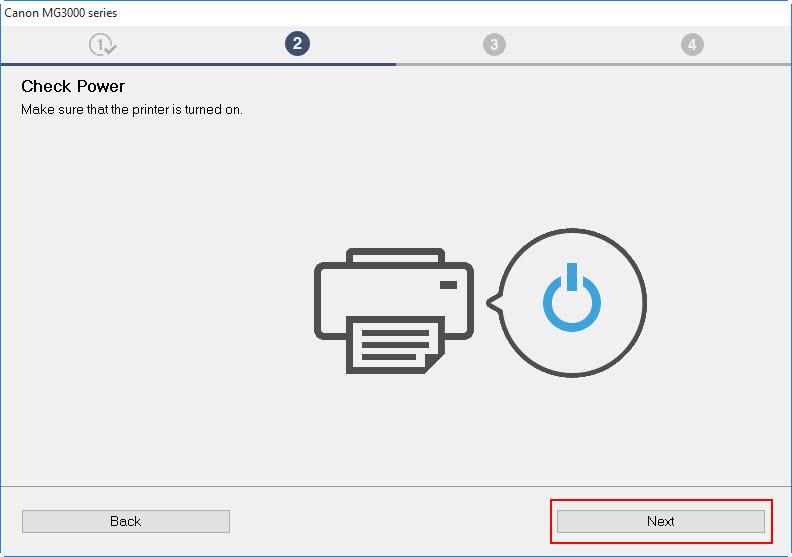
- On the Check Power screen, make sure that the printer is turned on. Click Next.
The computer will search for the printer on the network.

- On the Select Printer window, select Set up the network connection according to the guide and click Next.

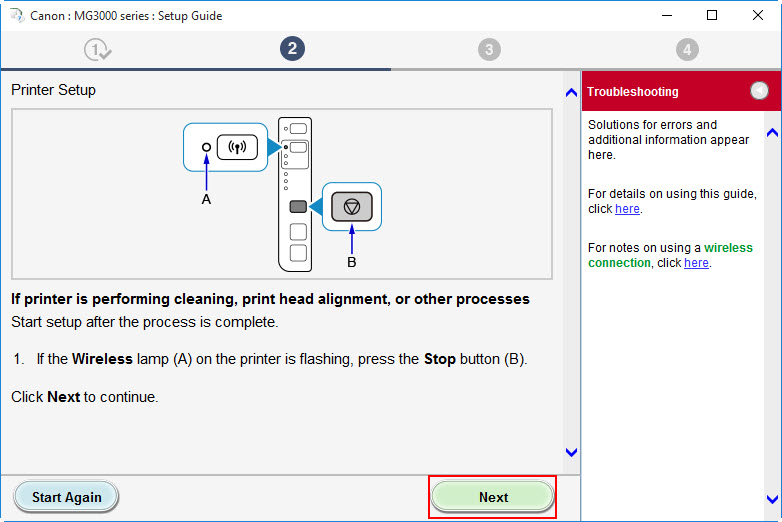
- The Printer Setup window will appear. Press the Stop button on the printer if the wireless lamp is flashing. Then, click Next.
- The installer will provide instructions for attempting Easy wireless connect. Follow the instructions provided and click Next.

- Make sure that the Wireless lamp on the printer is flashing as instructed. Then, click Next.

The computer will attempt to send network information to the printer.

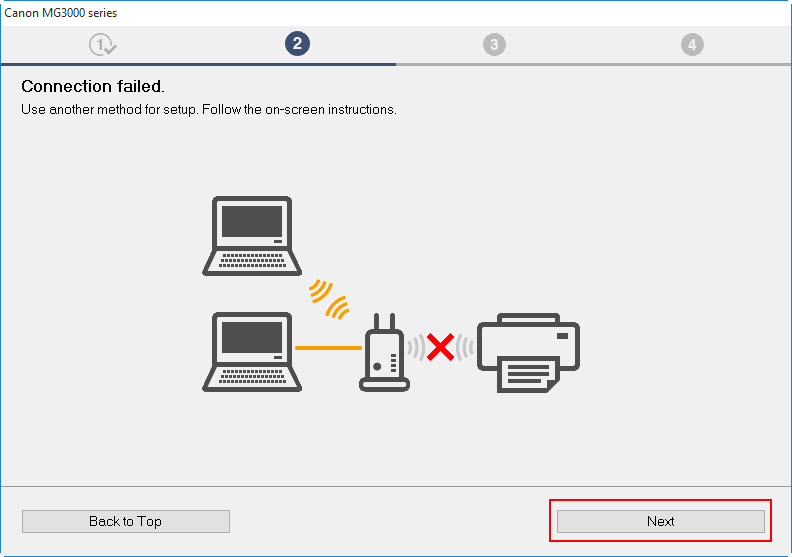
- If this fails, a Connection failed screen will appear. Click Next.
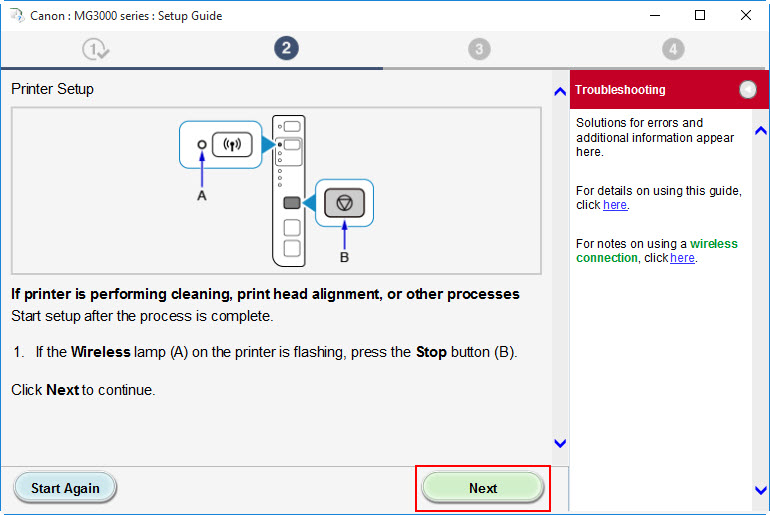
- When the Printer Setup window appears, press the Stop button on the printer if the Wireless lamp on the printer is flashing. Click Next.
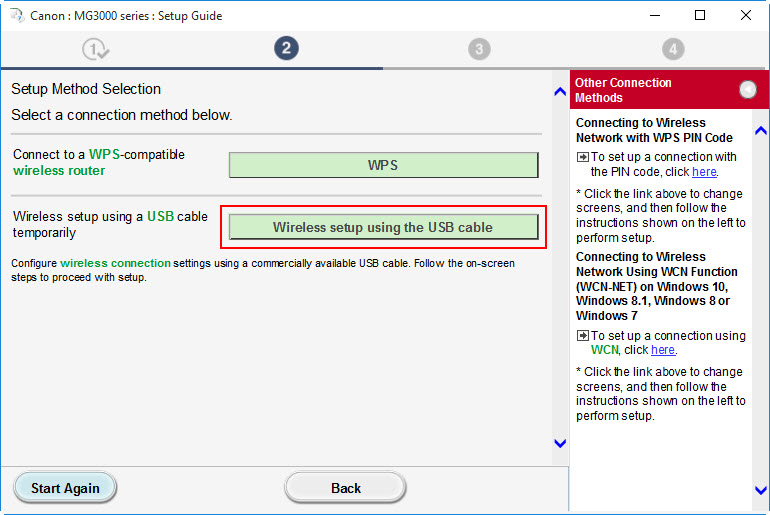
- On the Setup Method Connection screen, click Wireless setup using the USB cable.
- Connect the printer to your PC with a USB cable.

The installer will proceed. It will attempt to send the network information to your printer automatically.
Note: If your computer is connected to your network via ethernet, or if your computer does not automatically send the network information over to the printer, you will have to manually specify what network to connect your printer to. Select your network from the list of Wireless Routers. Then, enter your network key into the box on the right. Place a check in the box for Display network key if you want to see the characters you type in. If you want to keep your network key hidden as you type it in, do not place a check in that box.
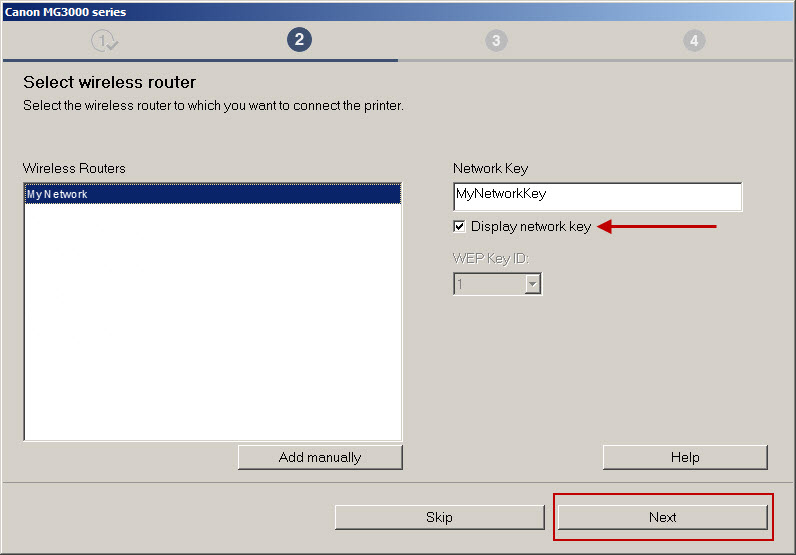
If your network is not listed, click Add manually to specify the settings for your wireless network.

Type your network name into the SSID box. Select your encryption method from the Encryption Method drop down menu. If you use WEP for encryption on your network, specify the WEP Key Length, WEP Key Format, and WEP Key ID from their respective drop down menus. Click OK.
Your network will then be added to the list of Wireless Routers. Click Next to send this information to the printer.
- When the Connection completed screen appears, click Next.

- Disconnect the USB cable. Click Next.

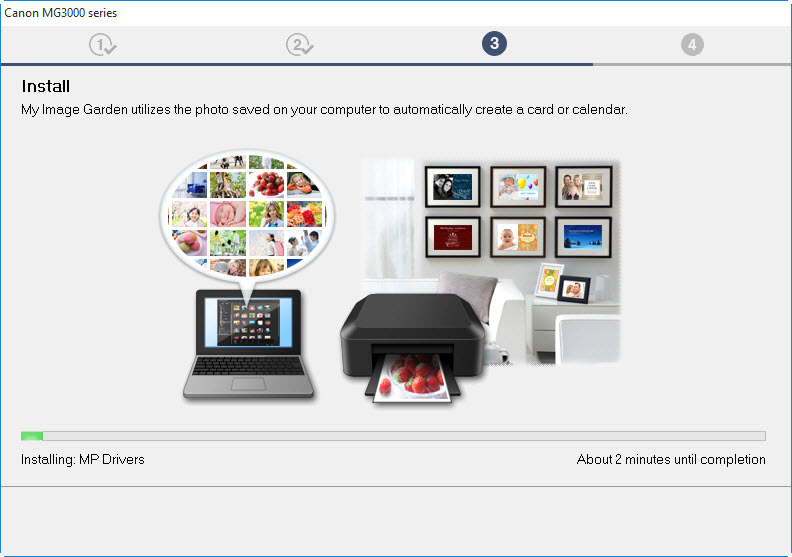
- The MP Drivers will be installed.
- On the Print Head Alignment Recommended screen, follow the instructions and click Execute to begin the alignment process. Click Next to continue to the next step in the installation process.

- On the Test Print page, click Execute to perform a test print. Click Next to proceed to the next step.

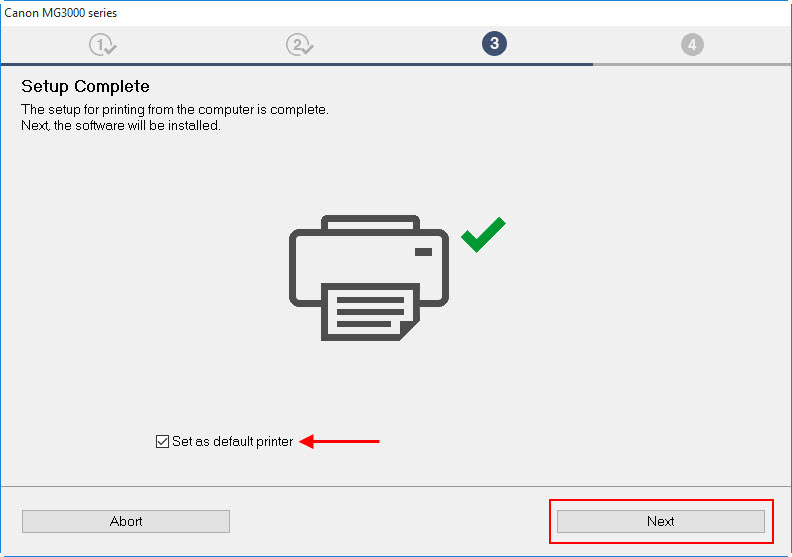
- The Setup Complete screen will appear. If you want this printer to be the default printer on your PC, make sure that there is a check in the box for Set as default printer. Click Next to proceed to the software installation.
- Proceed with any remaining on-screen instructions to finish the installation.
After the installation has been completed, you may wish to check
Printers / Devices and Printers to see if there are two listings for your MG3000 Series printer. If so, check the
Printer Properties by right clicking on the icon(s) for the MG3000 and selecting
Printer Properties. Click the
Ports tab at the top and check what port is being used.

The listing for the printer associated with the USB virtual printer port can be deleted if you choose.
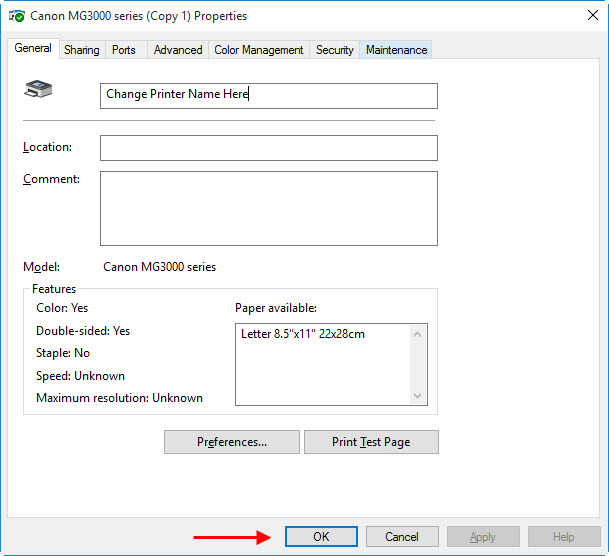
If you do not want to remove the USB listing for your printer, it is recommended that you change the name of one of the icons for your MG3000 Series printer to avoid confusion. To do this, click the
General tab in
Printer Properties. Change the name in the box near the top of the window. Click
OK to apply the change.