Auto Scan allows you to scan multiple documents at one time from the automatic document feeder (ADF) or if you prefer you can follow the manual setting instructions below .
Scan to your computer with Auto Scan
-
Place the document in the automatic document feeder (ADF).
 Duplex scanning of legal-sized documents is not supported using the ADF.
-
Start the IJ Scan Utility on your Windows PC or Mac®.
-
Click Settings.
-
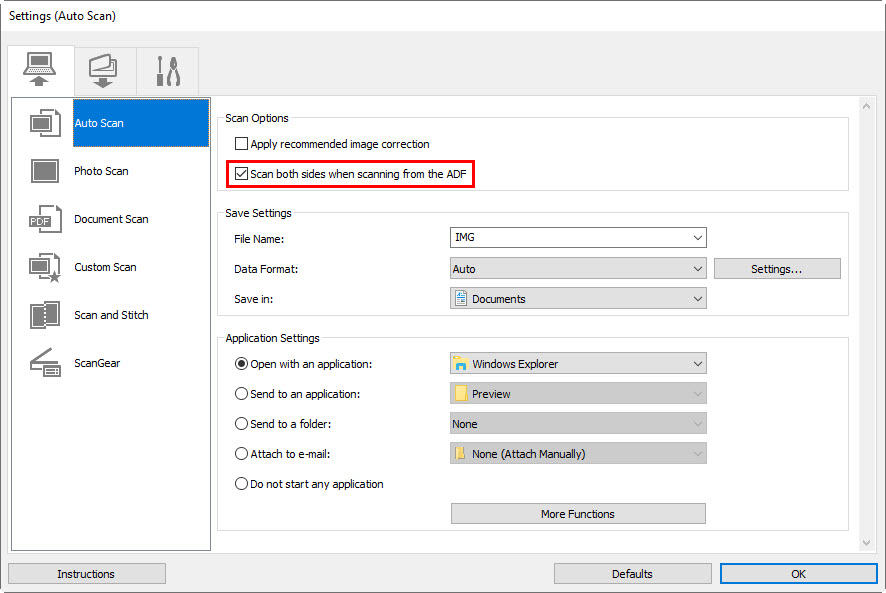
Click Auto Scan.
-
Place a check in the Scan both sides when scanning from the ADF checkbox in the Settings dialog box.
-
Change any other settings as desired, then click OK.
-
The IJ Scan Utility main screen appears. Click Auto. The back side of each document is scanned automatically after scanning the front side.
-
Scanned images are saved in the folder set for Save in Settings.
Scan to your computer with manual settings
-
Place the document in the automatic document feeder (ADF).
Duplex scanning of legal-sized documents is not supported using the ADF.
-
Start the IJ Scan Utility on your Windows PC or Mac®.
-
Click Settings.
-
In the Settings dialog box, click Document Scan.
-
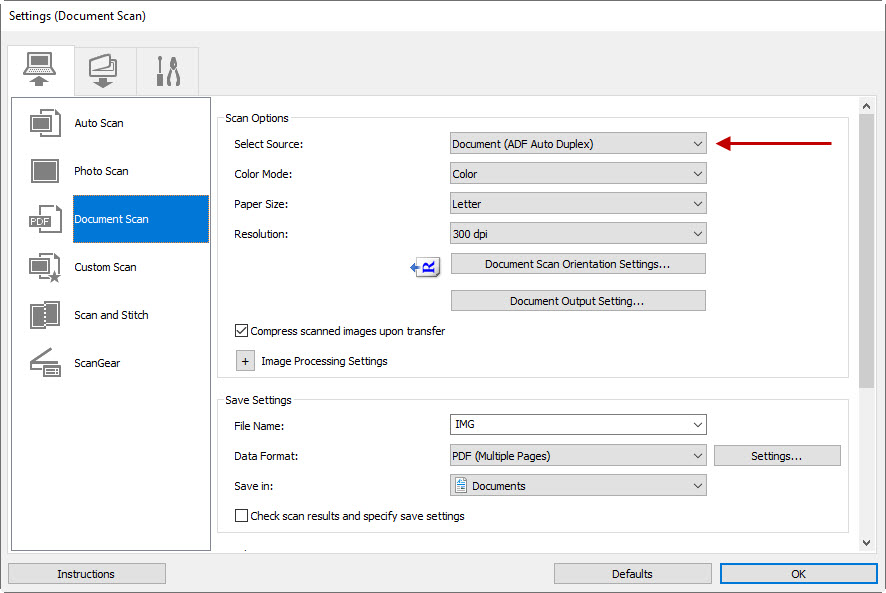
Set Select Source to Document (ADF/Platen) or Document (ADF Auto Duplex).
If using Document (ADF/Platen), place a check in the box for Scan both sides when scanning from the ADF.
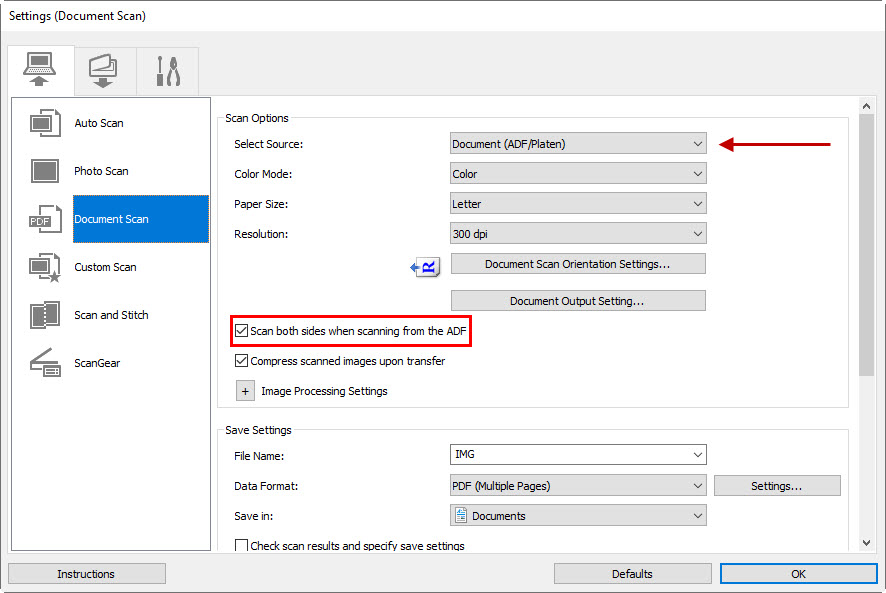
Notice in the image below this option does not appear if using Document (ADF Auto Duplex).
-
Set the color mode, document size, and scanning resolution as required.
-
Select Document Scan Orientation Settings... to specify the orientation of the documents to be scanned.
-
Select Document Output Setting... to specify how to output scanned documents. When setting is completed, select OK.
-
The IJ Scan Utility main screen appears. Click Document. The back side of each document is scanned automatically after scanning the front side.
-
Scanned images are saved in the folder set for Save in Settings.
