Loading Envelopes - TS6020
| Article ID: ART167092 |
| |
Date published: 01/03/2017 |
| |
Date last updated: 04/09/2019 |
Description
This article explains how to load envelopes into your PIXMA TS6020.
Solution
You can load Envelope DL and Envelope Com 10 in the rear tray.
The address is automatically rotated and printed according to the envelope's direction by specifying with the printer driver properly.
 Important
-
Prepare envelopes.
-
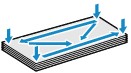
Press down on all four corners and edges of the envelopes to flatten them.
-
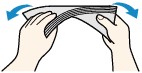
If the envelopes are curled, hold the opposite corners and gently twist them in the opposite direction.
- If the corner of the envelope flap is folded, flatten it.
-
Use a pen to press the leading edge in the inserting direction flat and sharpen the crease.
The figures above show a side view of the leading edge of the envelope.
Important
- The envelopes may jam in the printer if they are not flat or the edges are not aligned. Make sure that no curl or puff exceeds 0.12 inch (3 mm).
-
Load envelopes.
-
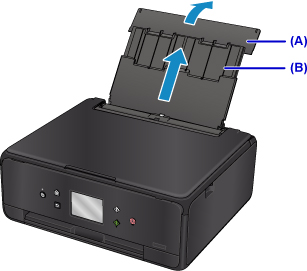
Open the rear tray cover (A) and then pull up the paper support (B).
-
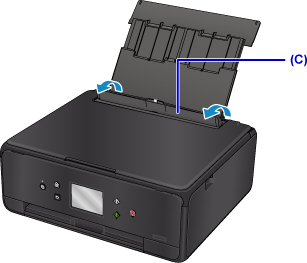
Open the feed slot cover (C).
-
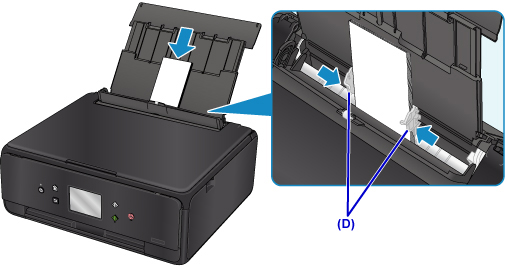
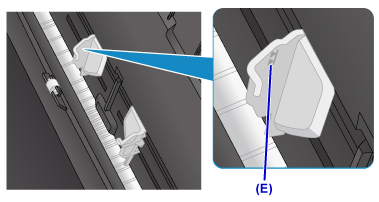
Slide the paper guides (D) to open them, and load the envelopes in the center of the rear tray WITH THE PRINT SIDE FACING UP.
Fold flap of the envelope and load the envelope in the portrait orientation with the address side facing up.
Up to 10 envelopes can be loaded at once.
-
Slide the paper guides (D) to align them with both sides of the envelopes.
Do not slide the paper guides too hard against the envelopes. The envelopes may not be fed properly.
 Note
Note
-
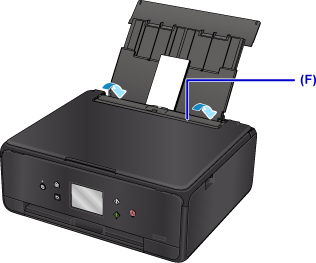
Close the feed slot cover (F) gently.
Important
- If the feed slot cover is open, paper cannot be fed. Be sure to close the feed slot cover.
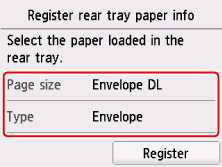
After closing the feed slot cover, the paper information registration screen for the rear tray is displayed on the touch screen.
-
Select the size and type of the loaded envelopes in the rear tray at Page size and Type, and then select Register.
-
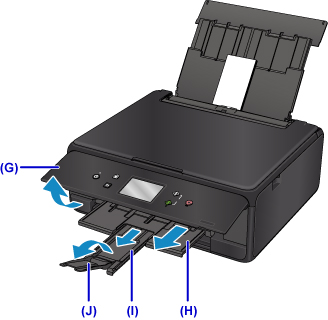
Open the operation panel (G), pull out the paper output tray (H) and paper output support (I), and open the output tray extension (J).
Be sure to open the operation panel before printing. If the operation panel is close, the printer does not start printing.
Note
- The printer may make operating noise when feeding envelopes.
- After loading envelopes, select the size and type of the loaded envelopes on the print settings screen of the printer driver.
TS6020 Page