To manage your PIXMA G series printer from a Mac® computer, the printer must first be connected to your wireless network. Then, the printer drivers and software need to be installed on your computer. The instructions below will walk you through the "Easy Wireless Connect" setup process to connect to the wireless network.
There are two parts to the setup:
-
Start Easy Wireless Connect on your printer.
-
Download and run the setup file on your computer.
1. Start Easy Wireless Connect on your printer
Prior to starting setup on the computer, smartphone or tablet device, start the Easy Wireless Connect on your printer. Then complete the setup on your computer or device.
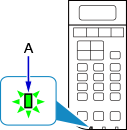
- Make sure that the printer is turned on.
If the power is on, the POWER lamp (A) will be lit.
 If the printer is performing cleaning, print head alignment, or other processes, wait for the process to finish, before starting setup.
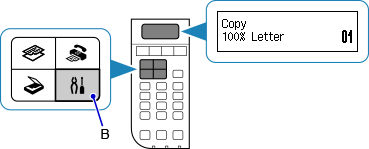
-
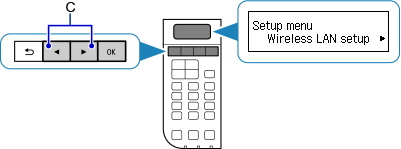
Press the Setup button (B) on the printer.
-
Use the  or
or  button (C) to select Wireless LAN setup.
-
Press the OK button.
-
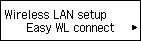
Select Easy WL connect.
-
Press the OK button.
-
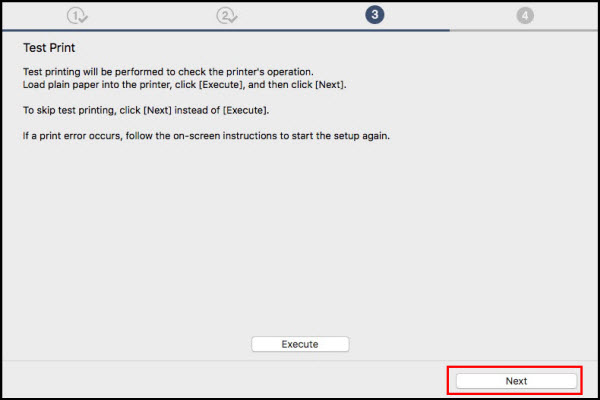
When the printer preparation is complete, the screen below appears.
Return to the application screen and proceed with the setup.

2. Download and run the setup file on your computer
-
Get the Setup File and read the information carefully. Make note of what to do if the setup file doesn't run automatically. Select the Download button to start the process.
-
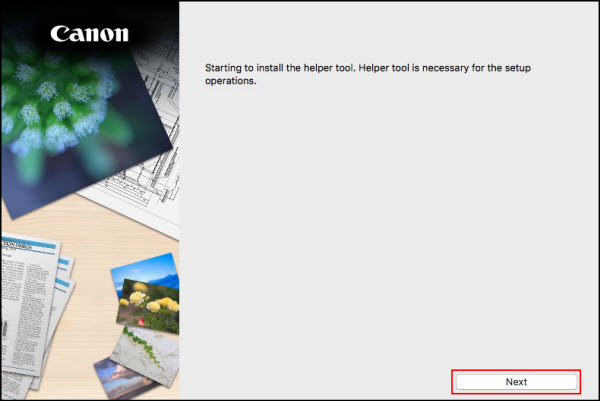
Start setup. Click Next on the first screen.
-
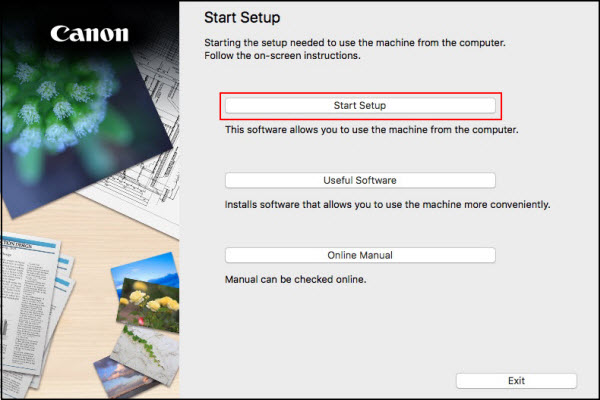
Select Start Setup.
-
Select appropriate region and click Next.

-
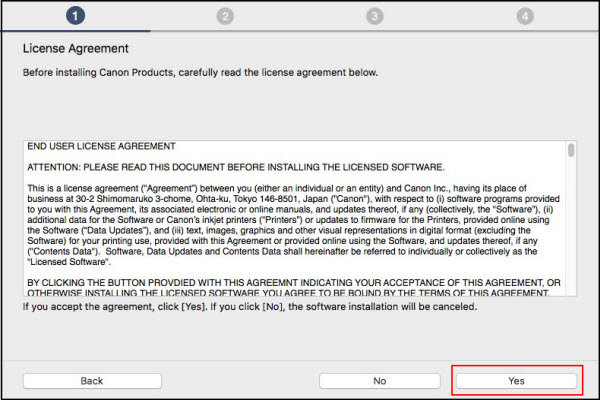
Select Yes on the License Agreement.
-
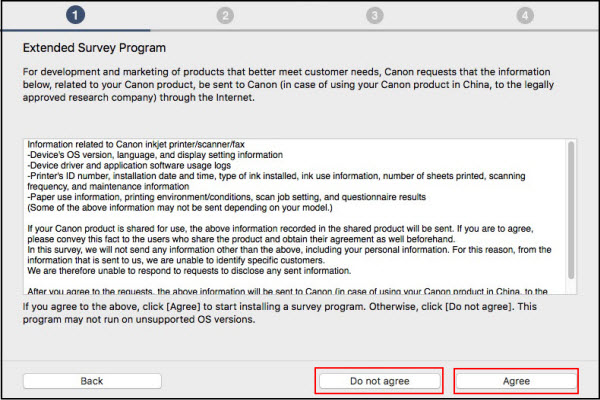
Select Agree or Do Not Agree to the Survey.
-
Status check occurs.

-
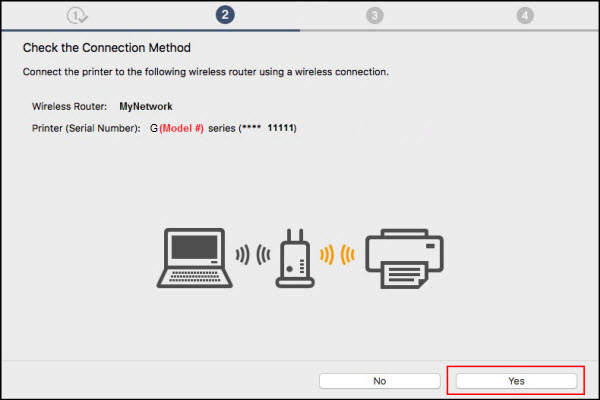
Select Yes on the Connection Method.
Model # used in example. Actual model series number will appear in the setup program.
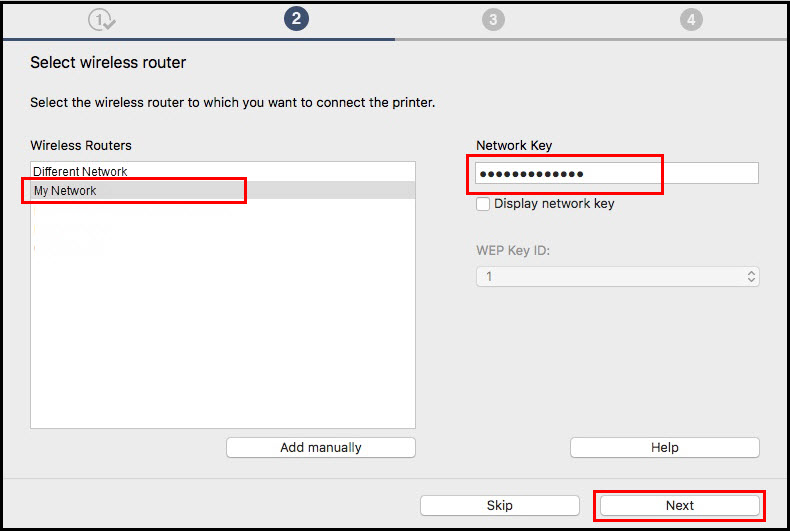
-
Setup continues. If the *Select wireless router screen (below) appears, select the wireless router to connect to the printer, enter the Network Key (password), then click Next.
*The router being used and its network settings determines whether or not this screen appears
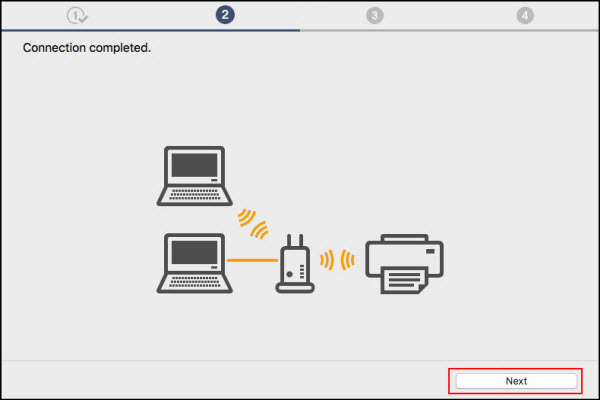
- Network Connection completed. Click Next.
-
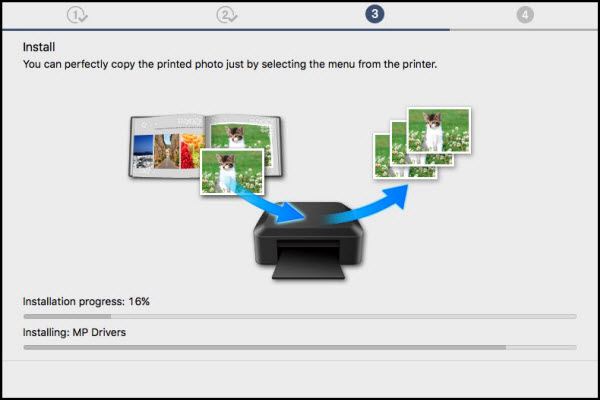
Drivers install.
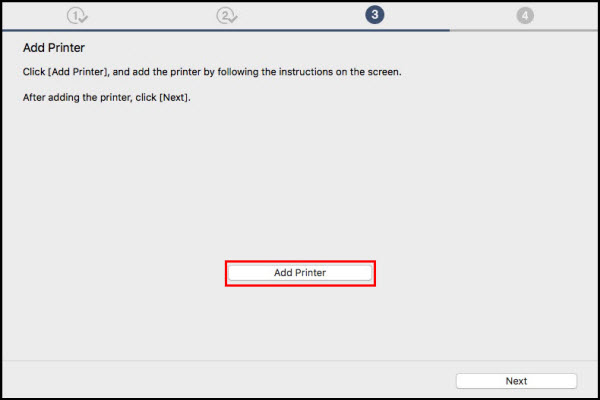
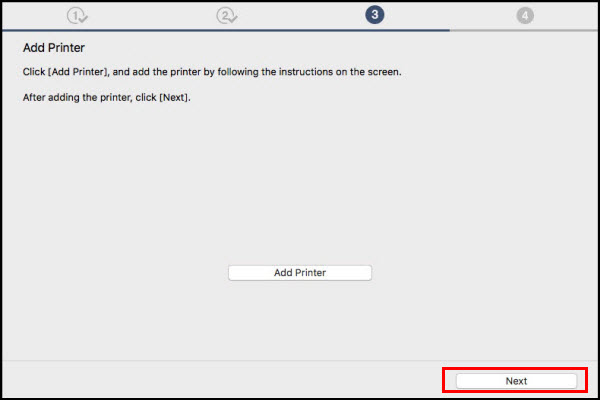
- Click Add Printer on the Add Printer screen
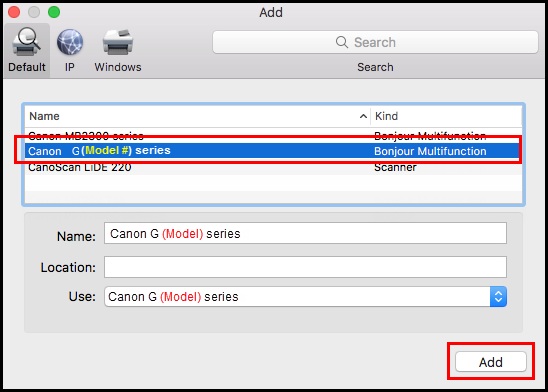
- On the Add screen, select the G series with Bonjour Multifunction listed in the Kind column. Select the Canon G (Model #) series* in the Use: dropdown list.
*The Model series varies by model, GS (Model #) series is used as an example only.
- Click Next on the Add Printer screen.
- Click Next.
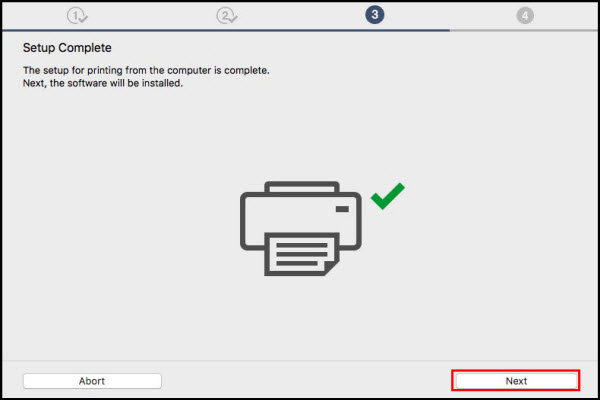
- Setup complete. Click Next.
-
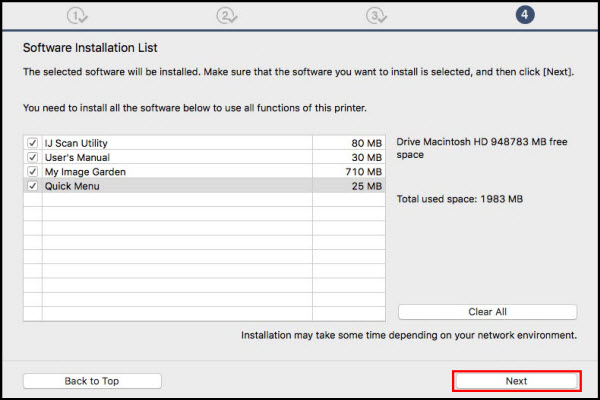
Select any optional application software desired. Click Next.
- Click Next.
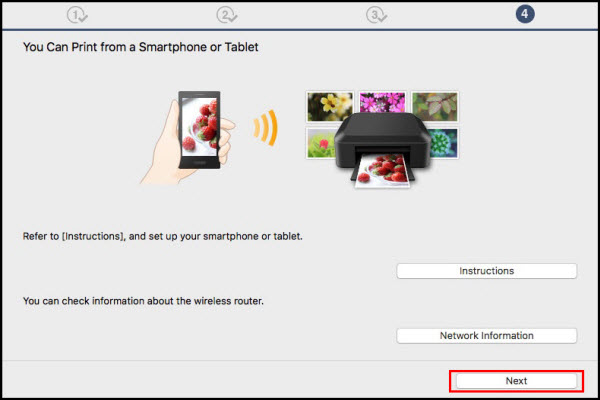
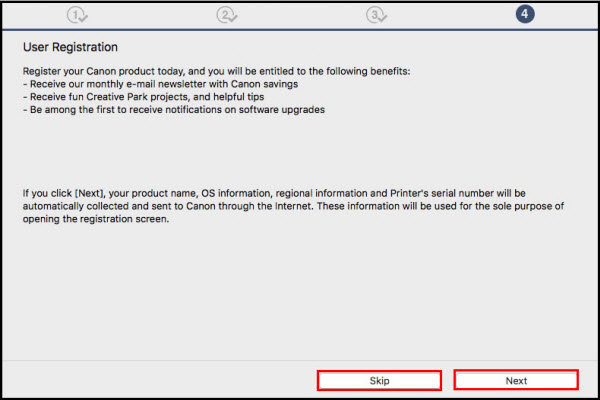
- Click Next or Skip.
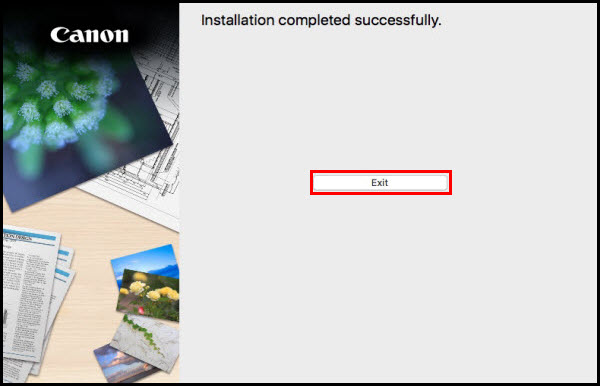
-
Click Exit.