A video showing how to install the inks for the printer can be found here. Although the video shows installing the inks during the initial setup, the steps for inserting the inks are the same as the ones followed when replacing an ink tank.
Replacing Ink Tanks
In the case of warnings or errors caused by low ink levels, messages appear on the touch screen to notify you. Respond to the message as needed.
 Note
Note
Steps to Replace ink tanks
When needed, replace ink tanks as follows.
-
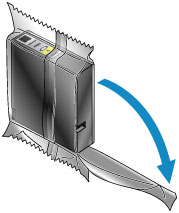
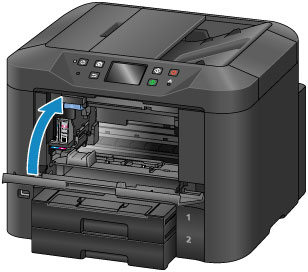
After confirming that the machine is on, open the front cover.
The ink tanks you can replace are identified on the touch screen, and the print head holder (A) moves into position for replacement of those ink tanks.
 Caution
- Do not stop the moving print head holder or force it to a different position. Do not touch theprint head holder until it stops moving.
 Important
Note
- If a warning about ink tank replacement appears, check the message and tap OK.
-
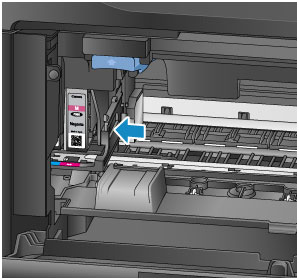
Once the ink tank for replacement is identified on the touch screen, push up the ink tank eject lever (B).
The ink tank is ejected.
To replace another ink tank, tap Next to display the screen for the next ink tank to replace.
Important
- Place the removed ink tank into a plastic bag immediately after removing from the machine.Otherwise, ink residue may stain your clothes or the surrounding area.
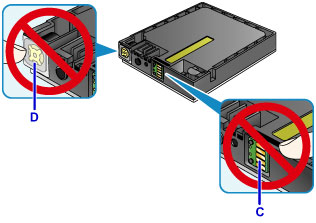
- Do not touch parts other than ink tanks.
- Follow local regulations when discarding used ink tanks.
- Handle ink tanks carefully. Do not drop them or press hard on them.
-
Remove the ink tank from the package.
Important
-
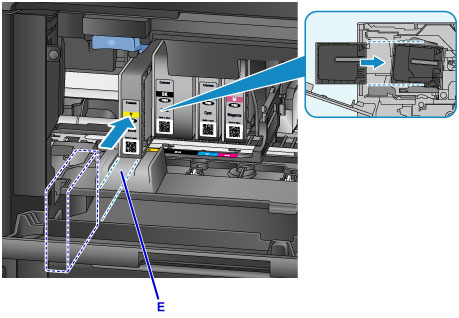
Insert the new ink tank, aligning it with the installation guide (E) on the machine.
Important
- The ink tank will not fit in the wrong position. Check the label under the installation position, and install the ink tank in the correct position.
-
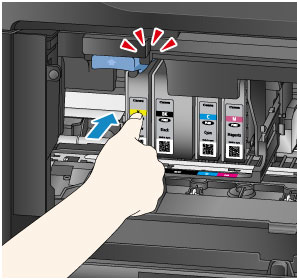
Push the ink tank in firmly until it clicks into place.
-
Tap Exit on the touch screen.
If Next is displayed, another ink tank can be replaced.
To replace the next ink tank, tap Next and repeat this procedure from step 2.
To exit ink tank replacement, tap Next until Exit is displayed.
The print head holder moves to the standby position. The ink tanks cannot be removed from this position.
Important
- Printing is not possible without a complete set of ink tanks installed. Install all ink tanks.
- Installed ink tanks cannot be removed until a replacement message appears.
-
Close the front cover.
After ink tank replacement, the machine starts mixing the ink automatically. Wait until this noise stops. (Mixing takes 1–2 minutes.)
Note
Notes on ink tanks
Important
- Install replacement ink tanks promptly. Do not leave the machine without ink tanks installed.
- Replace empty ink tanks with new ones. Installing used ink tanks may clog the nozzles. Used ink tanks may also prevent correct notification of the ink tank replacement timing.
- Do not remove installed ink tanks and leave them outside the machine. In this state, ink tanks will dry out, which may prevent correct operation when they are reinstalled. To maintain optimal print quality, use up ink tanks within six months after you install them.
Note
-
Color ink may be consumed even when printing black-and-white originals, or when black-and-white printing is specified.
All colors of ink are also consumed during standard and deep print head cleaning to maintain performance. When ink tanks run out of ink, promptly replace them with new ones.
MB5420 Page