-
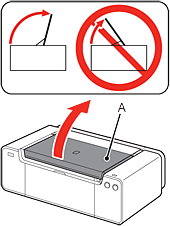
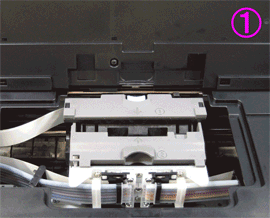
Open the Top Cover (A) completely.
-
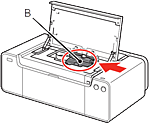
The Print Head Holder (B) moves to the installation position.
If the Print Head Holder does not move, make sure that the printer is turned on.
Refer to 5 to 7 in [ Preparation ] within this webpage.
-
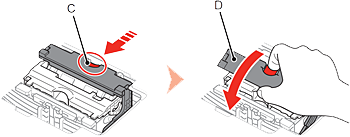
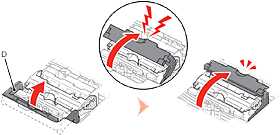
While pressing the Lock Button (C) in the direction of the arrow, open the Joint Lever (1) (D) forward.
-
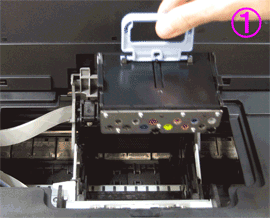
Open the Print Head Lock Lever (2) (E) fully until it stops.
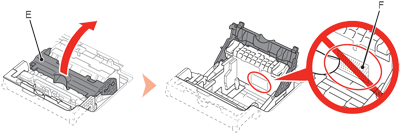
 Do not touch the inside of the Print Head Holder (F). The printer may not print properly if you touch it.
-
Remove the head case (G) from the silver package.
Remove the tape.
Hold the blue handle and remove the Print Head (H).
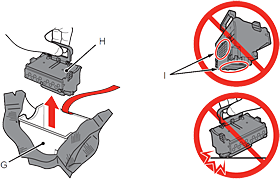
Do not touch the inside of the Print Head Holder (F). The printer may not print properly if you touch it.
Do not touch the metal parts (I) of the Print Head. The printer may not print properly if you touch them.
There may be some transparent or light color ink on the inside of the bag the Print Head comes in - this has no effect on print quality. Be careful not to get ink on yourself when handling these items.
-
Insert the Print Head from straight above as shown to set it in place.
Do not knock the Print Head against the sides of the holder.
-
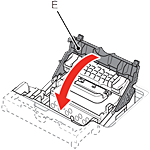
Lower the Print Head Lock Lever (3) (E).
-
Close the Joint Lever (4) (D) completely until it clicks.
The Joint Lever (4) may be tight and make a noise while being closed.
Once you have installed the Print Head, do not remove it unnecessarily.
-
Install the Head Cover (J)., close the Top Cover., then wait for about 20 minutes until the POWER lamp (white) (K) stops flashing and stays lit, then proceed to the next step.
This operation is required to make the printer ready for use. Do not turn off the printer until the POWER lamp stays lit.
The printer may make some operating noises when preparing to print. This is normal operation.

If the Alarm lamp (orange) (L) flashes, make sure that the Print Head Lock Lever is closed correctly. Open the Joint Lever and Print Head Lock Lever, then start again from 7.
When the printer is turned on for the first time, ink is used to ready the printer for printing. The remaining ink level can be checked from the printer driver (Windows) or Canon IJ Printer Utility (Macintosh) after software installation.
