|
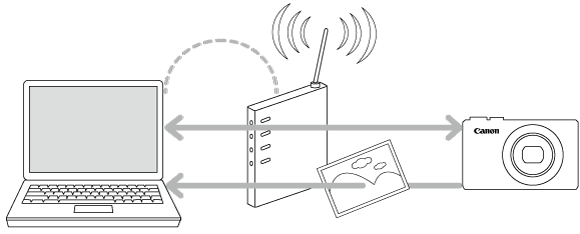
Getting Started To connect the camera to the computer using the Wi-Fi function, confirm that the computer is connected to an access point (Wi-Fi router).
IMPORTANT
In the following explanation, computer setting procedures are indicated by the  icon, and camera setting procedures are indicated by the  icon.
Step 1: Installing CameraWindow
 Download the CameraWindow software from the Canon website and install it on the computer.
Step 2: Setting Up the Computer
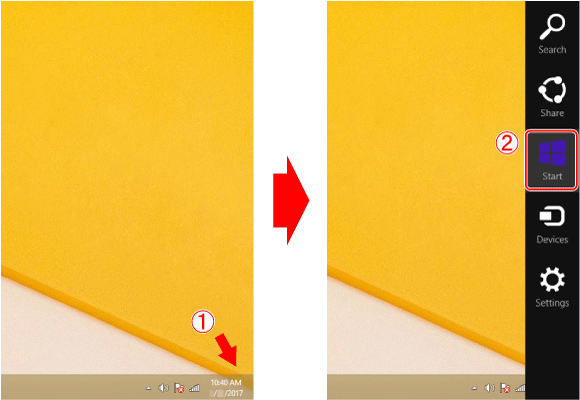
1. Move the pointer to the bottom right of the screen (  ) to display the Charms Bar, and then select [Start] (  ).
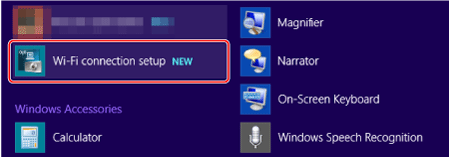
2. Click [Wi-Fi connection setup] on the [Apps] screen.
NOTE
If the [User Account Control] screen is displayed, click [Yes].
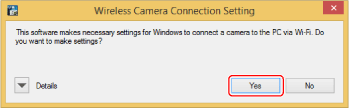
3. The following screen is displayed, so click [Yes].
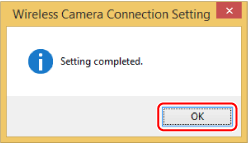
4. The following screen appears, so click [OK].
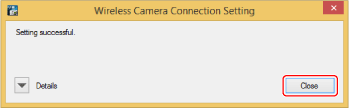
5. The screen shown below is displayed, so click [Close].
Step 3: Connecting the Camera to the Computer
IMPORTANT
- The procedure is shown on IXUS 190 for the purposes of explanation. The position and shape of the operation buttons, screens displayed, and setting items may differ according to the model you use.
- Please make settings by touching the screen in the models which are designed with touch-screens.
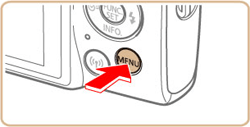
 1. Press the [  ] button.

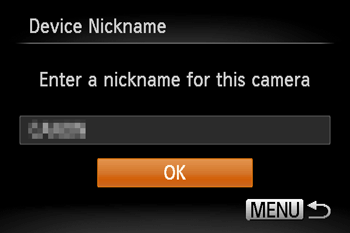
2. If the [Device Nickname] screen is displayed, press the [  ] [  ] buttons to choose [OK], and then press the [  ] button.
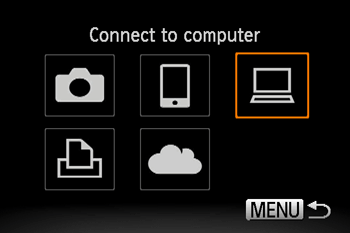
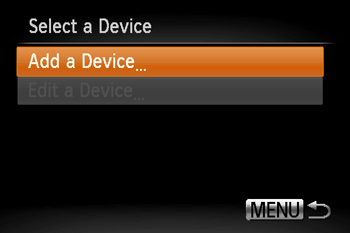
3. Press the [ ] [ ] [  ] [  ] buttons to choose [  ], and then press the [ ] button.

4. Press the [ ] [ ] buttons to choose [Add a Device], and then press the [ ] button.
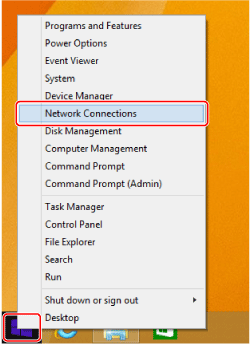
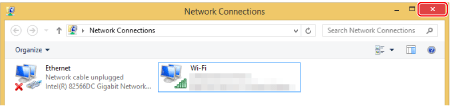
5. Right-click the Start button (  ) on the bottom left of the screen, and then select [Network Connections].
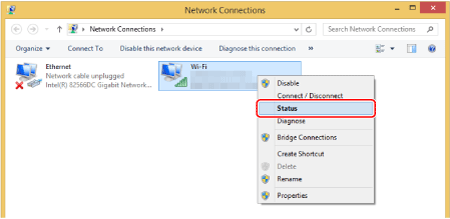
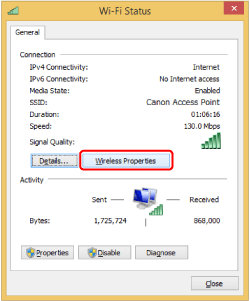
6. Right-click [Wi-Fi] and select [Status].
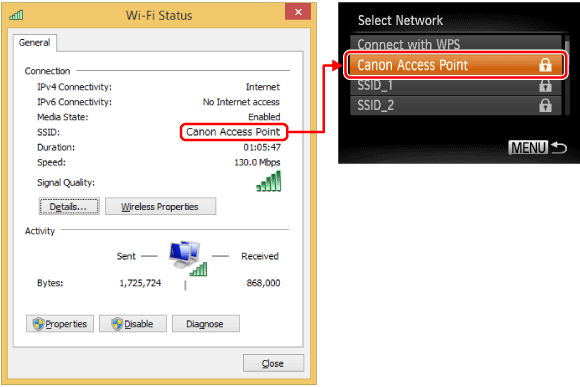
7. Select the SSID that matches with the one shown in [SSID:], and then press the [ ] button. (See the SSID example below).
8. Click [Wireless Properties].
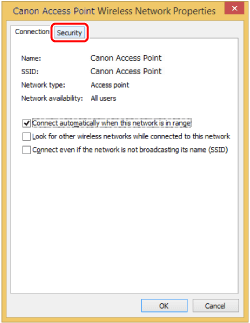
9. Click the [Security] tab.
10. Tick the [Show characters] checkbox.
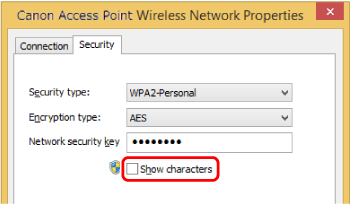
11. Press the [ ] [ ] buttons to choose the password entry field, and then press the [ ] button.
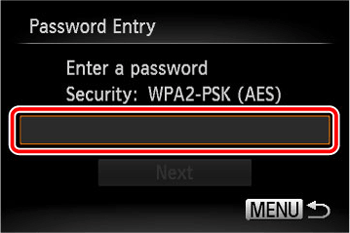
12. Enter the password displayed in the [Network security key].
(See the password example below).
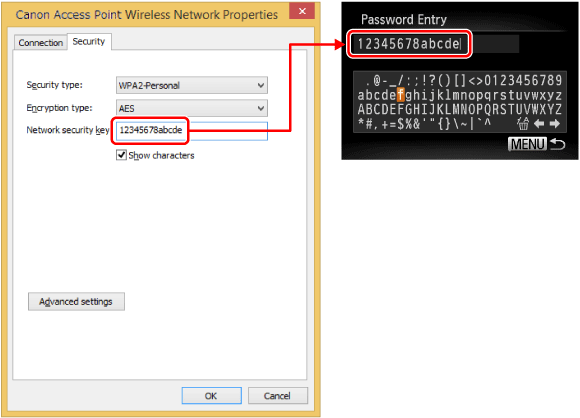
- Press the [ ] [ ] [ ] [ ] buttons to choose a character, and then press the [ ] button.
- To move the cursor, choose [
 ] or [ ] or [  ] and press the [ ] button. ] and press the [ ] button.
- Choose [
 ] and press the [ ] button to delete the previous character. ] and press the [ ] button to delete the previous character.
- After confirming input, press the [MENU] button to return to the previous screen.
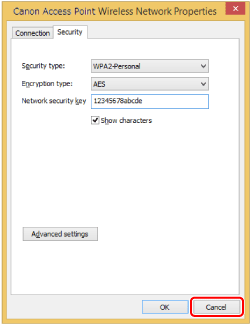
13. After you have finished entering the encryption key, press the [ ] [ ] buttons to choose [Next], and then press the [ ] button.

14. Click [Cancel].
15. Click [Close].

16. Close [Network Connections].
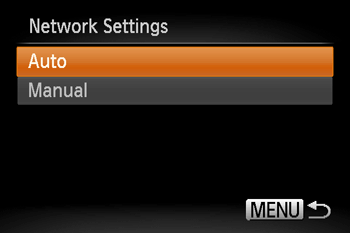
17. Press the [ ] [ ] buttons to choose [Auto], and then press the [ ] button.
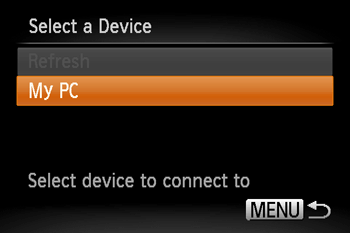
18. Press the [ ] [ ] buttons to choose the name of the computer you want to connect with, and then press the [ ] button. (See the example below).
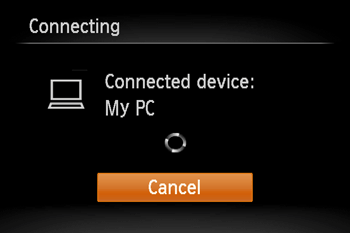
19. Make sure that the [Connecting] screen is displayed.
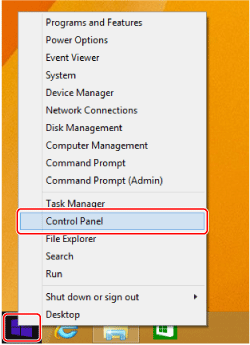
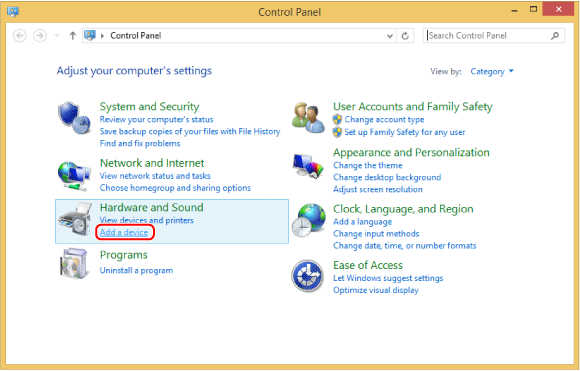
20. Right-click the Start button on the bottom left of the screen ( ), and then select [Control Panel].
21. Click [Add a device].
22. The cameraâs icon will be displayed in the [Add a device] screen. Double-click the icon to begin driver installation.
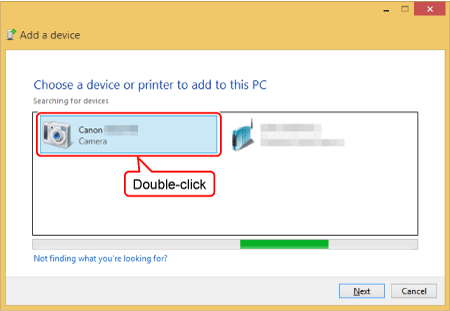
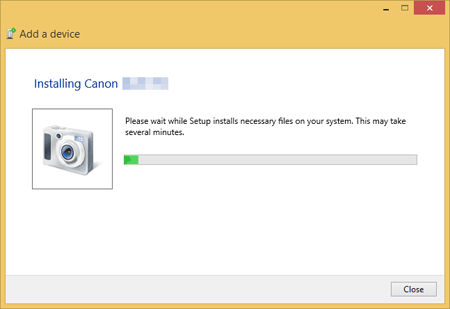
23. Driver installation begins.
Once the driver installation is complete and a Wi-Fi connection is established, the screen below is no longer displayed.
NOTE
When the camera is connected to a computer, the camera screen is blank.
Step 4: Sending Images to the Computer
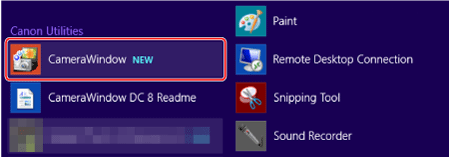
1. Move the pointer to the bottom right of the screen ( ) to display the Charms Bar, and then select [Start] ( ).
2. Click [CameraWindow] on the [Apps] screen.
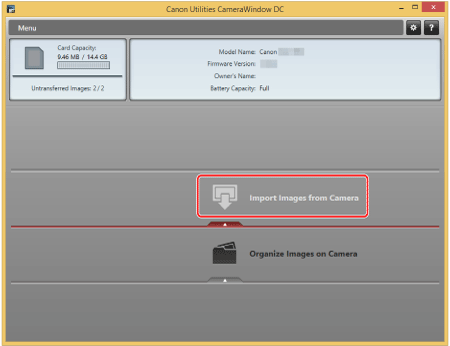
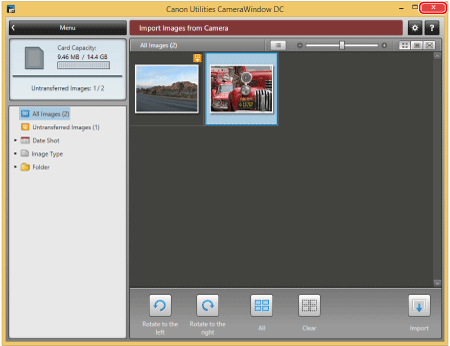
3. Click [Import Images from Camera].
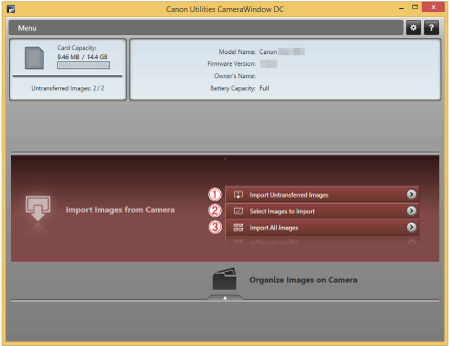
4. Select and click one of the following: [Import Untransferred Images] ( ), [Select Images to Import] ( ) or [Import All Images] (  ).
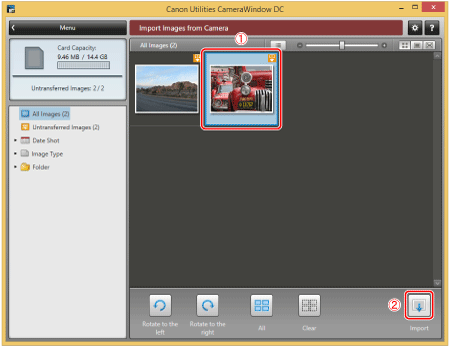
5. If you chose [Select Images to Import] in step 4, select the images you want to import ( ), and then click [Import] (  ) ( ).
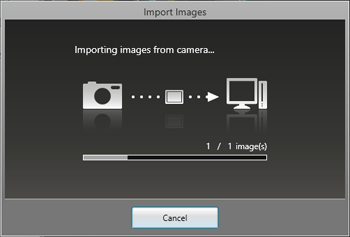
6. The following window will appear, and the computer will start to transfer images from the camera.
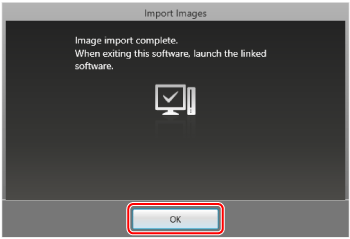
7. The following screen appears, so click [OK].
8. Close [CameraWindow].
9. A folder with the images you saved will open.
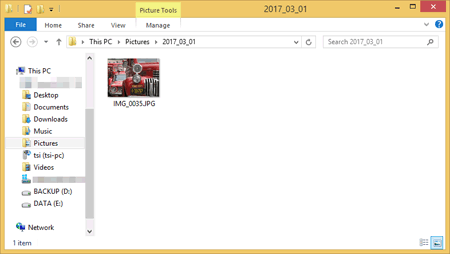
- This concludes the explanation for saving images to a computer.
NOTE
- Depending on the [CameraWindow] settings, image editing software might start.
- Movies will take longer to import since the file size is larger than still images.
- To disconnect from the camera, turn off the camera.
|
