
Using EOS Utility 3.x to Send Images to a Computer (Wi-Fi Function: Easy Connection) (EOS 80D)
| Article ID: ART167930 | | | Date published: 06/27/2017 | | | Date last updated: 07/18/2017 |
Description
Using EOS Utility 3.x to Send Images to a Computer (Wi-Fi Function: Easy Connection) (EOS 80D)
Solution
| Solution |
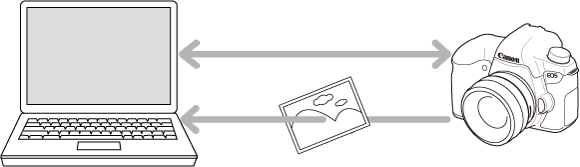
You can save images from the camera to a computer via Wi-Fi using EOS Utility (EOS software).
This section explains how to connect the camera directly to a computer via Wi-Fi.
Step 1. Prepare Necessary Items 1. Check the environment on your computer.
To check if your computer supports connection to a camera via Wi-Fi, refer to the "Related information" section below.
2. Make sure that EOS Utility is installed on the computer.
Step 2. Performing Basic Camera Settings The following settings must be performed before the camera's Wi-Fi function is used.
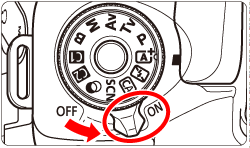
1. Turn on the camera.
Set the camera's power switch to <ON>.
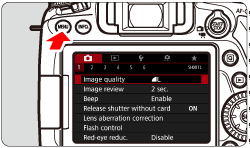
2. Press the <MENU> button to display the menu screen.
3. Use the <
 > < > <  > < > <  > < > <  > keys of the Multi-controller to select [Wireless communication settings] under the [ > keys of the Multi-controller to select [Wireless communication settings] under the [  ] tab, and then press < ] tab, and then press <  >. >.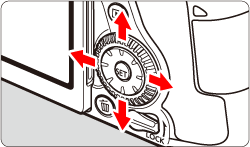 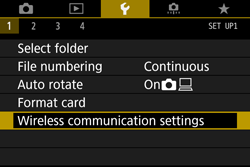
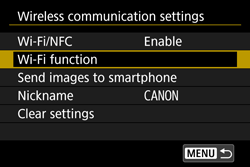
4. Select [Wi-Fi/NFC].
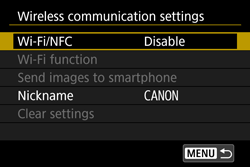
5. Select [Enable], then press <
>. [Wi-Fi function] is now selectable.
6. Select [Wi-Fi function], then press <
>.
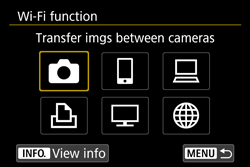
7. The [Wi-Fi function] screen will be displayed.
This concludes the basic camera settings.
Step 3. Connecting the Camera to the Computer 1. [
 ] Select [Remote control (EOS Utility)]. ] Select [Remote control (EOS Utility)].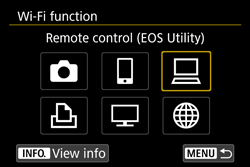
2. Select [Easy connection],[OK] and then press <
>.
3. Operate the computer to connect it to the camera.
Computer's screen (sample)
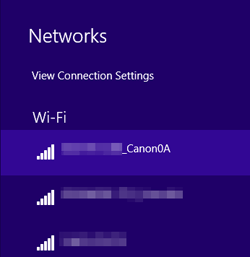 Camera's screen
4. Select [OK] and press <
>.
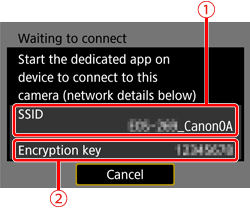
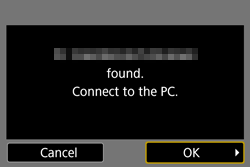
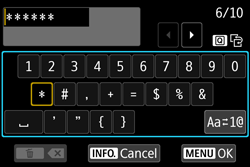
5. The following message is displayed.
"******" represents the last six digits of the MAC address of the camera to be connected.

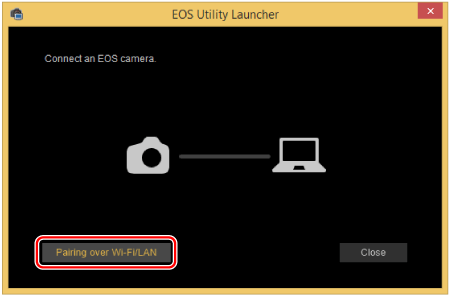
6. Start EOS Utility.
7. In EOS Utility, click [Pairing over Wi-Fi/LAN].
If a firewall-related message is displayed, select [Yes].
8. Select the camera to connect to and click [Connect].
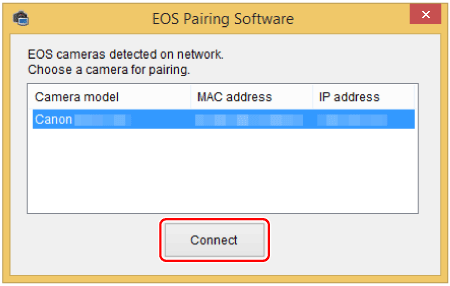
9. When the camera detects the computer on which you clicked [Connect] in step 8, the screen below is displayed.
10. The [
Wi-Fi on] screen appears.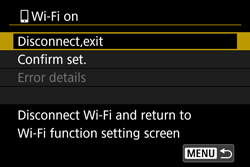
Connecting the camera and the computer is now complete.
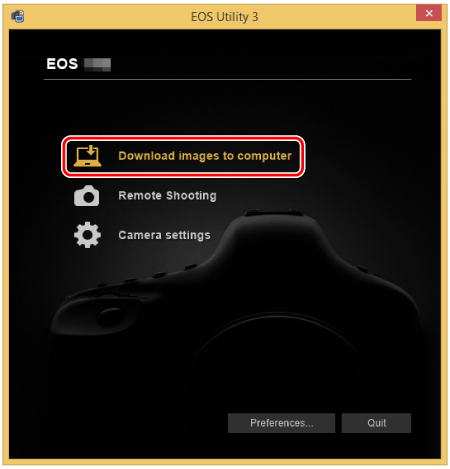
Step 4. Sending Images to a Computer 1. The main window of EOS Utility will be displayed, so click [Download Images to computer].
2. When the following window appears, click either (
 ) to [Start automatic download], or ( ) to [Start automatic download], or (  ) to [Select and download] images. ) to [Select and download] images.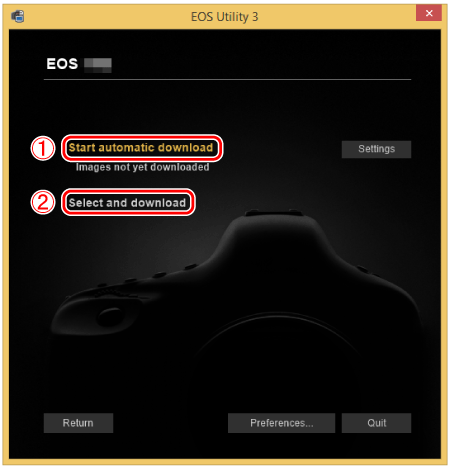
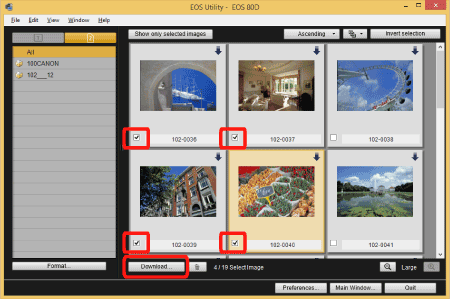
3. When [Select and download] is selected in step 2, the viewer window appears and the images in the memory card are displayed.
In the displayed list of images, checkmark the images to download and click [Download] (here, 4 images are selected).
If you selected [Start automatic download], proceed to step 5.
4. The [Download image] dialog box appears. To change the save destination, click [Destination Folder] and in the dialog box that appears, specify the destination. Click [OK].
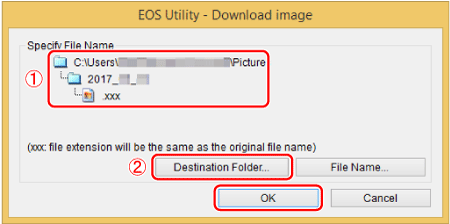 Displays the save destination on the computer Specify the save destination Displays the save destination on the computer Specify the save destination
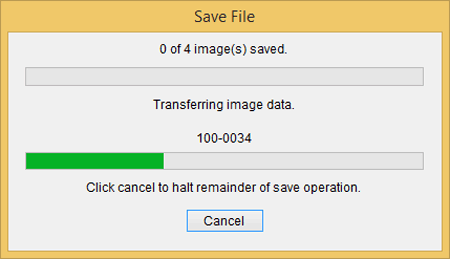
5. The images are downloaded to your computer.
6. When all images have been downloaded, click the [Quit] button to close EOS Utility.
Downloading images is now complete.
|
| Related Info | Computer Environment Required for Connecting the Camera via Wi-Fi (EOS Utility 3.x) Using EOS Utility 3.x to Send Images to a Computer (Wi-Fi Function) (EOS 80D) |
|
ID: 8203546100_EN_2
|
|
 ] tab, set [Auto power off] to [Disable] as necessary.
 ] at the bottom right of the bottom entry area. Each time you press <
  > button to delete one character.
 ] on the bottom left side of the [Start] screen. On the [Apps] screen that is displayed, click [EOS Utility].
 > button on the Quick Control screen <
  > to go back to the [
  ] to change the thumbnail order.
 ] icon appears on the top left of the image.
 ] in the upper right of the window to sort the images with various conditions and choose images you want to download.
SIMS Doc Id
8203546100