Get written or video instructions on how to load paper in the rear tray of the PIXMA TR8520.
Solution
The following video will show you how to load paper in the rear tray. If you prefer to follow written steps, look for them below the video.
Refer to this article if you want to load paper in the front tray.For more information on paper, scroll to the bottom of this article.
How to load paper in the rear tray
Prepare the paper. Make sure paper is flat and the stack is aligned.
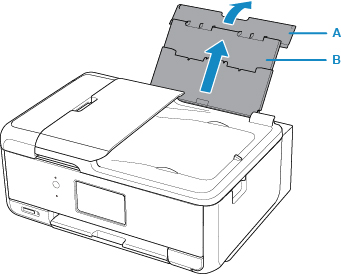
Open the rear tray cover (A) and then pull up the paper support (B).
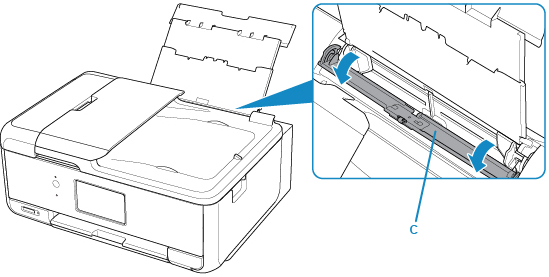
Open the feed slot cover (C).
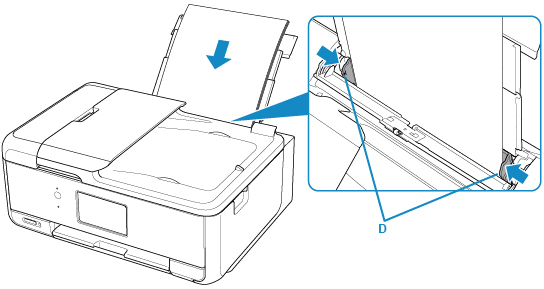
Slide the paper guides to open them, and load the paper in the center of the rear tray with the print side facing up.
Slide the paper guides (D) to align them with both sides of the paper stack. Be careful not to push the guides too hard against the paper.
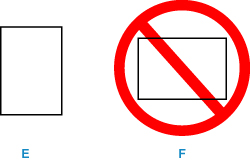
Always load paper in the portrait orientation (E). Loading paper in the landscape orientation (F) can cause jams.
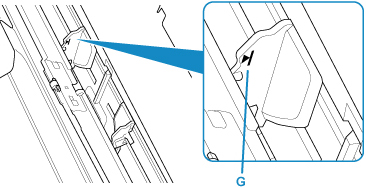
Don't load sheets of paper higher than the load limit mark (G).
Gently close the feed slot cover.
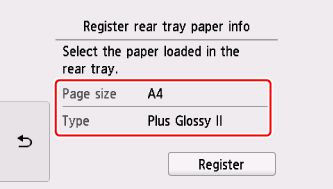
The paper information registration screen displays on the touch screen.
Select the Page size and Type of the loaded paper, then select Register. Select Others if the page size you use isn't listed.
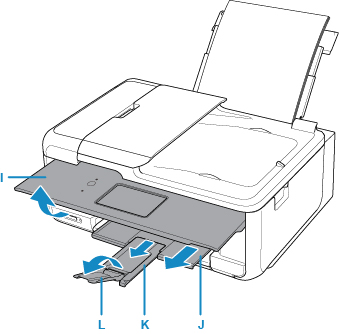
Open the operation panel (I), pull out the paper output tray (J), and the paper output support (K), and open the output tray extension (L). Be sure to open the operation panel before printing. If the operation panel is closed, printing won't start.
Notes about paper
We recommend Canon genuine photo paper for printing photos. For details, see supported media types.
If you cut plain paper into small sizes such as 4" x 6" (10 x 15 cm) or 5" x 7" (13 x 18 cm) it can cause jams.
Specify which paper feed source to use.
There are many paper types, such as photo paper for printing images and each type has preset settings for best quality. The wrong setting can result in poor color quality or scratches on the printed surface.
You should change your printer setting to match the paper you are using.
If you notice blurring or uneven colors, increase the print quality setting
This printer detects whether the paper loaded in the rear tray matches the paper settings. When this function is enabled, an error message displays when the settings don't match. If you see an error message, check and correct the paper settings.

 Refer to this article if you want to