Easy Wi-Fi Setup With a Mac - PIXMA TS9120

Article ID: ART168213 | Date published: 07/24/2017 | Date last updated: 02/27/2020
 

Description

Set up your PIXMA TS9120 on a wireless network (LAN) using the Easy Wireless Connect method from a Mac.

Solution

The Easy Wireless Connect method connects your PIXMA TS9120 printer to a Wi-Fi® network so you can print or scan wirelessly from a Mac®.
NoteThese instructions are for a Mac®. Go to this article if you need setup instructions for Windows.


There are two parts to the setup process:

  1. Start Easy Wireless Connect on your printer.
  2. Download and run the setup file on your computer.


1. Start Easy Wireless Connect on your printer

  1. Make sure the printer is turned ON and the POWER lamp (A) is lit.

    figure: POWER lamp lights up

    Note If the printer is busy performing a task, such as cleaning or print head alignment, wait for it to finish.

  2. Tap the home screen icon HOME on the left of the printer panel. If an error screen displays, tap OK, then the home screen icon HOME.

  3. Tap the Wi-Fi® icon Network status (B).

    HOME screen: Select Network status

  4. Tap LAN settings.

    Basic network information screen: Select LAN settings

  5. Tap Wireless LAN.

    LAN settings screen: Select Wireless LAN

  6. Tap Wireless LAN setup.

    Wireless LAN screen: Select Wireless LAN setup

  7. Tap Easy wireless connect.

    Other setup screen: Select Easy wireless connect

  8. Tap Yes.

    Easy wireless connect screen: Settings will be made on a computer or smartphone, etc.

  9. When the printer preparation completes, the screen below appears.

    Easy wireless connect screen: Follow the instructions on the computer or smartphone, etc. to perform the operation.

  10. Return to the setup application screen and go to Part TWO to complete the setup.


2. Download and run the setup file on your computer

  1. Get the setup file.
    Note Setup can also be performed by using the Setup CD.

  2. Read the information carefully and take note of how to run the setup file if it doesn't start automatically.

     If you see a message like this:

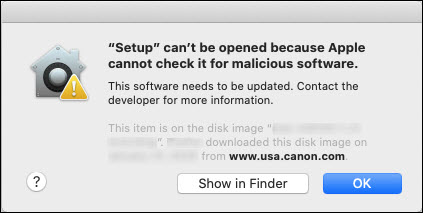
    Select OK. Then, control-click on the setup file, select Open, then select Open in the error message window. This will allow the setup program to proceed.

  3. Select Download.

  4. Select Next on the first screen.

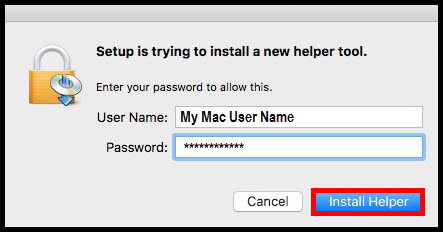
  5. Enter your computer User Name and Password, then select Install Helper.
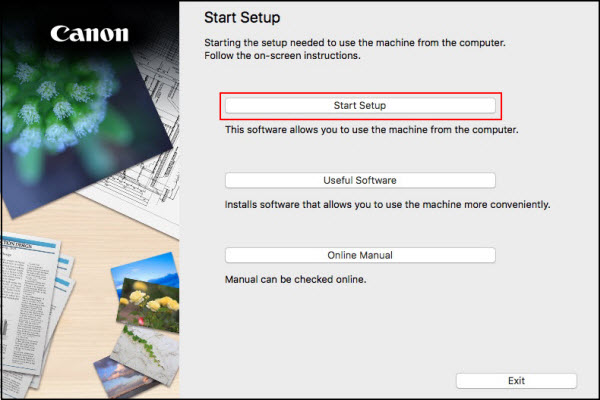
    User Name and Password entered in the fields, then Install Helper button shown selected at bottom right.

  6. Select Start Setup.

    Start Setup button selected from Start Setup screen

  7. Select the appropriate region and country, then Next.

    Region (USA, Canada, Latin America) and country (United States) selected from drop-downs.

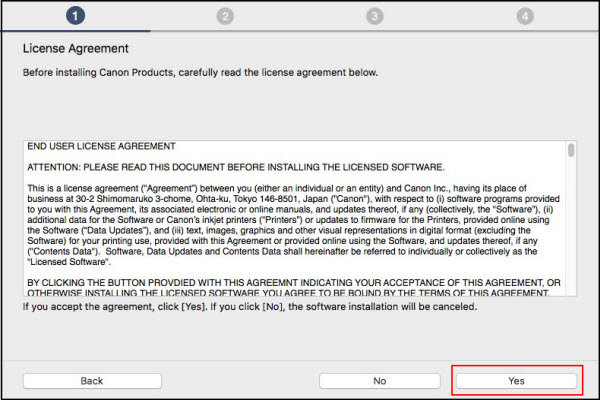
  8. Select Yes to the License Agreement to continue the setup process.

    Yes button selected on License agreement screen

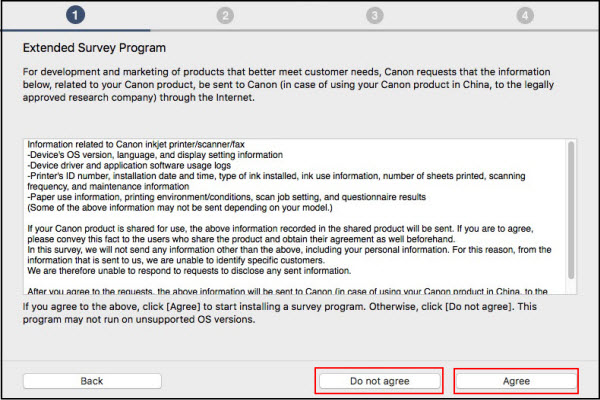
  9. Select Agree or Do not agree to the survey.

    Extended Survey Program screen, with Agree or Disagree buttons shown.

  10. A status check occurs. Wait for the process to finish.

    Checking printer status screen

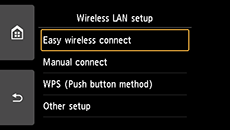
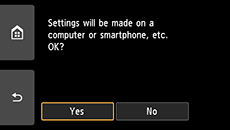
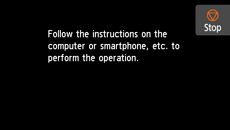
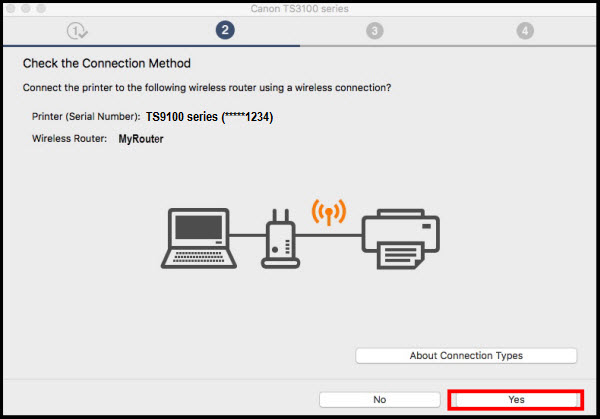
  11. Select Yes on the Connection Method screen.

    Check the connection method screen, Yes button selected.

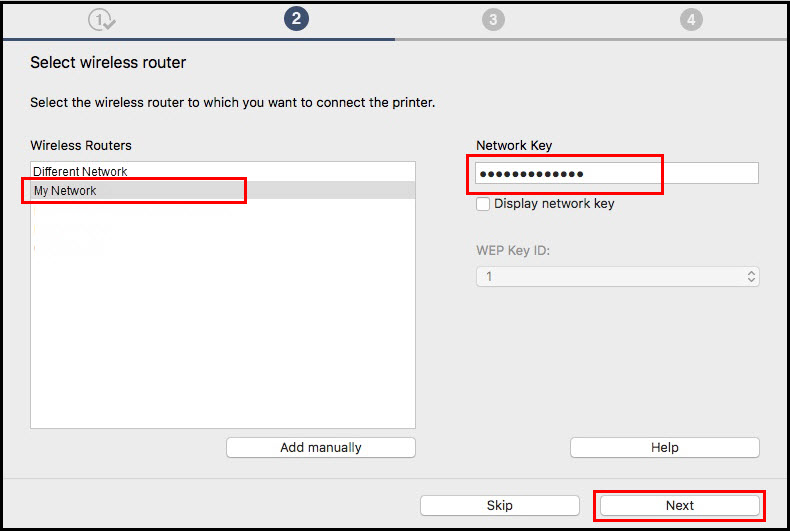
  12. Setup continues. If the Select wireless router screen (below) appears, select the wireless router to connect to the printer, enter the Network Key (password) and select Next.
    Note This screen may not appear, depending on your router and network settings.

    Select wireless router screen, with Router selected, and Network Key entered, then Next button selected.

  13. When the network connection is completed, select Next.

    Connection completed screen with Next button selected.

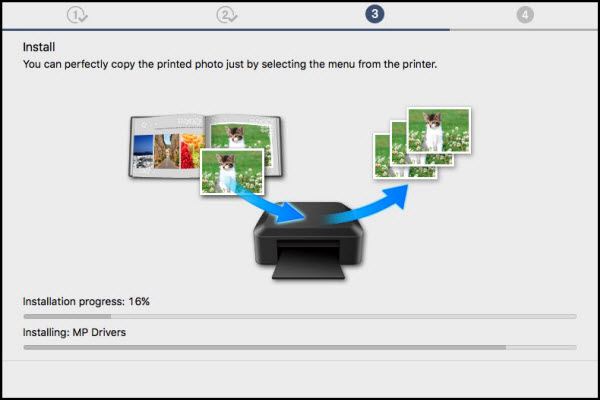
  14. The drivers will now be installed. Wait for this to finish.

    Install screen

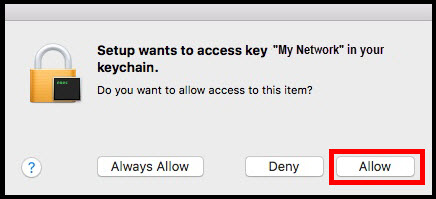
  15. If the following screen appears, select Allow.

    Setup wants to access key "My Network" in your keychain - with Allow button selected

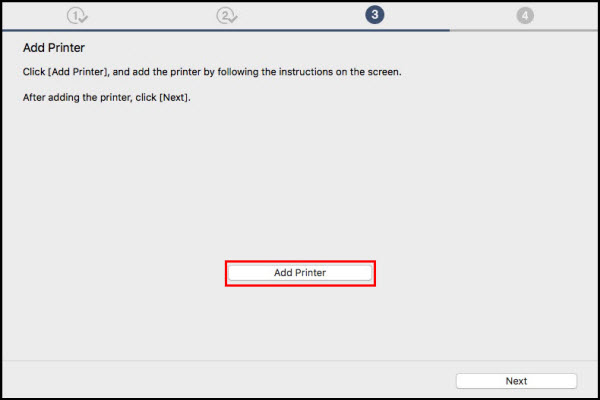
  16. Select Add Printer on the Add Printer screen.

    Add printer button selected on the Add printer screen.

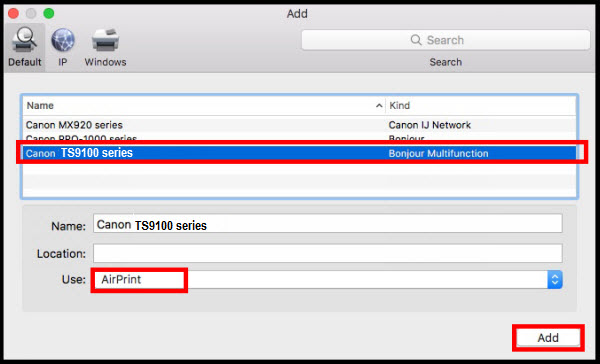
  17. On the Add screen, select the TS series with Bonjour Multifunction listed in the Kind column. Select AirPrint or Secure AirPrint in the Use: dropdown list.

    Canon TS9100 selected (as an example) under printer name. Bonjour Multifunction displays in the Kind column.

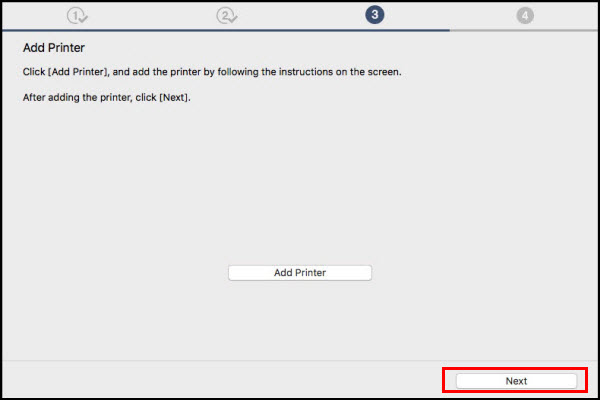
  18. Select Next on the Add Printer screen.

    Next selected from Add Printer screen

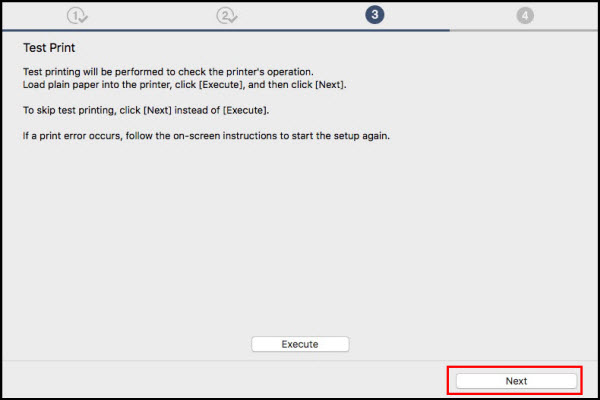
  19. Select Execute if you want to run a test print. If not, select Next to continue.

    Test Print page gives the option to Execute (for a test print) or Next to continue

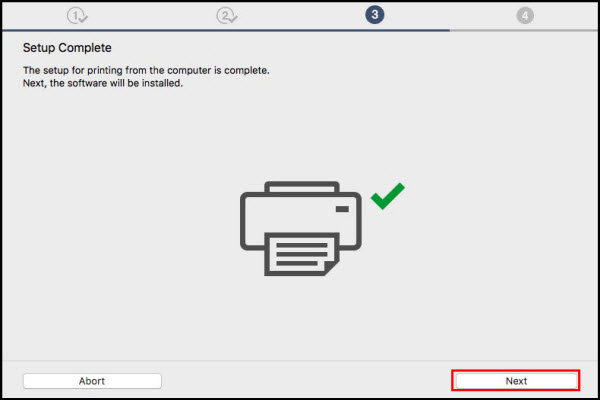
  20. When you see the Setup Complete screen, select Next. You are almost finished.

    Setup Complete screen with Next button selected.

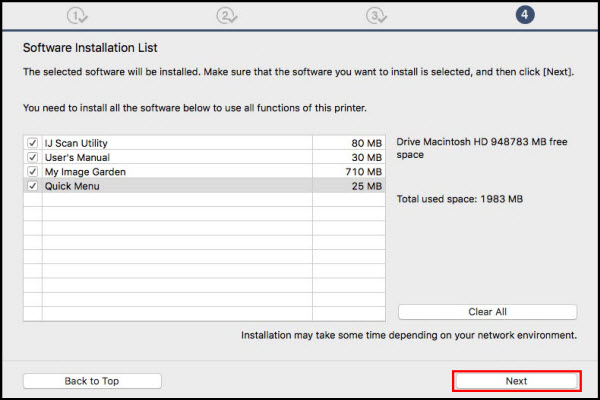
  21. Select any optional software applications you want to add, then select Next.

    Optional software shown selected from Software Installation List screen (selections made by clicking on checkmark box to the left of each option).

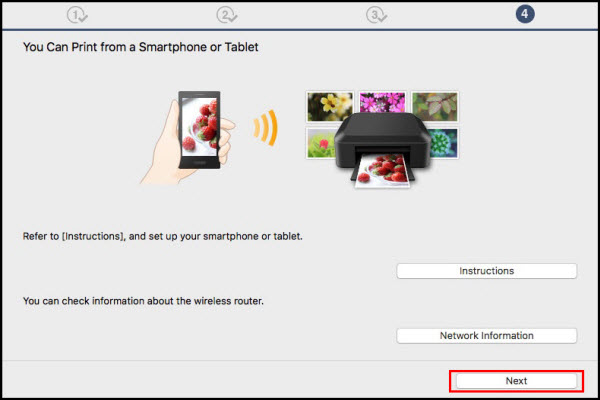
  22. On the You Can Print... screen, select Next.

    Next chosen on the You can Print from a Smartphone or Tablet screen.

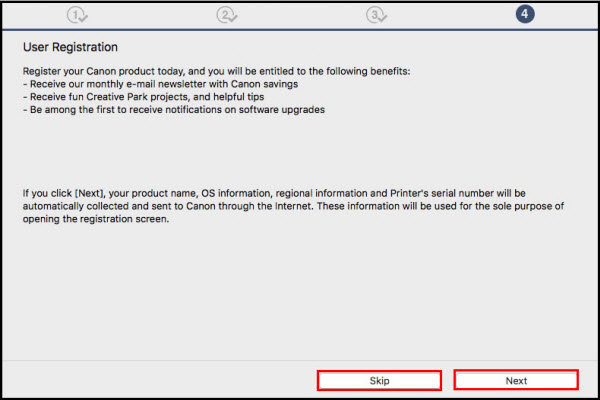
  23. Select Skip or Next on the User Registration screen.

    User Registration Screen with Skip and Next buttons shown selected.

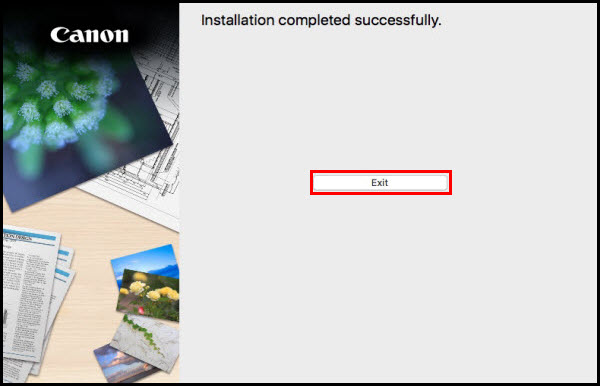
  24. Select Exit. The installation is complete. You are ready to print or scan wirelessly.
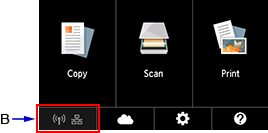
    Installation complete screen.


Rate this Article
Was this article helpful?
Yes, This document is helpful
No, This document needs a clearer explanation
 
Please provide your comments