Easy Wireless Connect Setup - Windows - PIXMA TS6120
Article ID: ART168214
|
Date published: 07/24/2017
|
Date last updated: 01/31/2020
Description
Use Easy Wireless Connect setup to print or scan wirelessly on the PIXMA TS6120 printer from a Windows computer.
Solution
To manage your PIXMA printer from a Windows computer:
The printer must be connected wirelessly.
The printer drivers and software need to be installed on your computer.
The video below will walk you through the "Easy Wireless Connect" setup process, or if you prefer written instructions please follow the steps provided below the video.
Easy wireless connect setup (Windows) - Video
Written Instructions
There are two parts to the setup:
Start Easy Wireless Connect on your printer.
Download and run the setup file on your computer.
1. Start Easy Wireless Connect on your printer
Make sure the printer is turned on. If the power is on, the lamp (A) will be lit.
If the printer is performing cleaning, print head alignment or other tasks, wait for the process to finish.
Press the HOME button (B) on the printer. If an error screen displays, tap OK, then press the HOME button again.
Tap the network status icon (C).
Tap LAN settings.
Tap Wireless LAN.
Tap Wireless LAN setup.
Tap Easy wireless connect.
Tap Yes.
When the printer preparation is complete, the screen below appears. Return to the setup application screen to continue the setup.
2. Download and run the setup file on your computer*
*Setup can also be performed using the Setup CD.
If you have a firewall enabled on your computer, you may need to temporarily disable it during the software installation. If you don't want to disable it, you may need to configure it to open various ports to allow communication with the printer across the network. Refer to your firewall's documentation for information.
Get the Windows setup file and read the information carefully. Make note of what to do if the setup file doesn't run automatically. Select the Download button to start the process.
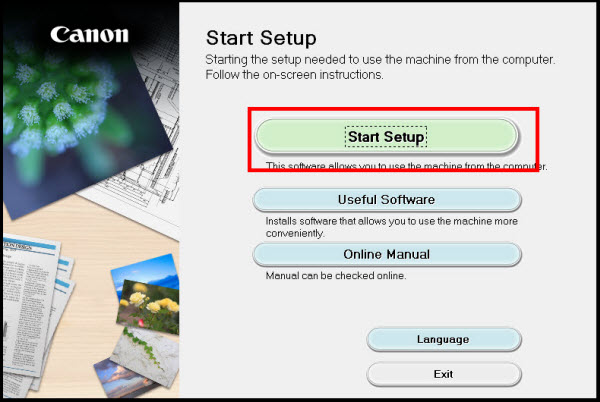
Select Start Setup.
Select your country or region, then Next.
Select Yes to the License Agreement.
Select Agree or Do not agree to the Extended Survey Program.
Select Next.
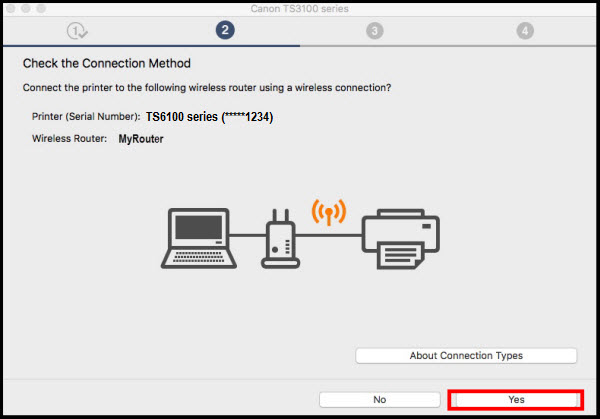
Select Yes on the Connection Method screen.
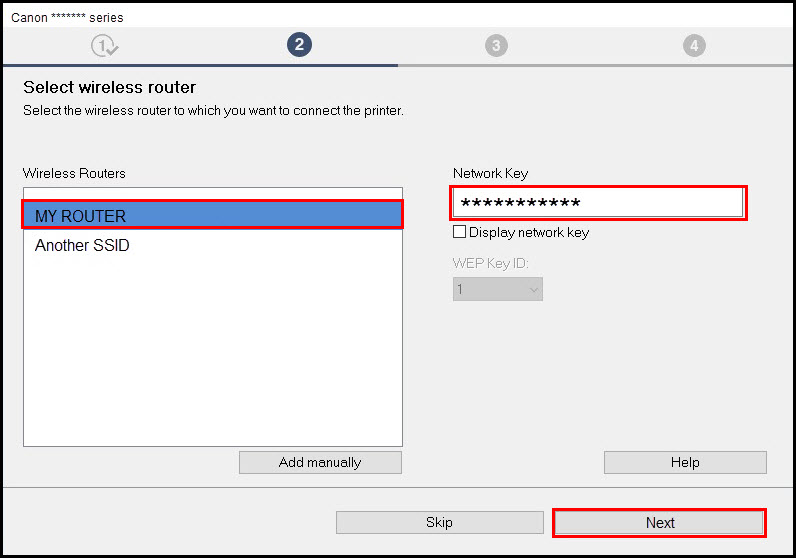
Setup continues. If the Select wireless router screen (below) appears, select the router you want to connect to the printer, enter the Network Key (password) and select Next. (Depending on your printer model, this screen may not appear.)
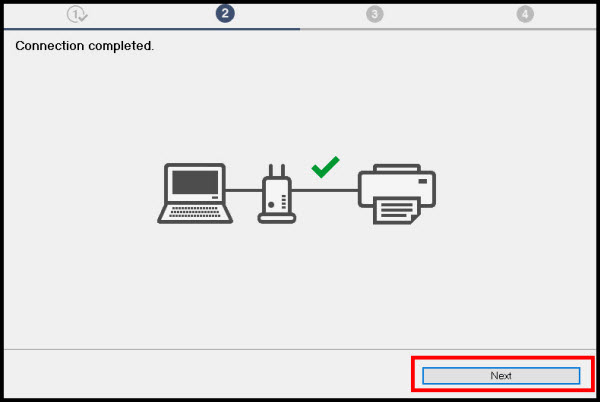
The system will indicate that it's setting up. When you see the Connection completed screen, select Next.
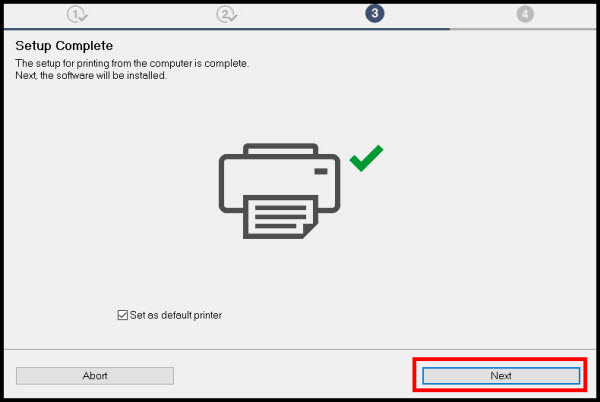
On the Setup Complete screen, select Next. You are almost finished.
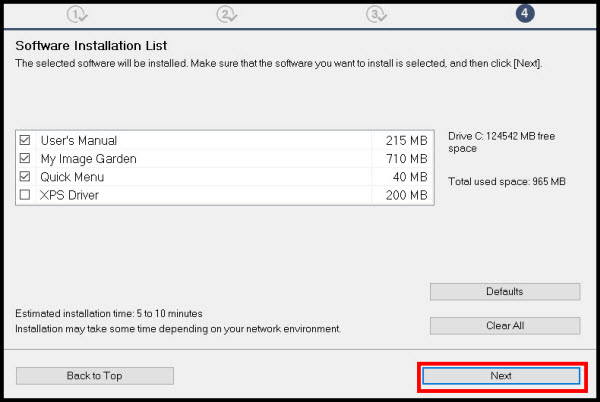
Select any optional application software desired (click the checkbox to select or unselect an option) then choose Next.
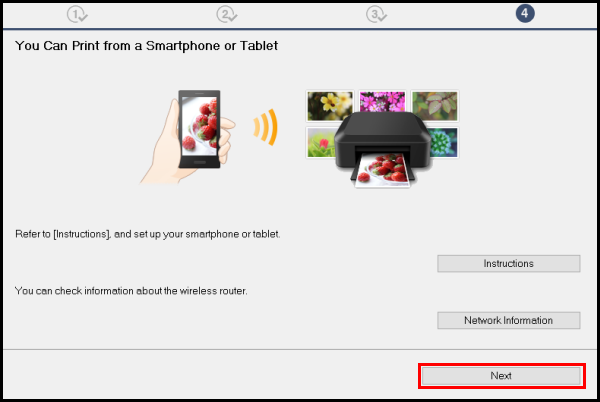
Select Next from the You Can Print... screen.
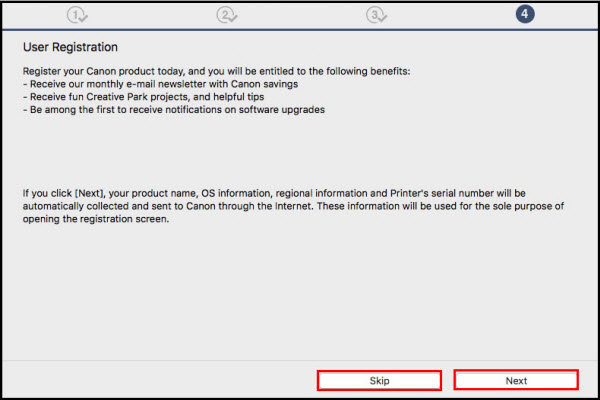
Select Next or Skip on the User Registration page.
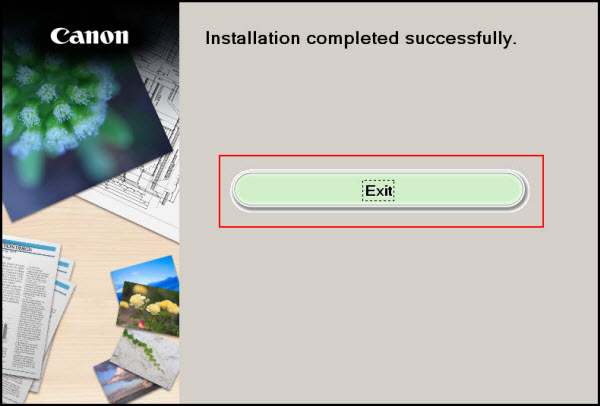
Select Exit.
Installation is complete. You are ready to print or scan wirelessly.

 Easy wireless connect setup (Windows) - Video
.gif)
.gif)
.gif) (C).
(C).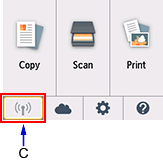
.gif)
.gif)
.gif)
.gif)
.gif)
.gif)
 If you have a firewall enabled on your computer, you may need to temporarily disable it during the software installation. If you don't want to disable it, you may need to configure it to open