|
Getting Started
- Before you can print via Wi-Fi from a computer, the computer with the images to send must be connected to an access point.
IMPORTANT
- The access point must support IEEE 802.11b/g connections.
- Before using Wi-Fi, be sure to read "Wi-Fi (Wireless LAN) Precautions" in the Printer User Guide.
NOTE
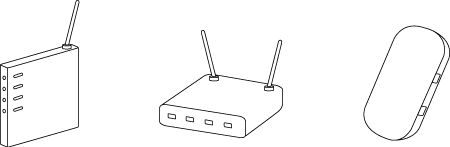
- For convenience, wireless routers and other base stations are referred to as "access point".
Connecting Selphy to the Access Point How to connect varies depending on whether the access point is WPS compatible or not.
For more information onãnon-compatible access points, please refer to Non-WPS Access Points.
[WPS-Compatible Access Points]
1. Check the access point.
- Confirm that the access point is on and ready for communication.
2. Prepare SELPHY.
- Remove any inserted memory cards or USB flash drives.
- Insert a loaded paper cassette and an ink cassette in SELPHY.
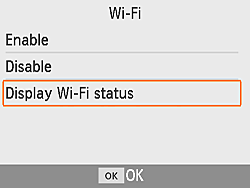
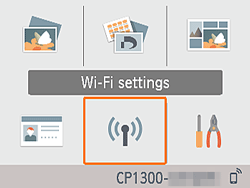
3. Access the setting screen.
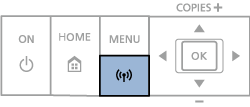
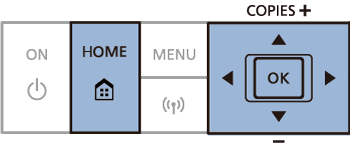
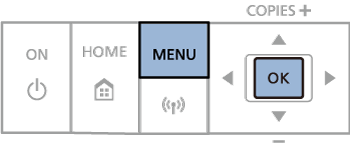
- Press the home button <
 >. >.
- Press the <
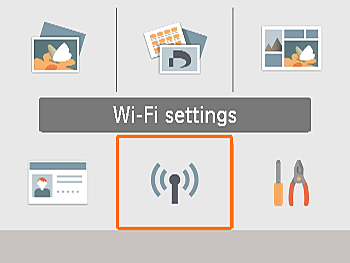
 >< >< >< >< >< >< > buttons to select [Wi-Fi Settings], and then press the < > buttons to select [Wi-Fi Settings], and then press the < > button. > button.
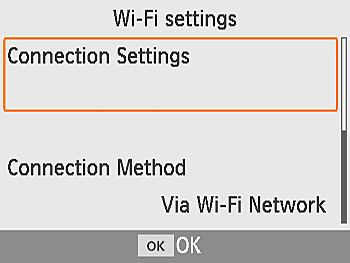
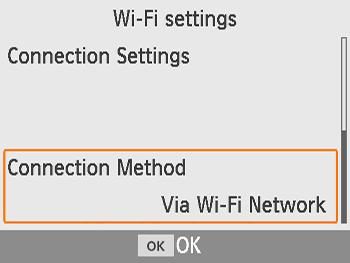
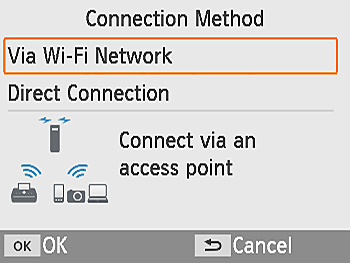
4. Choose the connection method.
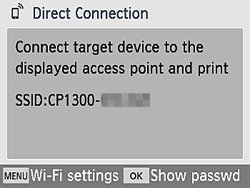
- Press the <><> buttons to select [Direct Connection], and then press the <> button.
- Press the <><> buttons to select [Direct Connection], and then press the <> button.
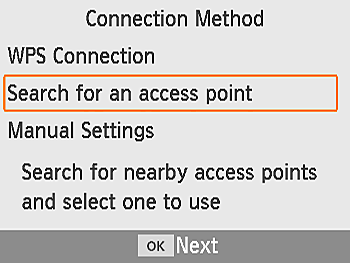
5. Choose the access point connection method.
- Press the <><> buttons to select [WPS Connection], and then press the <[|G0212350||3]]> button.

6. Choose the WPS connection method.
Press the < >< > buttons to select [PBC Method], and then press the < > button.
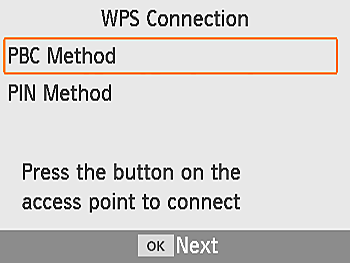
- The screen at below is displayed.
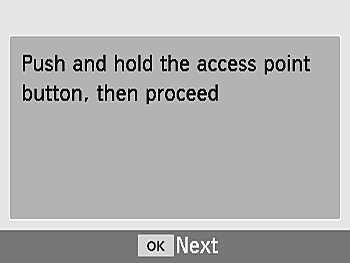
7. On the access point, hold down the WPS connection button for a few seconds.
NOTE
For details on where the button is located and how long to press it, check the access point user manual
8. Establish the connection.
- On the printer, press the <> button.
- [Connecting] is displayed on the printer, followed by [Connected to access point] when connected. Press the <> button.
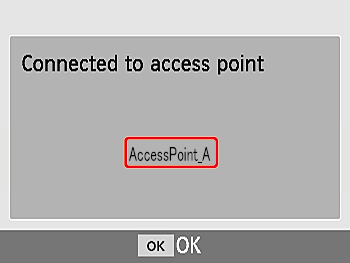
9.Check the access point.
ã»The screen at below is displayed, indicating the name of the access point.
NOTE
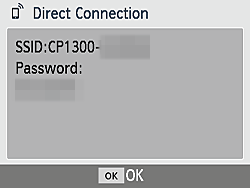
- If you selected [PIN Method] in step 6, use the computer to specify the PIN code (displayed on the printer) on the access point, press the <> button on the printer, and go to step 8. For instructions on configuring PIN codes, refer to the access point user manual.
Please proceed to Preparing the Computer
[Non-WPS Access Points]
1. Check the access point.
- Confirm that the access point is on and ready for communication.
2. Prepare SELPHY.
- Remove any inserted memory cards or USB flash drives.
- Insert a loaded paper cassette and an ink cassette in SELPHY.
3. Access the setting screen.
- Press the home button <>.
- Press the <><><><> buttons to select [Wi-Fi Settings], and then press the <> button.
4. Choose the connection method.
- Press the <><> buttons to select [Direct Connection], and then press the <> button.
5. Choose the access point connection method.
- Press the <><> buttons to select [WPS Connection], and then press the <> button.
6. Choose the WPS connection method.
Press the < >< > buttons to select [PBC Method], and then press the < > button.
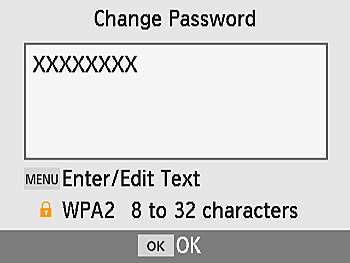
7. Enter the password.
- Press the MENU button to access the input screen, and then enter the password.
- Press the <> button.
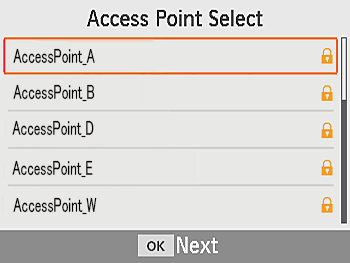
8. Check the access point.
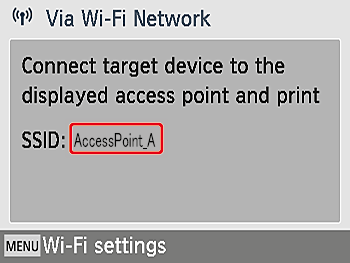
- Once the printer is connected to the access point, the screen at left is displayed. Check the indicated access point name and press the <> button.
9.Check the access point.
ã»The screen at below is displayed, indicating the name of the access point.
NOTE
Printing from a Computer You can print from the computer using AirPrint.
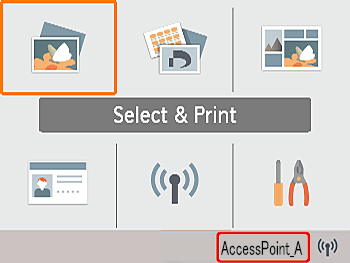
1. Confirm that SELPHY is connected to the access point.
Confirm that the screen below is displayed on SELPHY.
Computer settings are explained from step 2.
2. Access the printing dialog box.
Start the photo software, select images to print, and access the printing dialog box.
- As the destination printer, select [Canon (SELPHY) CP1300].
3.ãChoose printing options.
- Specify the paper size, orientation, and number of copies.
- To print at L size, select [89 x 119 mm] as the paper size.
- To print at P size, select [Postcard].
- To print at C size, select [54 x 86 mm] as the paper size.
4.ãPrint.
IMPORTANT
- Printing in progress cannot be canceled from SELPHY by using the <
 > button. Use the computer to stop printing. > button. Use the computer to stop printing.
- For computer or photo software instructions, refer to the relevant user manual.
NOTE
- Mac OS: If "Canon SELPHY CP1200" is not available as a destination printer, register SELPHY on the computer as follows.
 Access [System Preferences] > [Printers & Scanners] or [Print & Scan].
 Click [+] below the list.
 Choose "Canon SELPHY CP1300".
- Authentication is required in order to display the printerâs webpage from printer settings screens in Mac OS. Log in by entering ADMIN as the name and canon as the password.
If you have changed the password and cannot remember it, use [Reset Settings] in [Wi-Fi settings] or [Reset all to default] in [Setup] on SELPHY to restore the default password.
|


 > button.