|
Getting Started
-
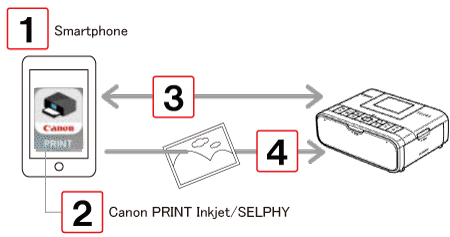
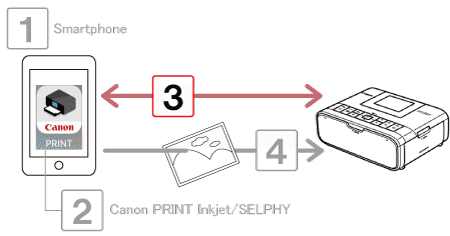
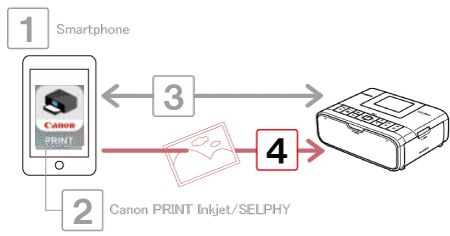
You can print by sending images from a smartphone via Wi-Fi.
-
In places without an access point, [Direct Connection] makes SELPHY operate as a simplified access point for connecting wirelessly and printing from a smartphone.
IMPORTANT
NOTE
-
For convenience in this article, wireless routers and other base stations are referred to as "access points".
-
In the text, the operation instructions that begin with this illustration  are for smartphones. The operation instructions that begin with this illustration are for smartphones. The operation instructions that begin with this illustration  are for SELPHY. are for SELPHY.
 : Check your iOS version : Check your iOS version
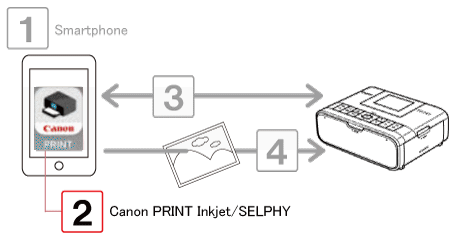
 : Install Canon PRINT Inkjet/SELPHY on your smartphone : Install Canon PRINT Inkjet/SELPHY on your smartphone
 : Connect your SELPHY and smartphone : Connect your SELPHY and smartphone
 : Use your SELPHY to print images on your smartphone : Use your SELPHY to print images on your smartphone
Step 1: Check your iOS version
1. Check the environment on your smartphone.
-
Please refer to the "Related information" section at the bottom of this page for specifications and system requirements of the smartphones which can be connected by Canon PRINT Inkjet/SELPHY and Wi-Fi.
-
You can check your iOS version by accessing "About" in "Settings" on your smartphone.
NOTE
Step 2: Install Canon PRINT Inkjet/SELPHY on your smartphone
: Download and install Canon PRINT Inkjet/SELPHY from the App Store.
NOTE
-
Here, instructions are given using iOS 8.1 as an example.
-
The text includes an example of a smartphone screen. The items displayed on the screen may differ depending on the model of your smartphone. For details, refer to the user manual of your smartphone.
1. Tap the [App Store] icon on your smartphone to open the App Store.

IMPORTANT
-
You can download Canon PRINT Inkjet/SELPHY for free. However, you will be charged communication fees when connecting to the App Store.
-
You need an Apple account to download Canon PRINT Inkjet/SELPHY.
-
If you are using a smartphone without the App Store, you cannot download Canon PRINT Inkjet/SELPHY.
-
When you use a cell phone line, downloading via Wi-Fi may take some time.
2. Tap the search icon.
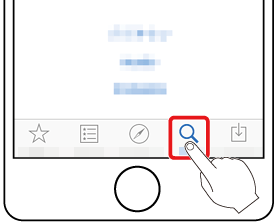
3. Enter "Canon PRINT Inkjet/SELPHY" as the keyword in the search field  and tap [Search] and tap [Search]  . .
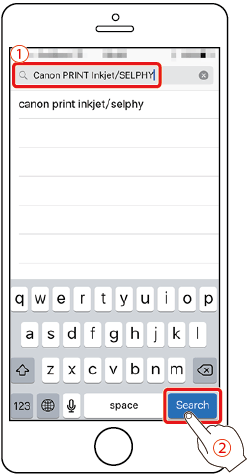
4. Select "Canon PRINT Inkjet/SELPHY" in the search results and install it.
Step 3: Connect SELPHY with your smartphone
1. Turn on your smartphone.
2. Make sure your smartphone is not in airplane mode.
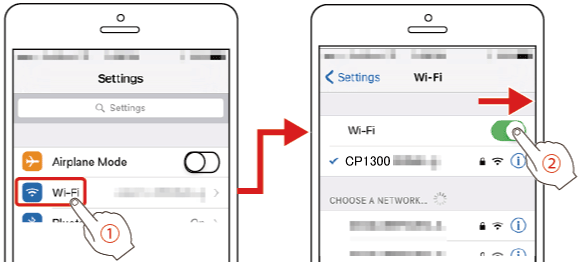
3. Tap the menu key on your smartphone and tap [Settings].
4. Turn the [Wi-Fi] switch ON and tap [Wi-Fi] .
5. Prepare SELPHY.
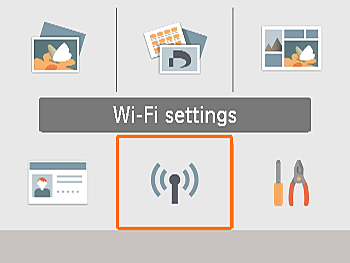
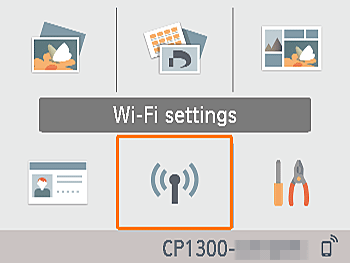
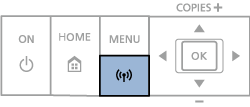
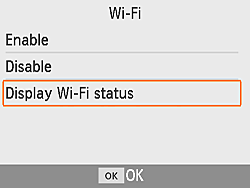
6. Access the setting screen.

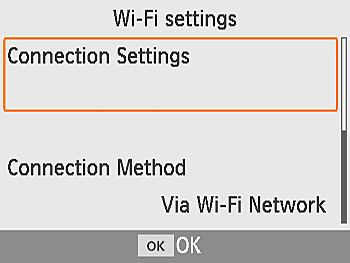
7. Choose the connection method.
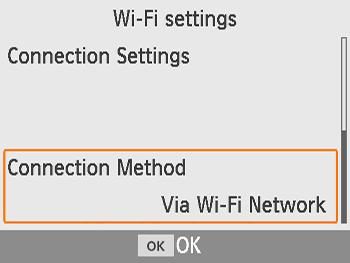
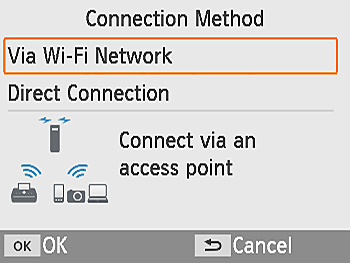
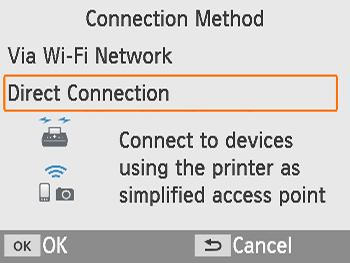
 Selecting [Direct Connection] will allow you to connect your iPhone directly to your SELPHY without using an access point. Selecting [Direct Connection] will allow you to connect your iPhone directly to your SELPHY without using an access point.
8.Choose the password set.

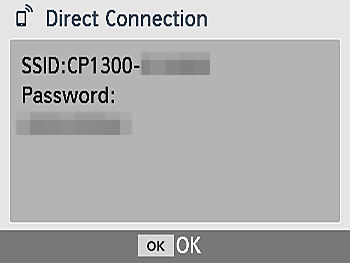
9. Change the password.
-
The current password is displayed. Change the password as needed, and then press the < > button. > button.
-
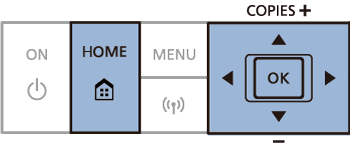
Press the <MENU> button to access the input screen.
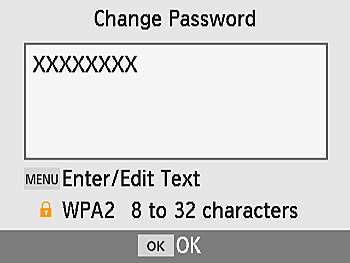
-
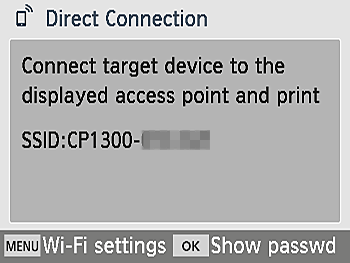
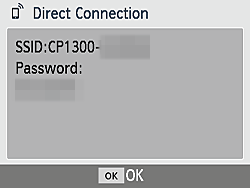
The following screen is displayed.
-
Once you complete the Direct Connection settings, they can be used for subsequent connections.
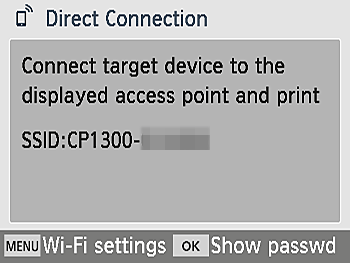
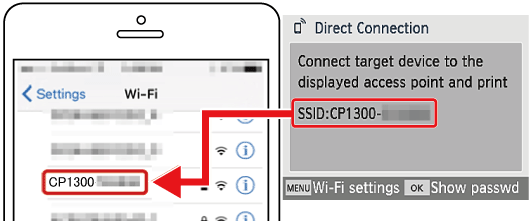
10. Use your smartphone to join the network displayed on the printer screen.
-
In the smartphone's Wi-Fi settings, select the SSID (network name) displayed on the printer.
-
Enter the password displayed on the printer into the password field.
NOTE
When entering your password, be careful not to confuse numbers and letters (for example "1" and "I" or "0" and "o").
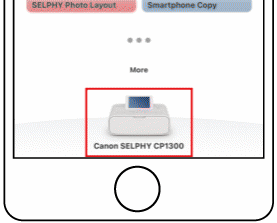
11. Make sure that SELPHY and your smartphone are connected and tap the home button to return to the home screen.
NOTE
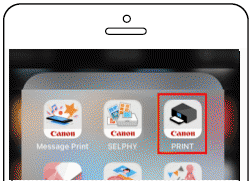
Tap the "Canon PRINT Inkjet/SELPHY" (  ) icon on your smartphone to start "Canon PRINT Inkjet/SELPHY". ) icon on your smartphone to start "Canon PRINT Inkjet/SELPHY".

Step 4: Use your SELPHY to print images on your smartphone
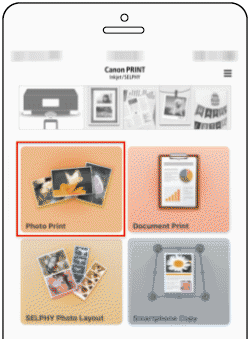
1. Tap the "Canon PRINT Inkjet/SELPHY" () icon on your smartphone to start "Canon PRINT Inkjet/SELPHY".
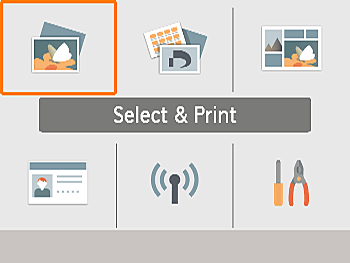
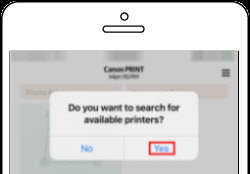
2. Tap the items that include the data you want to print. (Choose [Photo Print] here.)
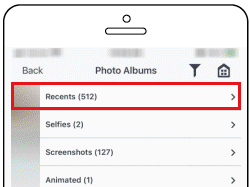
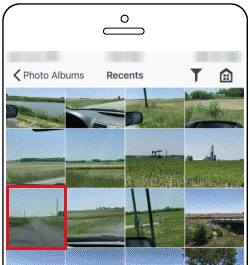
3. Tap the images you want to print in your photo album.
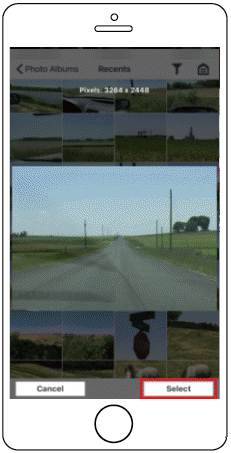
4. Tap the photos you want to print.
5. Tap [Select].
6. Tap [Next] after you have selected the photos.

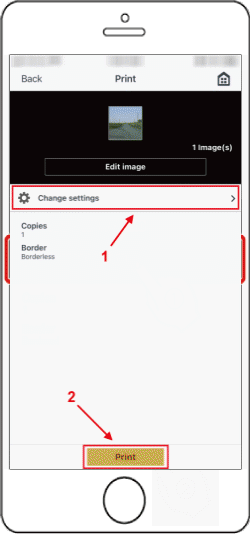
7. The following screen is displayed. Select [Change settings] and specify the number of copies as well as if you want a bordered or borderless print. Tap [Print] to print.
 When you print for the first time, you'll be prompted to confirm that you want to print with the SELPHY CP1300. Tap [OK] to beginj printing. When you print for the first time, you'll be prompted to confirm that you want to print with the SELPHY CP1300. Tap [OK] to beginj printing.
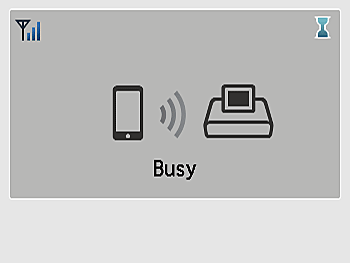
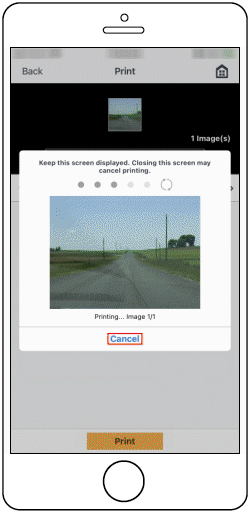
8.Once printing begins, the screen below is displayed.
NOTE
Printing in progress cannot be canceled from SELPHY by using the < > button. Use the smartphone to stop printing. > button. Use the smartphone to stop printing.
Tap [Cancel] to stop.
9. The Home screen or screen at following is displayed when the camera is no longer connected.
NOTE
[Subsequent Printing]
Check the password as follows.
-
Press the < > button. > button.

|

 >.
>. ><
>< ><
>< ><
>< > buttons to select [Wi-Fi Settings], and then press the <