 There are a few things to know about paper to ensure the best print quality.
Prepare the paper
Flatten the paper if it's curled by gently bending it in the opposite direction.
.jpg)
Load the paper
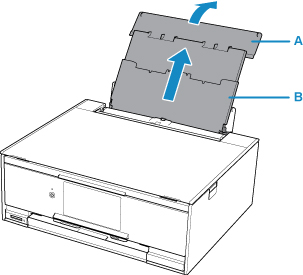
- Open the rear tray cover (A) and then pull up the paper support (B).
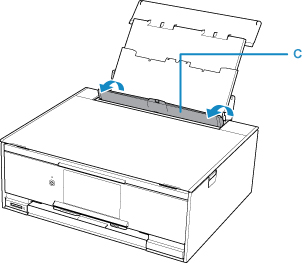
- Open the feed slot cover (C).
-
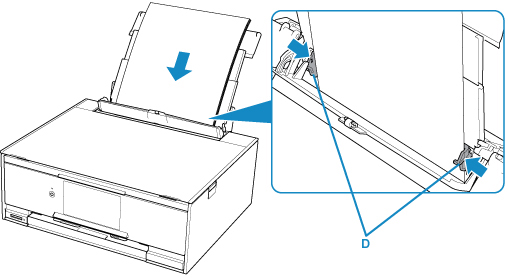
Slide the paper guides to open them, and load the paper in the center of the rear tray with the print side facing up. Load photo paper with the glossy side facing up.
-
Slide the paper guides (D) to align them with both sides of the paper stack, being careful not to push the paper guides too hard against the paper.
 Always load paper in the portrait orientation (E). Loading paper in the landscape orientation (F) can cause jams.

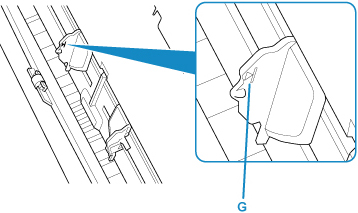
- Be careful not to load sheets of paper higher than the load limit mark (G).
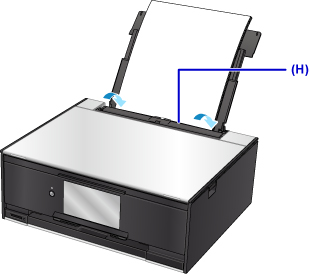
- Slowly close the feed slot cover (H).
If the feed slot cover is open, the paper won't feed.
- After closing the feed slot cover, the paper information screen displays. Select your loaded paper Page size and Type, then select Register.
.jpg)
Good to know
-
There are various types of paper, such as paper with a special coating for photos. Each type has preset settings, to give you the best image quality. The wrong paper settings may cause poor color quality or scratches on the printed surface. If you notice blurring or uneven colors, increase the print quality setting and try to print again.
-
This printer has a function that detects if the information set for the paper loaded on the rear tray matches the paper settings. When this function is enabled, an error message displays if these settings don't match. If you see the error, check and correct the paper settings.
