Set the auto focus (AF) point - EOS 7D Mark II
| Article ID: ART168615 |
| |
Date published: 10/11/2017 |
| |
Date last updated: 10/31/2017 |
Description
Learn how to manually set the auto focues (AF) point to target an area of your shot to be in focus.
Solution
Steps to set a manual auto focus point
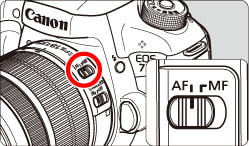
- Set the lenss focus mode switch to <AF>.
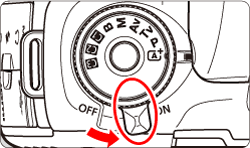
- Switch the camera <ON>.
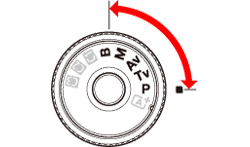
- Set the Mode Dial to < P / Tv / Av / M / B>.
- Press the <
 > button.

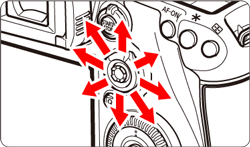
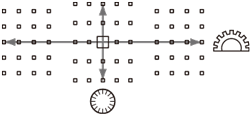
- Select an AF point.
- The AF point selection will change in the direction you tilt <
 >.
>.
- If you press <> straight down, the center AF point (or center zone) will be selected.
- You can also select a horizontal AF point by turning the <
 >dial and select a vertical AF point by turning the <
 > dial.
- In the Zone AF mode, turning the <> or <> dial will change the zone in a looping sequence.
Good to know
- In the <
 > mode, the AF operation and AF area selection mode are set automatically.
- When [
 :
:  Initial AF pt, AI Servo AF] is set to [ Initial AF pt selected], you can use this method to manually select the AF starting position of the AI servo.
- When you press the <> button, the LCD panel displays the following:
- 65-point automatic selection AF, Zone AF, Large Zone AF:
 AF.
AF.
- Single-point Spot AF, Single-point AF, and AF point expansion: SEL
 (center) or SEL AF (off-center).
- With [
 : Manual AF pt. selec. pattern], you can set either [Stops at AF area edges] or [Continuous].
