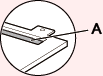
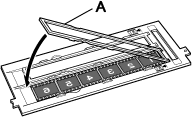
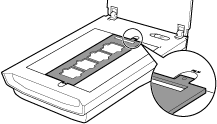
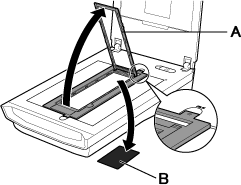
Open the film holder (A) and place the film on the film guide, with the front side of the film (the side on which images appear correctly) facing down.
Note
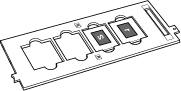
Make sure that the spaces between frames are aligned with the white lines on the holder.
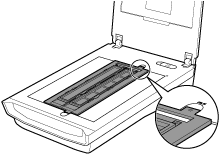
Place the film guide on the platen.
Align the tabs on the film guide with the FILM symbol on the platen.


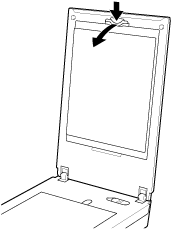


 mark) and the hinge.
