When scanning film in ScanGear, you may sometimes find that the preview images are not properly cropped. In instances like this, you can switch between Thumbnail view and Whole Image view. Follow the steps below to do this.
-
Place the film on your scanner.
-
Start IJ Scan Utility and click ScanGear..
-
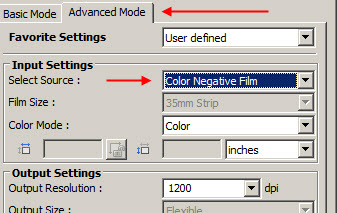
Click the Advanced Mode tab and select the type of film you are scanning for Select Source.
-
Click Preview.
-
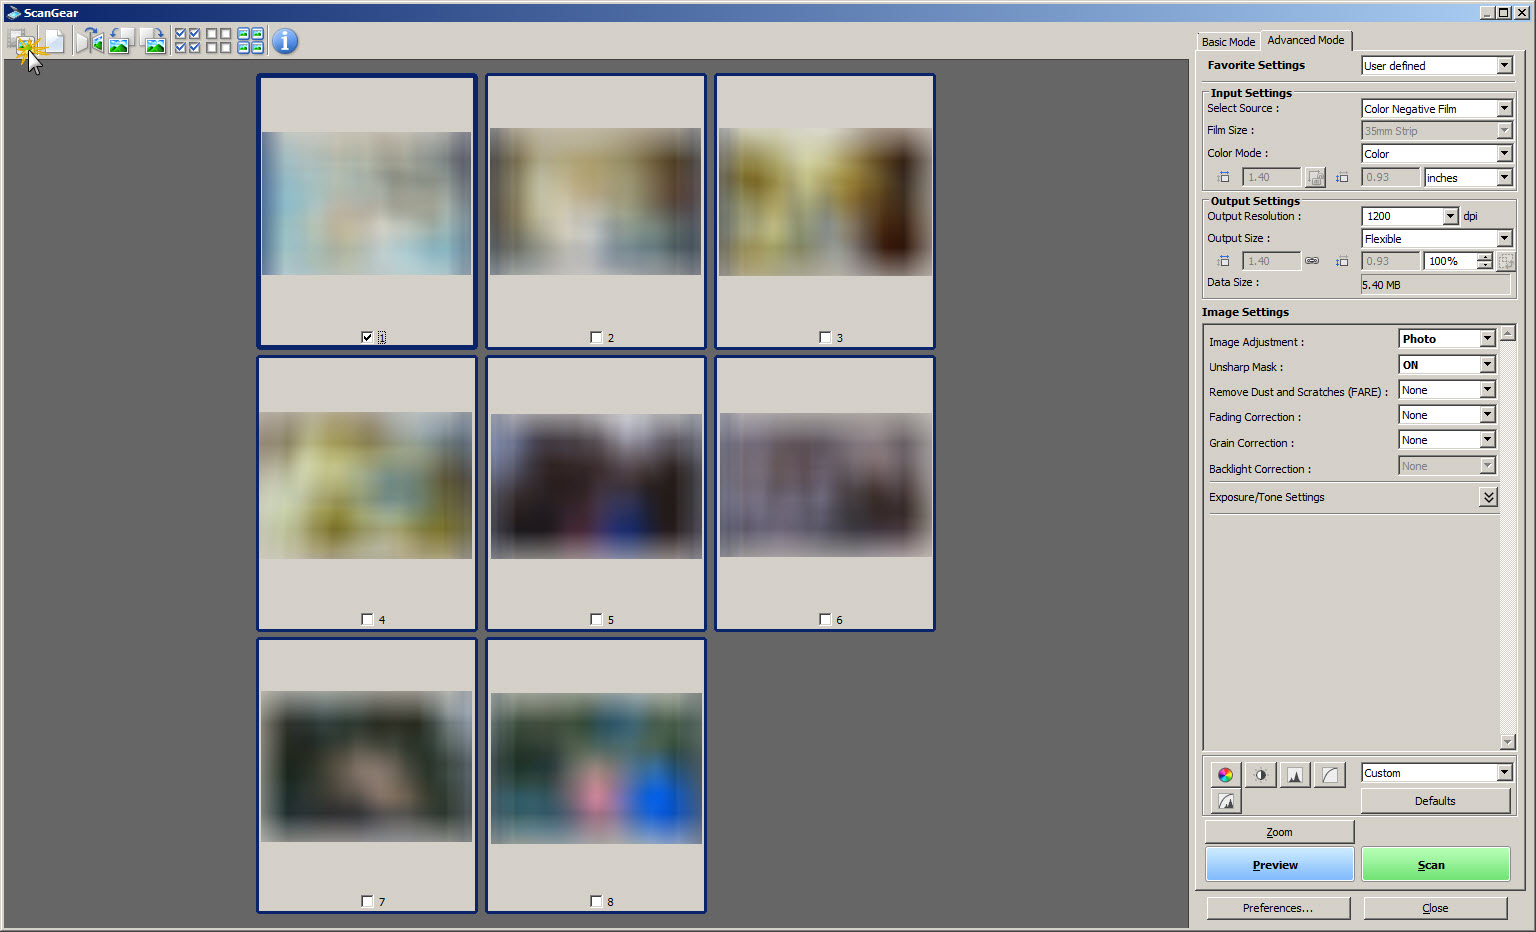
When the preview images have appeared on your screen, click the  (Film Thumbnail) icon at the upper left corner of the Preview window. This will show the
  (Whole Film Image) view.
Film Thumbnail view:
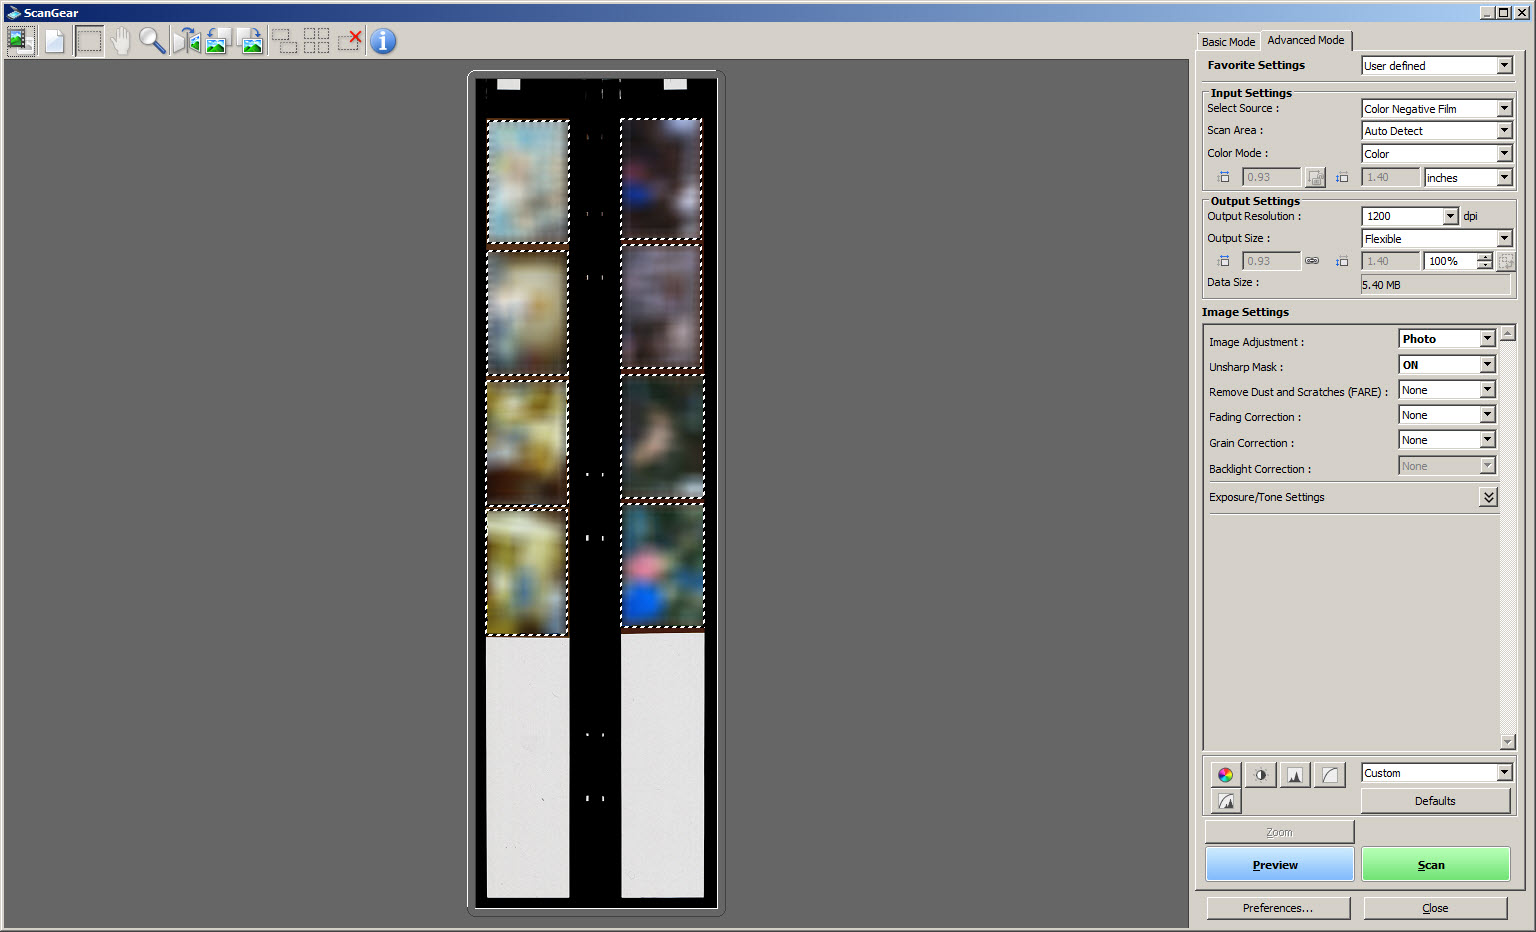
Clicking the (Film Thumbnail) icon will change the view to the Whole Film Image view:
-
In the Whole Film Image view, adjust the cropping boxes for the images as necessary. These boxes can be adjusted by clicking on the box and dragging it to surround the frame that you want to scan. After the adjustments have been made, click Scan.
-
After the scanning process has finished, the following dialog box will appear.
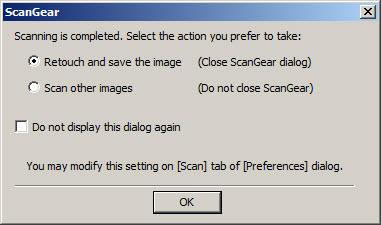
To finish scanning, select Retouch and save the image and click OK. If you have more images to scan, select Scan other images and click OK.
For support and service options, sign into (or create) your Canon Account from the link below.
My Canon Account
