Things you need
•Office 365 account
–Password
•Certification files
–Two Root CA Certs
•DigiCert Global Root CA
•GlobalSign Root CA
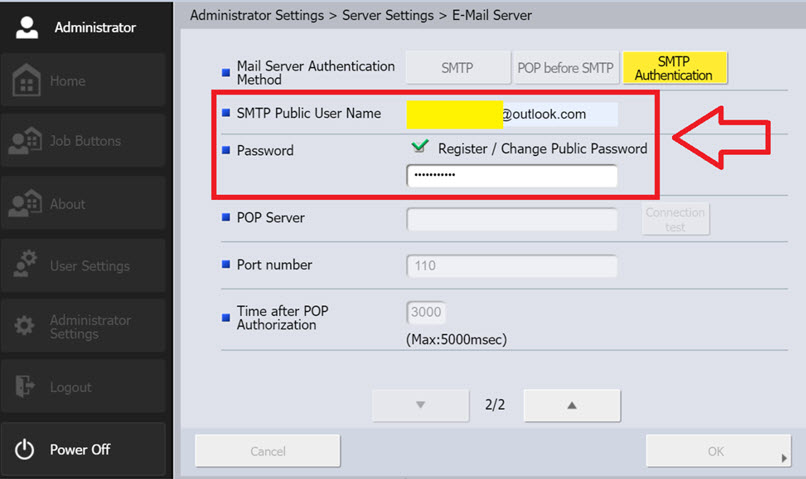
Step 1: Configure the “Mail Server settings” as below.
- Scan Kiosk II screen example below:

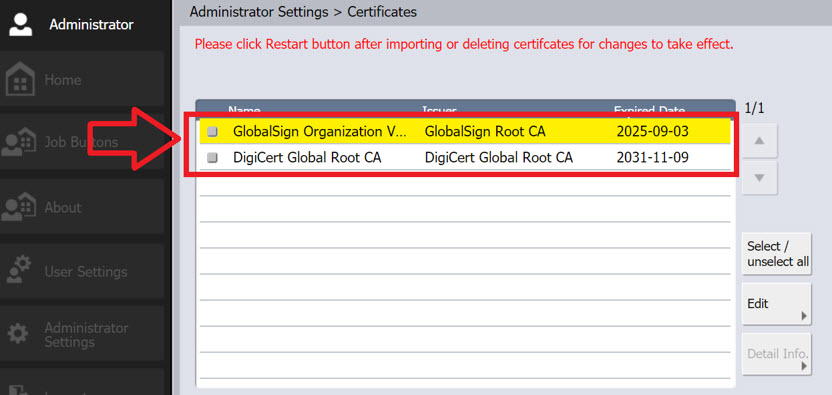
Step 2: Import the certificate you downloaded.
- GlobalSign Root CA
- DigiCert Global Root CA
Step 3 (Default User): Enter Office 365 account credentials.
- This "Default User" step applies to the Scan Kiosk II ONLY
- If using "Default User", enter credentials in below area (Email Server Settings)
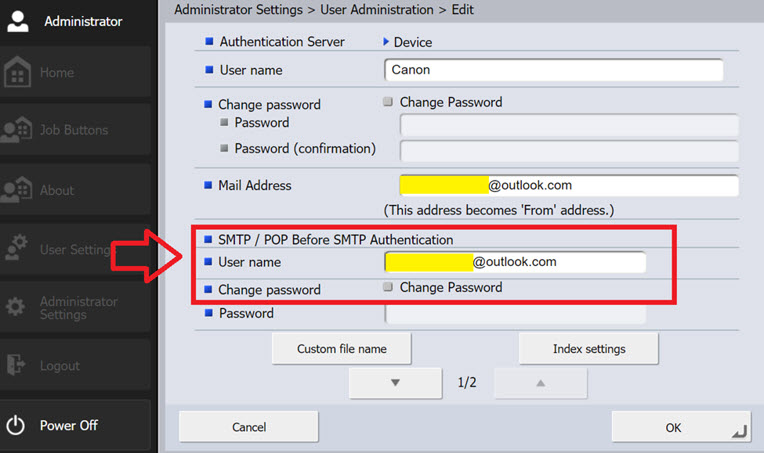
Step 3 (Logged In User): Enter Office 365 account credentials
- This "logged in User" step applies to both the ScanFront 400 and the Scan Kiosk II.
- If using "Logged in User", enter credentials in the below area (User Admininstration).
TIPS:
• Please make sure that your SF-400 or Scan Kiosk II has correct time, date, and a time zone
• Please make sure that you can connect to “smtp.office365.com”
– If not, please make sure DNS server settings are correctly set
•Please make sure that your network environment allows you to use the port 587
Now you’re ready for scan to Office 365!