Learn how to use the digital compass on your EOS 7D Mark II camera.
Solution
Setting the digital compass
Camera orientation information (the direction the camera is facing) can be added to the image. You may need to calibrate the compass after enabling the setting.
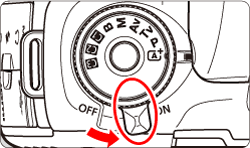
Switch <ON> the camera.
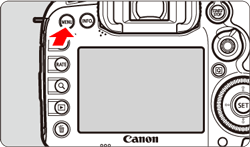
Press <MENU>.
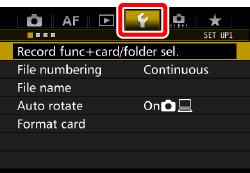
Press the <> button and select the [ ] tab.
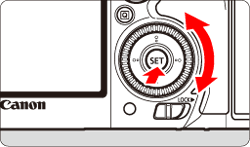
Turn the <> dial to select the [ ] tab.
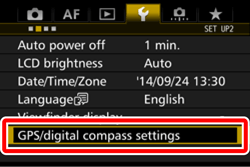
Turn the <> dial to select [GPS/digital compass settings], then press <>.
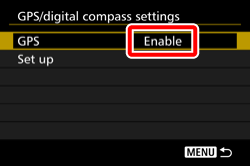
Check that [GPS] is set to [Enable]. Enable GPS if it isn't already.
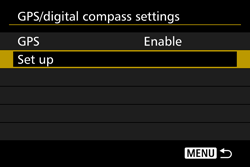
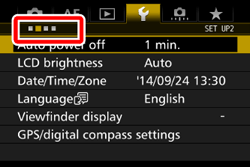
Turn the <> dial to select [Set up], then press <>.
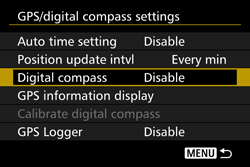
Turn the <> dial to select [Digital compass], then press <>.
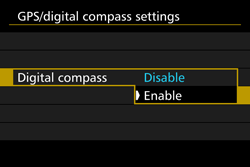
Turn the <> dial to select [Enable], then press <>.
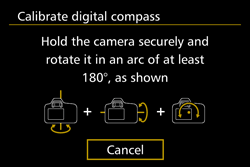
If the [Calibrate digital compass] screen appears, perform calibration.
Compass Display During Shooting
You can show the current orientation on the LCD monitor. When you press the <INFO.> button to display the digital compass, the direction is displayed on the bottom of the screen.
During Live View shooting and movie shooting, you can confirm the direction using the arrow icon at the location circled in this sample screen.

 > button and select the [
  ] tab.
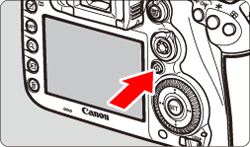
 > dial to select the [
  ] tab.
 > dial to select [GPS/digital compass settings], then press <
 >.
>.