The Accounting Manager allows you to calculate the costs for ink and paper used when printing images. Follow the steps below to set up the unit costs.
-
Launch the Accounting Manager.
 If you don't have the Accounting Manager installed, click here to open the imagePROGRAF PRO-1000 support page. Select your operating system from the drop down menu if it is not automatically detected. Click the Software tab. Click Select for the Accounting Manager, then click Download.
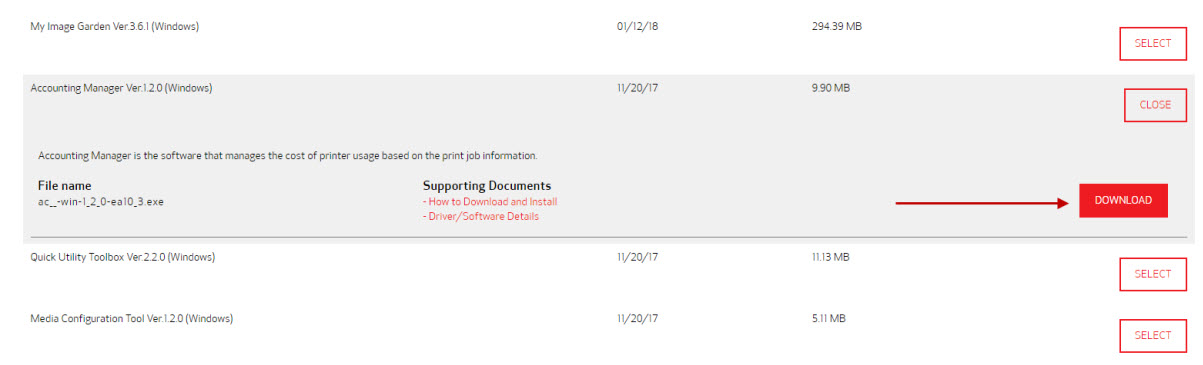
Once the file has been saved to your computer, run it to begin the installation program. Follow all on-screen instructions to install the Accounting Manager.
-
Select the printer you want to register unit costs for from the printer list.
-
Click the  Unit Costs button or select Unit Costs from Job Cost in the File menu.
The Unit Costs dialog box will appear.
The Unit Costs dialog box consists of the following sheets.
-
Ink sheet : Setting the Unit Cost for Ink
-
Paper sheet : Setting the Unit Cost for Paper
-
Others sheet : Setting the Unit Cost for Items Other Than Ink and Paper
You can copy unit costs set on a printer to another printer using "Copying Unit Costs".
Setting the Unit Cost for Ink
Set the ink unit costs using the Ink sheet.
Click the Ink tab to display it.
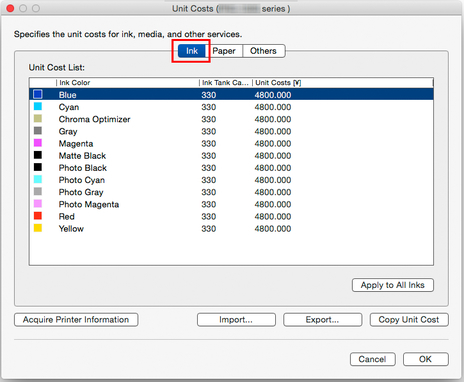
To set different unit costs for each ink color
-
Select an ink.
-
Edit Unit Costs and Ink Tank Capacity directly in the list. To do this, double-click the item to be edited.
-
Click the OK button.
To set the same unit cost for all the inks
-
Select the ink color to be copied.
-
Click Apply to All Inks button.
The selected ink unit cost and tank capacity are applied to all ink colors.
-
Click the OK button.
Setting the Unit Cost for Paper
Set paper unit costs using the Paper sheet.
Click the Paper tab to display it.
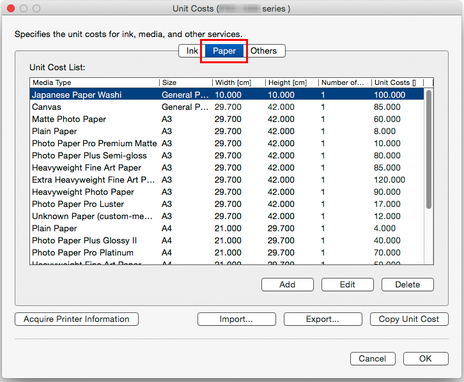
Adding Paper Unit Costs
-
Click the Add button.
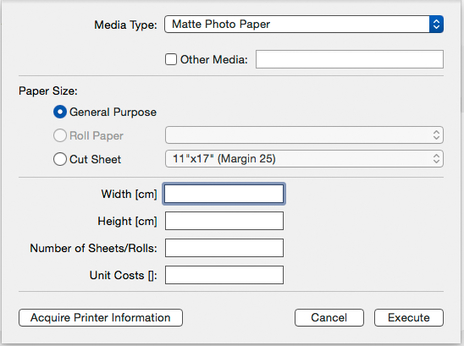
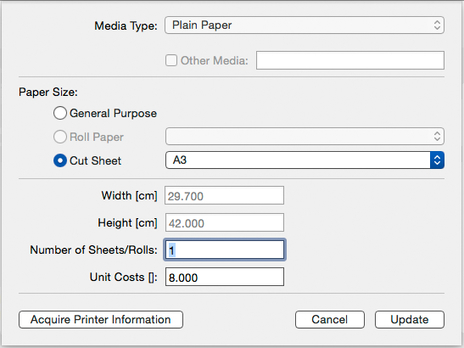
The Add Paper Unit Cost dialog box appears.
-
Set the Media Type, Paper Size, and Unit Costs.
Set the Width, Height, and Number of Sheets/Rolls as necessary.
For Roll Paper, specify the number of rolls in Number of Sheets/Rolls.
-
Click the Execute button.
The unit cost settings you added are added to the Unit Cost List.
-
Editing Paper Unit Costs
-
The procedure for editing paper unit costs is shown below.
-
Editing the Unit Cost List in the List
-
-
Edit the Width, Height, Number of Sheets/Rolls, and Unit Costs directly in Unit Cost List by double-clicking the item to be edited..
-
Click the OK button when you are finished editing.
-
Editing with Edit Paper Unit Cost Dialog Box
-
-
Click the Edit button.
The Edit Paper Unit Cost dialog box appears.
-
Edit the item to be changed.
-
When you finish editing, click the Update button and close the Edit screen.
-
Click the OK button.
Setting the Unit Cost for Items Other Than Ink and Paper
Set the costs other than ink and paper costs on the Others sheet.
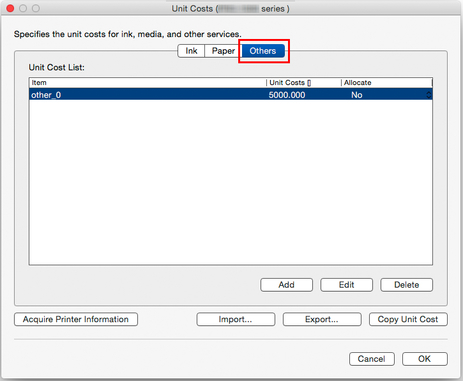
Click the Others tab to display it.
-
Adding Other Unit Costs
-
-
Click the Add button.
The Add Other Unit Costs dialog appears.

-
Set the Name, Unit Costs, and Add to Tabulation.
-
Click the Execute button.
The unit cost settings you added are added to the Unit Cost List.
-
Editing Other Unit Costs
-
The procedure for editing other unit costs is shown below.
-
Editing the Unit Cost List in the List
-
-
Directly edit in the list by double-clicking on the item in the Unit Costs or the Allocate column,.
-
Click the OK button when you have finished editing.
-
Editing with Edit Other Unit Cost Dialog Box
-
-
Click the Edit button.
The Edit Other Unit Cost dialog appears.

-
Edit the items to be changed as needed.
-
Click the Update button.
-
Click the OK button.
Copying Unit Costs
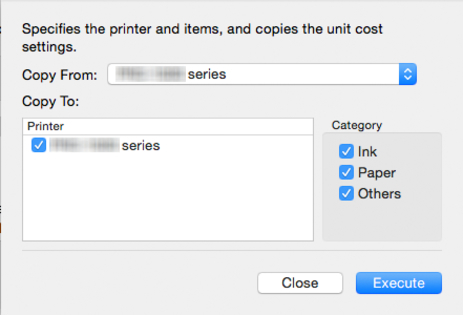
Clicking the Copy Unit Cost button in the Unit Costs dialog box displays the Copy Unit Cost dialog.
You can copy unit costs set on a printer to another printer.
-
Select the printer from which the unit costs will be copied in Copy From.
-
Select the printer to be copied to in Copy To.
-
Select the items to be copied in Category.
-
Click the Execute button.
 For details on each item, see "Unit Costs Dialog."
If your product issue was not resolved after following the steps above, or if you require additional help, please create or log in to your Canon Account to see your technical support options.
Or if you still need help, visit our Canon Community by clicking the button below to get answers:

____________________________________________________________________________________________
PRO-1000 Page
