Use the following procedure to uninstall (delete) and reinstall EOS Utility Ver.3.x.
IMPORTANT
Before deleting EOS Utility Ver.3.x, exit all software that is currently running.
Uninstalling (Deleting) EOS Utility Ver.3.x
1.

On the computer desktop screen, move the mouse pointer to the lower-right corner to open the Charms and select

[Settings]. Next, select

[Control Panel].
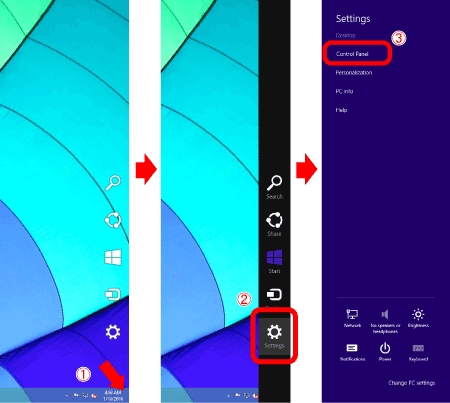
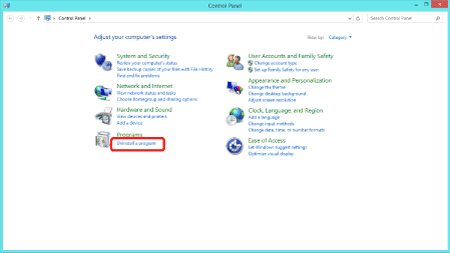
2. When the Control Panel is shown, click [Uninstall a program*].
*If the desktop display is set to [Large Icons] or [Small Icons], click [Programs and Features].
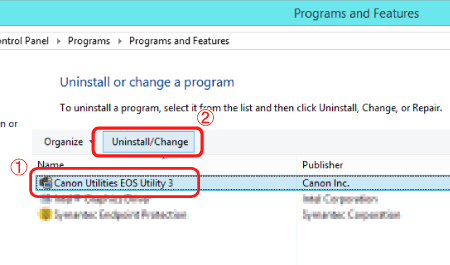
3.Select
[Canon Utilities EOS Utility 3], and then click
[Uninstall/Change].
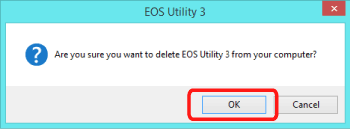
4. The following dialog is displayed.
Click [OK] to start the uninstallation of EOS Utility 3.
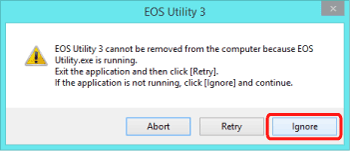
5. If the following figure is shown, click [Ignore].
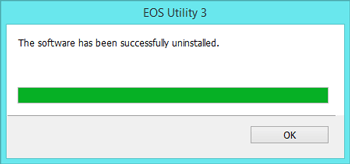
6. When uninstallation is complete, the following dialog is displayed.
Click [OK] to close the screen.
The procedure for uninstalling EOS Utility Ver.3.x is now complete.
Reinstalling EOS Utility Ver.3.x from Downloaded "EOS Digital Software"
1. Use the procedure above to uninstall EOS Utility Ver.3.x, and then restart the computer.
IMPORTANT
Be sure to restart the computer after deleting EOS Utility Ver.3.x. Otherwise, the computer might not operate correctly. In particular, reinstalling EOS Utility Ver.3.x without first restarting the computer can result in misoperation.
2. Right-click the downloaded file and select [Extract All].
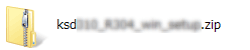
3. Follow the instructions on the screens to unzip the files. Double-click [setup.exe] in the generated folder.

IMPORTANT
- Since you need to be able to connect to the Internet, connection fees or communication fees from your provider apply.
- When installing or uninstalling, log in with administrator permissions.
NOTE
Depending on the computer being used, a security warning screen might be displayed. In this case, click [Run] to proceed to the next step.
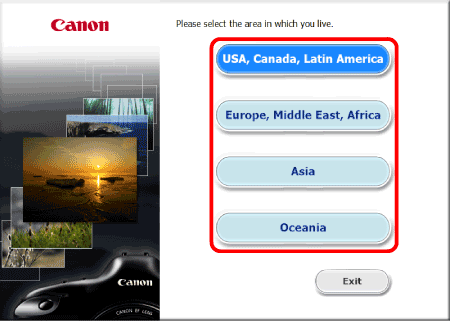
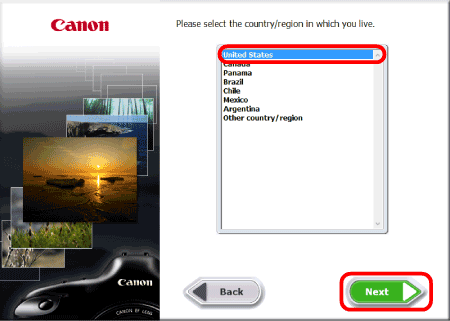
4. Select the area in which you live.
5. Select the country where you live, and then click [Next].
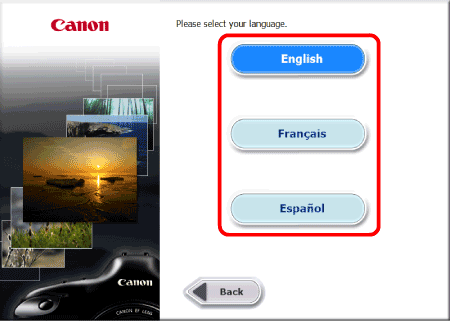
6. If a language setting screen appears, select the desired language from the options displayed.
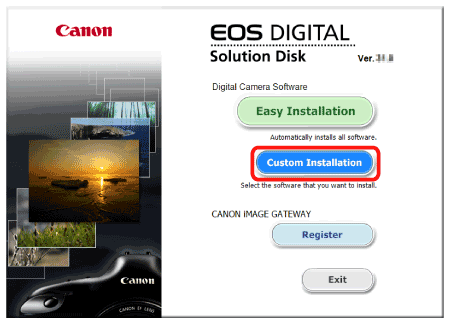
7. When the following screen is shown, click [Custom Installation].
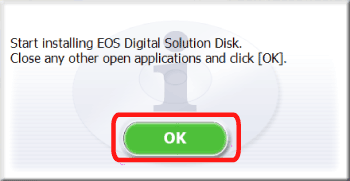
8. If you are prompted to close any other applications, close all currently running applications and then click [OK].
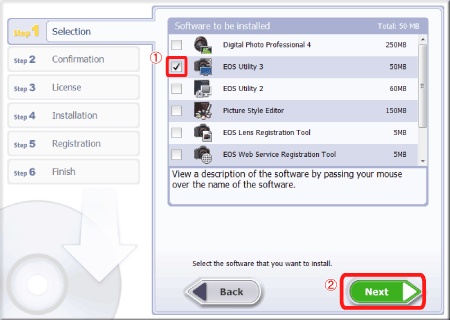
9. In the [Software to be installed] window, select
[EOS Utility 3] (

), and then click
[Next].
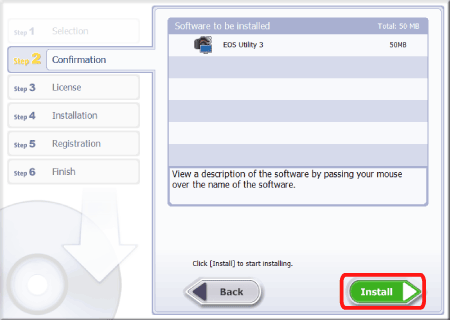
10. If the following screen is displayed, confirm that [EOS Utility 3] is selected and then click [Install].
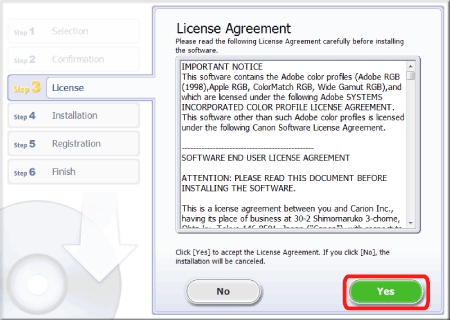
11. If you accept the [License Agreement], click [Yes] to install the software.
NOTE
Depending on your device model, [User Account Control] may appear. In this case, click [Yes] to proceed to the next step.
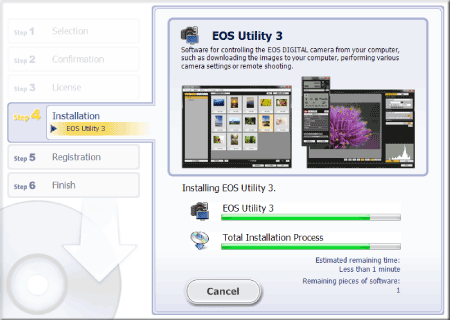
12. Installation starts.
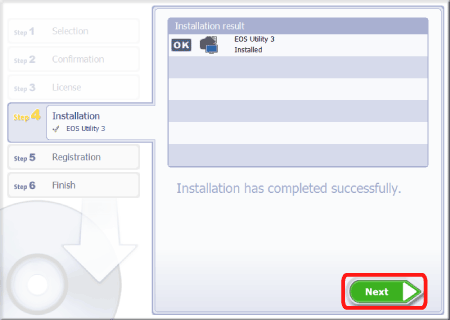
13. When [The software has been successfully installed.] is shown, click [Next].
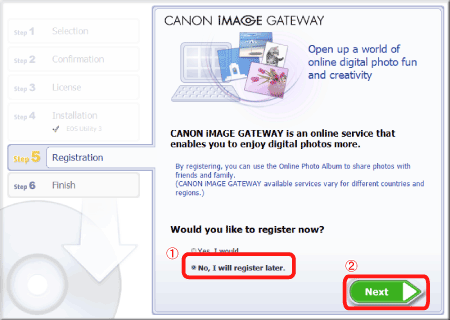
14. The following screen is displayed. Select
[No, I will register later.], and then click
[Next].
To register your camera on CANON iMAGE GATEWAY, click [Yes, I would.].
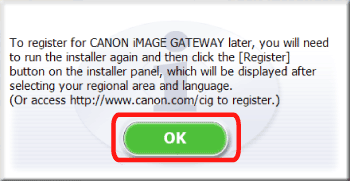
15. Click [OK].
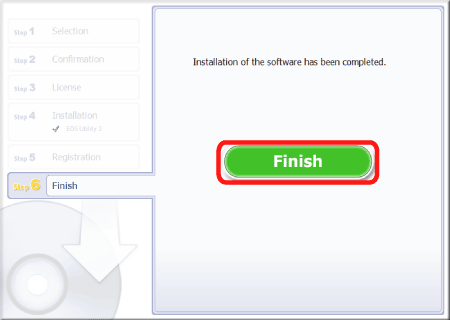
16. Click [Finish].
The procedure for reinstalling EOS Utility Ver.3.x is now complete.
