Print Studio Pro - Adjusting the Brightness/Contrast by Looking at Patterns
| Article ID: ART169101 |
| |
Date published: 12/05/2017 |
| |
Date last updated: 12/05/2017 |
Description
Adjust the brightness and contrast by printing and viewing a pattern with which you can check the brightness and contrast of the image.
Solution
Adjusting the Brightness/Contrast by Looking at Patterns (Print Studio Pro)
Adjust the brightness and contrast by printing and viewing a pattern with which you can check the brightness and contrast of the image.
-
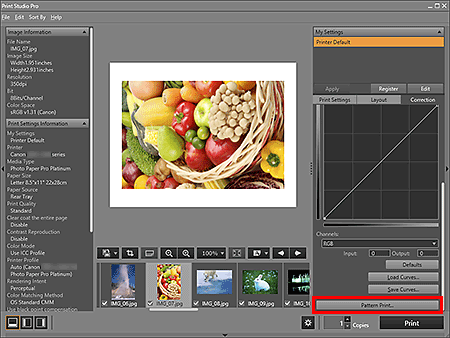
Select the image of which you want to print a pattern.
-
On Correction tab, click Pattern Print....
The Pattern Print window appears.
-
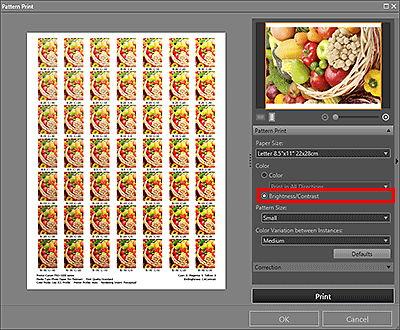
Select Paper Size according to the paper to be used for Pattern Print.
-
Select Brightness/Contrast in Color.
-
Select Pattern Size and Color Variation between Instances.
-
Finely adjust the color tone in Correction as needed.
 Note
Note
-
Click Print.
The Print dialog box appears.
-
Click OK.
The pattern is printed.
-
From the printed pattern, enter the values described under the image with the brightness and contrast you want into Brightness and Contrast.
-
Click OK in the Pattern Print window.
The Pattern Print window closes; the values are reflected in Brightness and Contrast in the main screen.
Note