With Canon PRINT, you can make a copy of a document or a picture using your mobile device, or you can make a copy of a photo that is already stored in your mobile device. You can also make perspective corrections to images. To use this feature, follow the steps below.
 The images below were taken from an iPhone 8 Plus. Layouts may vary slightly depending on your iOS device.
-
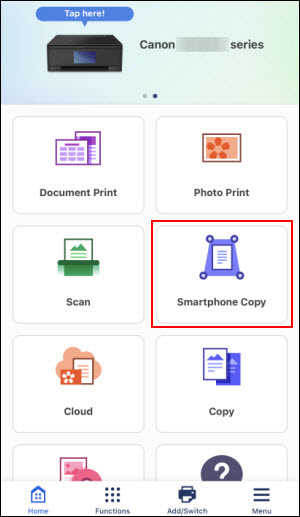
From the main menu of Canon PRINT, tap Smartphone Copy.
If you receive a prompt stating that Canon PRINT wants to access your camera, tap OK or the appropriate affirmative response.
-
Place a document or picture on a flat, level surface. Aim the camera so that the entirety of the image is in the frame. Tap the shutter button at the bottom to take a picture.
 The icon at the upper right will provide a visual guide for lining up the picture or document in the frame. When this is enabled, the symbol is blue. Lines will appear on one of the edges of the screen, depending on how the mobile device is being held (while the example in this article shows the mobile device being held in the portrait orientation, this function can be used in the landscape orientation as well).
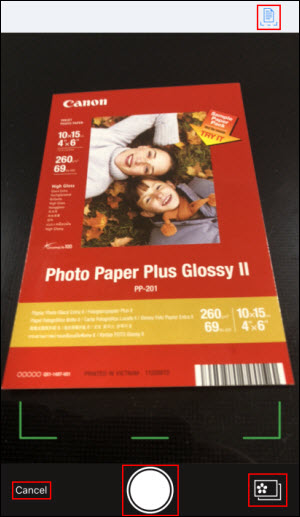
You can use this function with a picture that is already stored on your mobile device. Tap the picture icon at the lower right and you can select an image.
Tapping Cancel will back out of this process.
-
After tapping the shutter button, you will come to the Correct Distortion screen. Here, you can make adjustments to the frame (the green box). You can adjust this frame as needed by dragging a point in one of the corners of the frame, or by dragging one of the points in the middle of each side of the frame.
Tap Next to proceed to the next step.
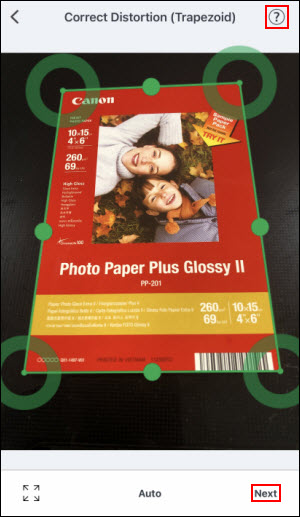
Tapping the question mark will bring up the following:
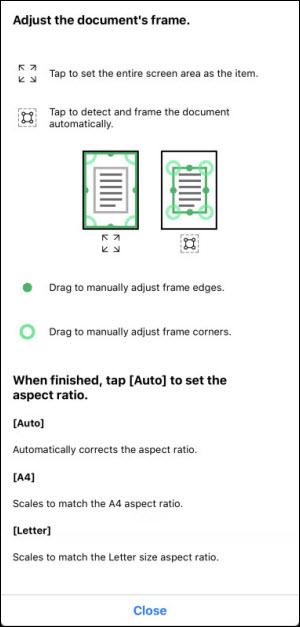
Tap Close to close this information. Make any adjustments to the green frame as needed. Then, tap Next.

-
A preview image will appear. This will show not only the area of the image as shown in the frame, but it will also show that the perspective has been corrected:
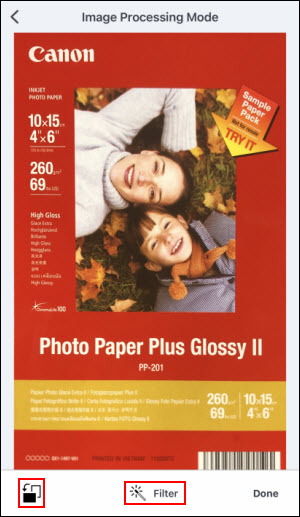
You can rotate the image by tapping the rotate icon at the lower left.
Tapping Filter will allow you to apply a filter to your image as desired:
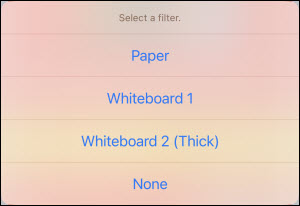
Select a filter from the list, or None.
Tap Done to proceed.
-
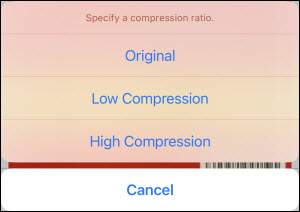
Specify a compression ratio to proceed.
-
The Document Print screen will appear. Tapping the Share icon will present several options to you, such as saving the image to your iOS device, printing the image, or emailing the image (the Mail app must be set up to work with an email account in order to use this function).
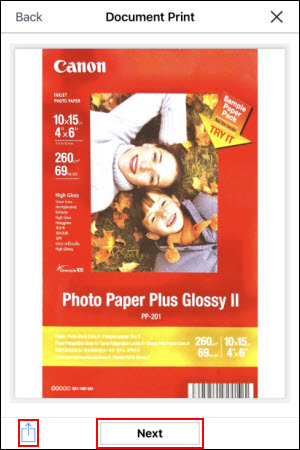
Tap Next to proceed to the Print screen.
-
On the Print screen, tap Change settings if you want to make any adjustments to the options used for this print. Tap Print to begin printing.
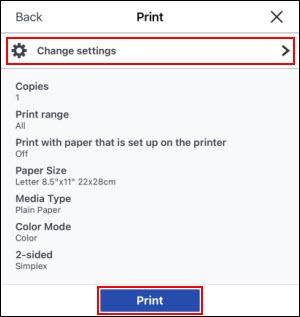
Printing will begin.
For support and service options, sign into (or create) your Canon Account from the link below.
My Canon Account
