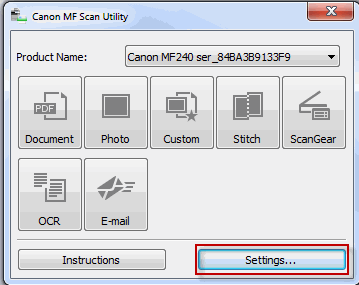
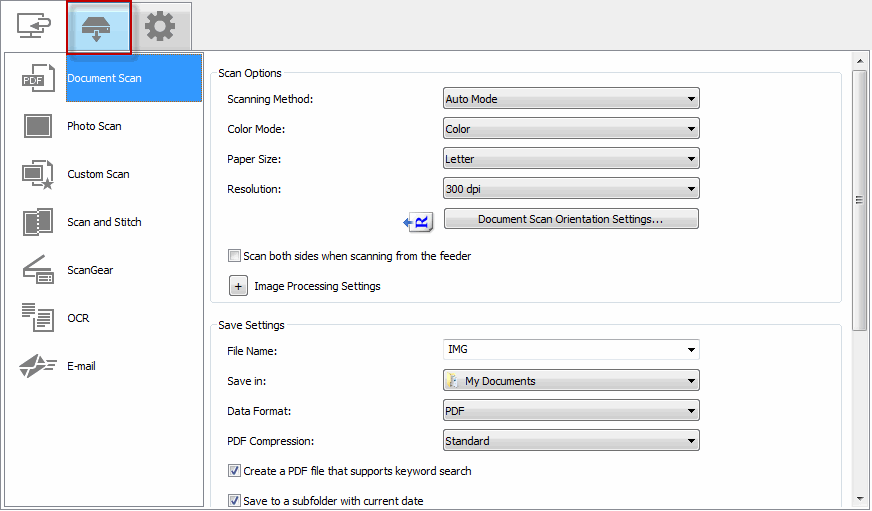
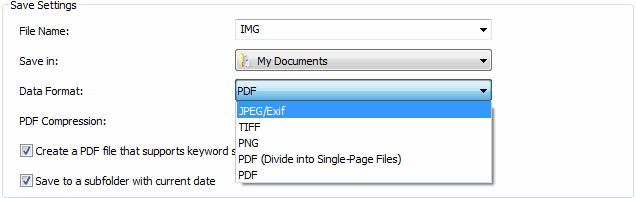
1. Click then [All Apps] or [All Programs]. Cick the [Canon] folder,[MF Scan Utility] folder and then click the [MF Scan Utility] program 2. Click on Settings in the bottom right corner. 3. Click on the scanner icon (middle tab to the left of the gear icon) in the Settings dialog window. 4. Select the scan mode (Color Scan, B & W Scan, Custom 1, or Custom 2) on the left side, 5. Select the desired format for the Data Format in the Save Settings section. (For multi page scans select PDF or TIFF) 6. Click OK. The Setting dialog window closes. 7. Close the MF Scan Utility. 8. Turn off your printer for 30 seconds then turn it back on.

 then [All Apps] or [All Programs]. Cick the [Canon] folder,[MF Scan Utility] folder and then click the [MF Scan Utility] program